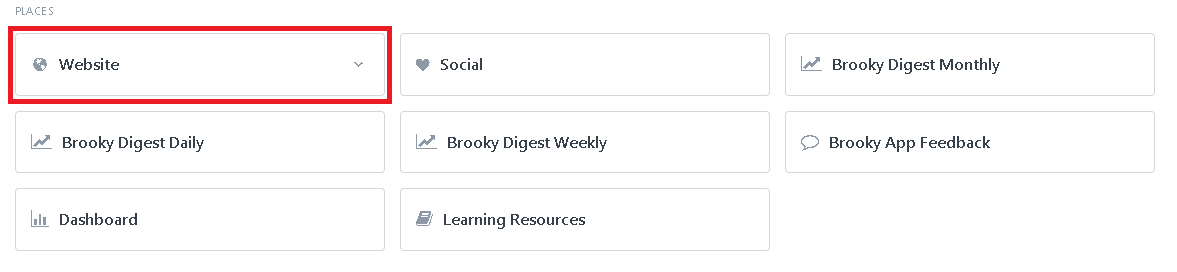
(PLACES) Website, Brooky App Feedback, & Dashboard
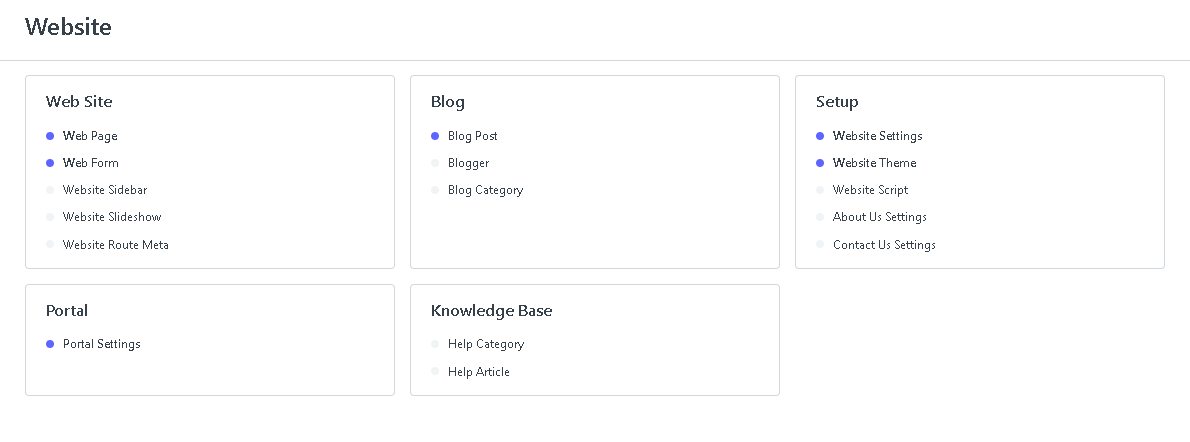
Website
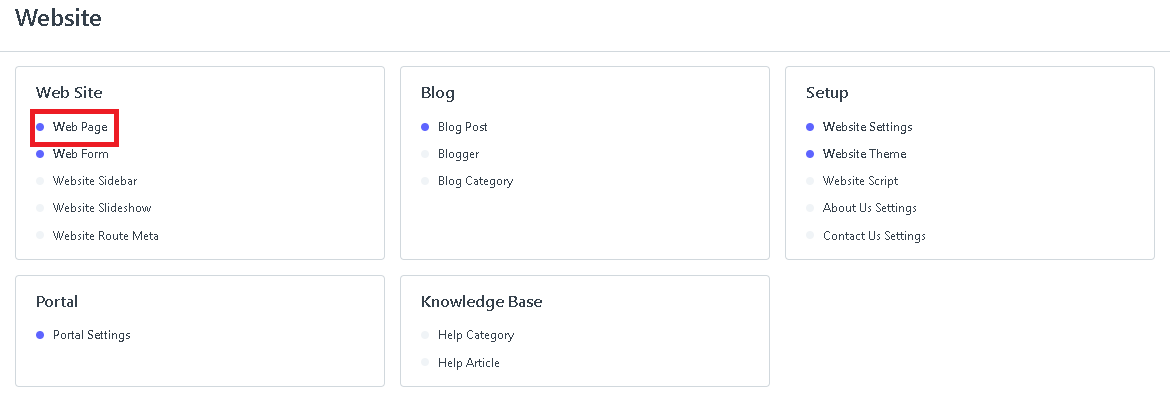
How to Use Website And Create A Web Page
- Open the Brooky Portal and log in your credentials.
- On the Brooky Admin Portal homepage, click on the Website and it will redirect you to its page.
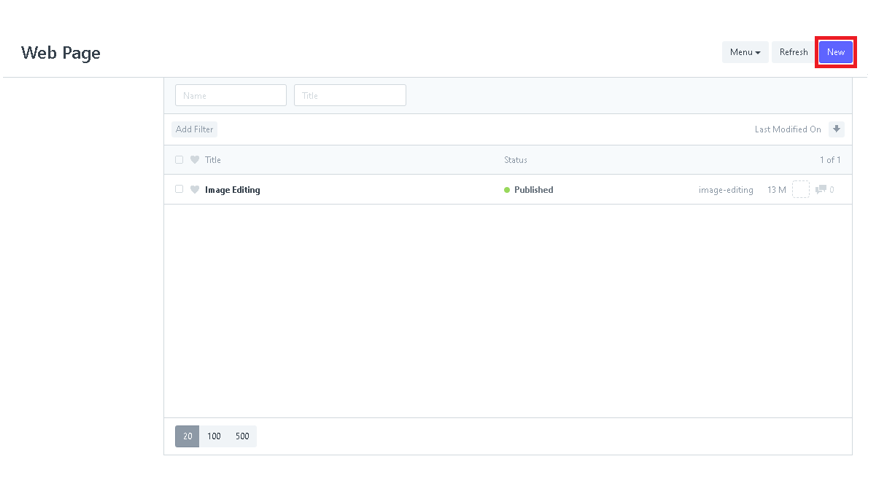
3. Click the Web Page.
4. Click the New button to create a New Web Page.
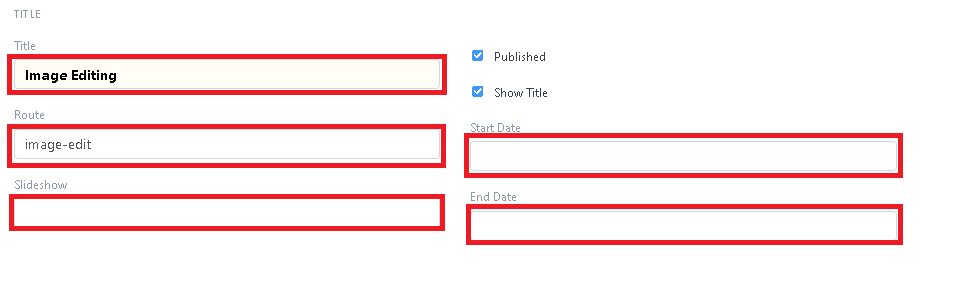
5. After clicking the New button, Fill in the Title of the web page such as Title, Route, Slideshow, Start Date, and End Date.
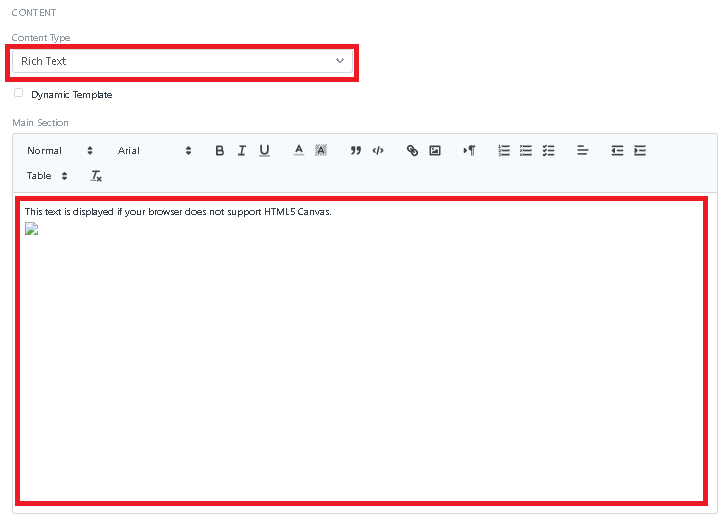
6. After Filling in the Title section , Fill in the Content of the web page such as the Content-Type, and the Main Section. You can also edit the format of the text in the Main Section.
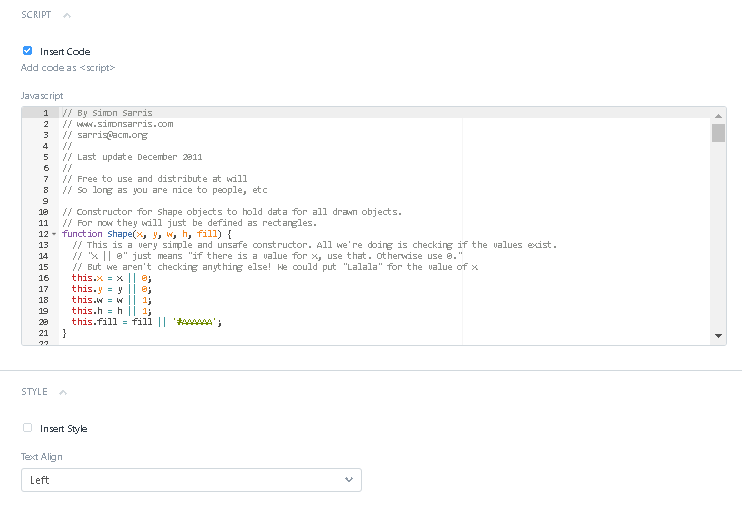
7. After filling in the Content section, Insert the code in the Script section, and Insert Style in the Style section.
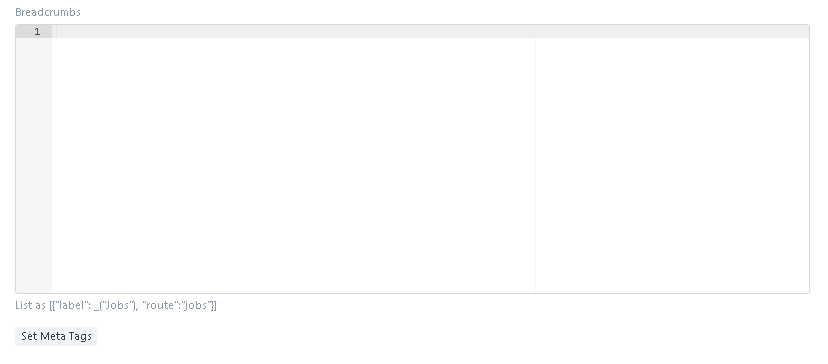
8. After Inserting the Script and Style section, add a Header, Breadcrumbs, and Meta Tags.

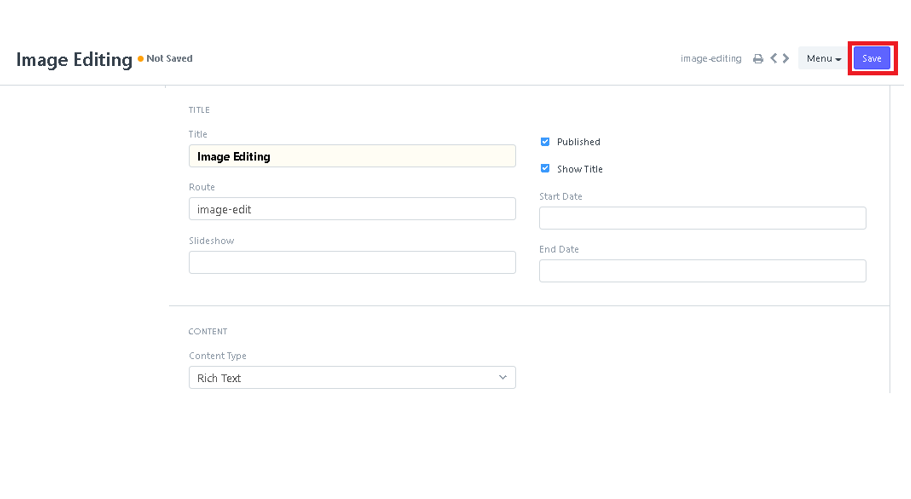
9. Click the Save button after you fill in each section.
How to Use And Create A Web Form
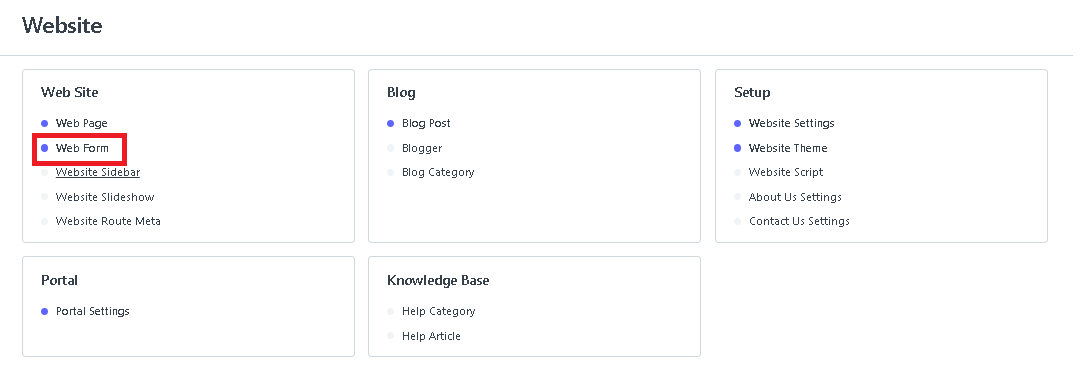
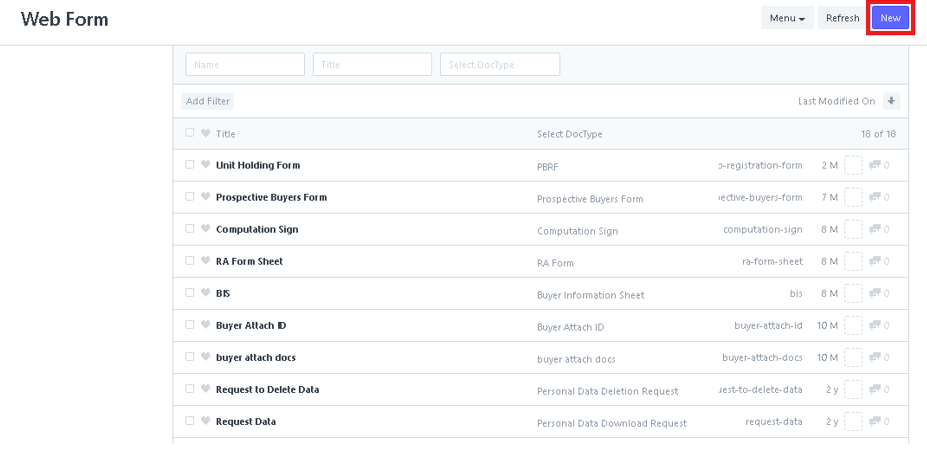
- Click the Web Form and it will redirect you to its page.
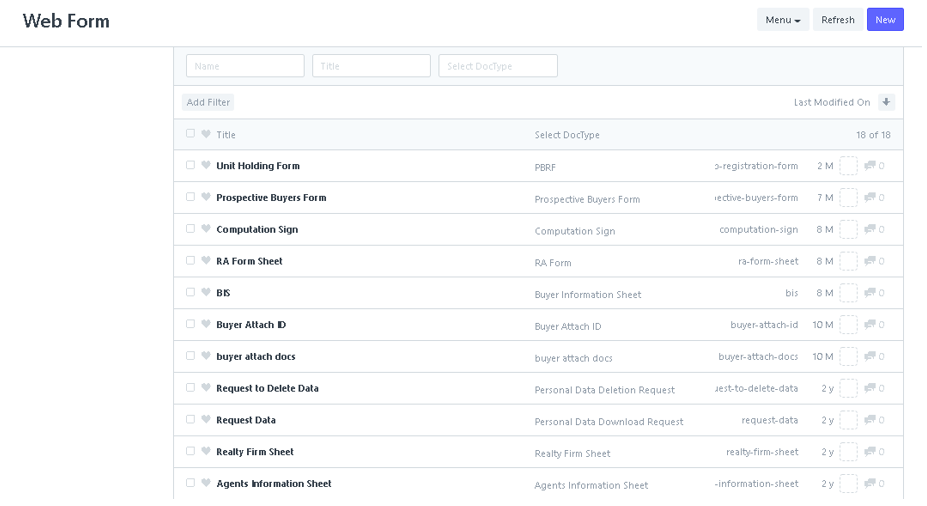
You can see here all the list of the forms
2. Click the New button to create a new Web Form.
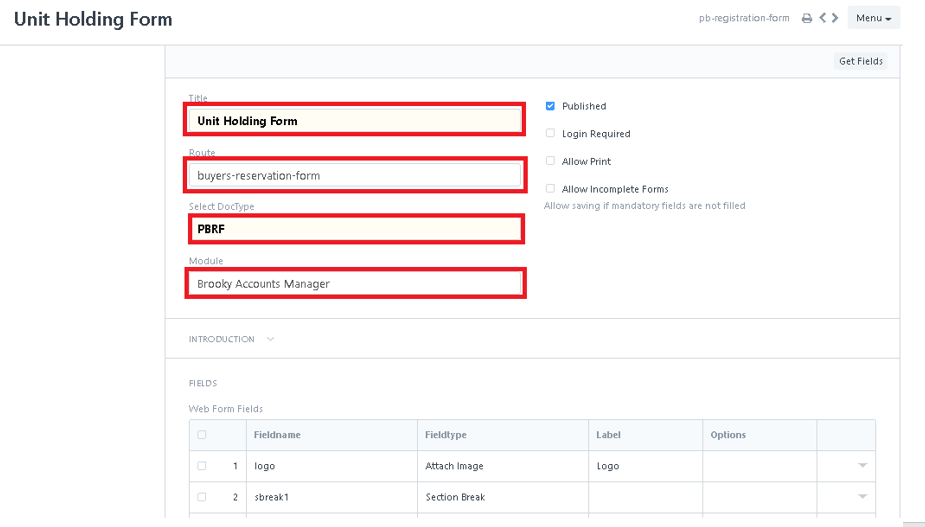
3. After clicking the New button, you can see the form. Fill in the form such as Title, Route, Module, and Select a DocType.
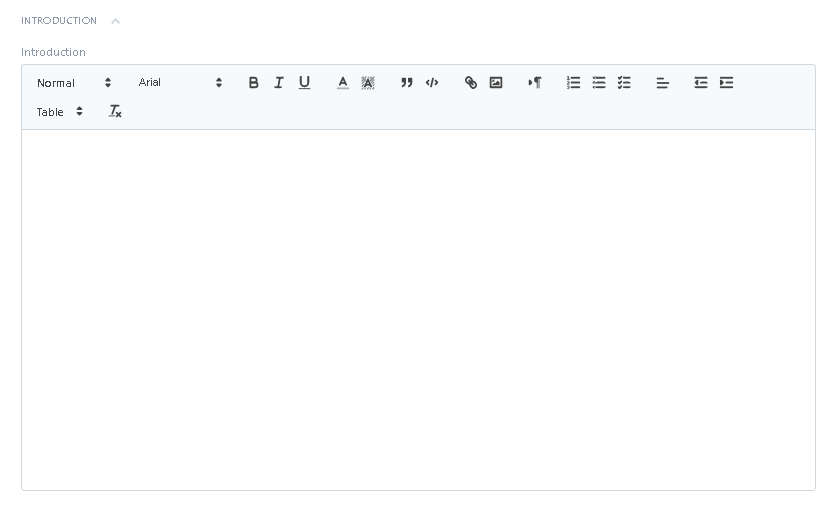
4. In the Introduction, you can edit the format of the text.
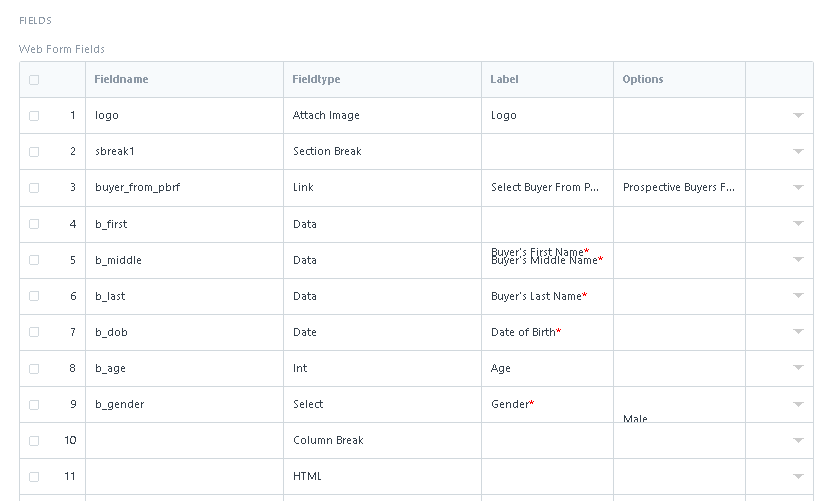
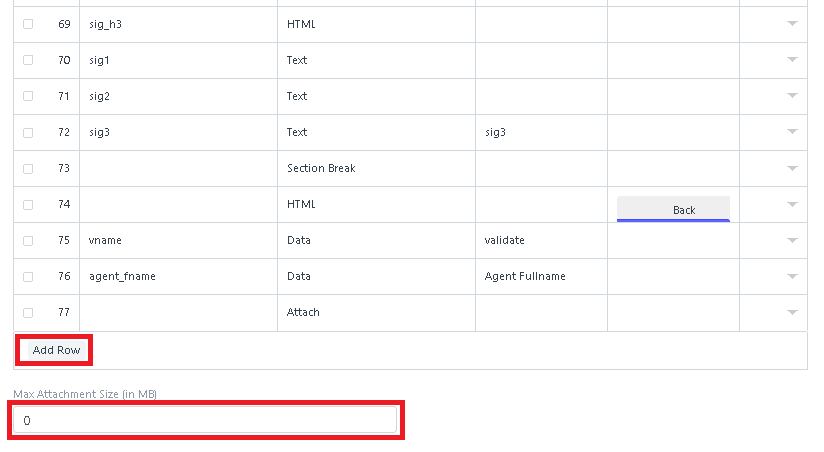
5. In the Fields section, you can see here all the web form fields. You can also add a row in the web form fields and set an attachment size.
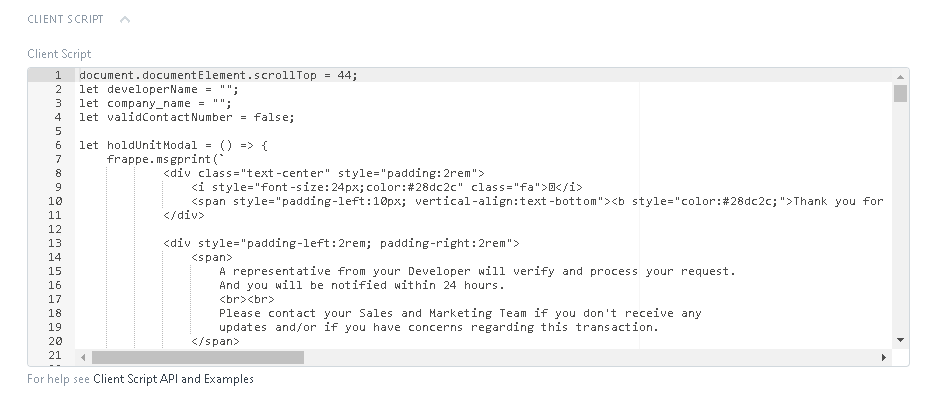
6. In the Client Script section, input the code. As you can see the example of Client Script API below.
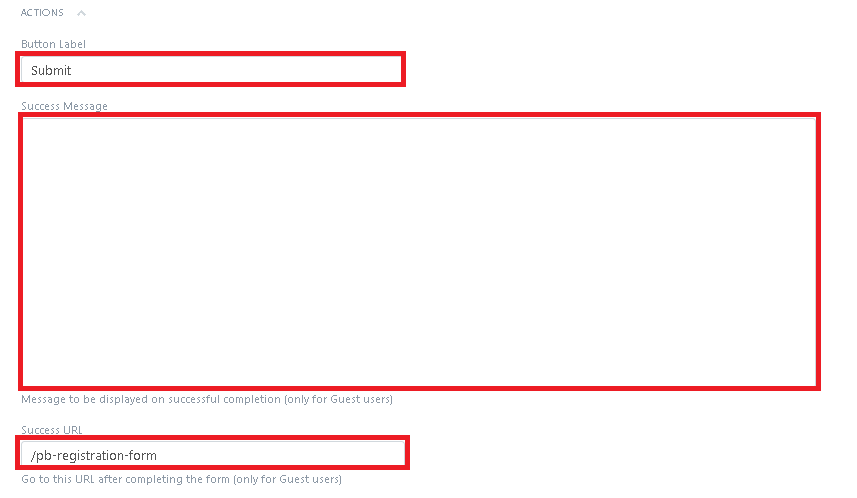
7. In the Actions section, Input a Button Label and fill in the Success Message and Success URL.
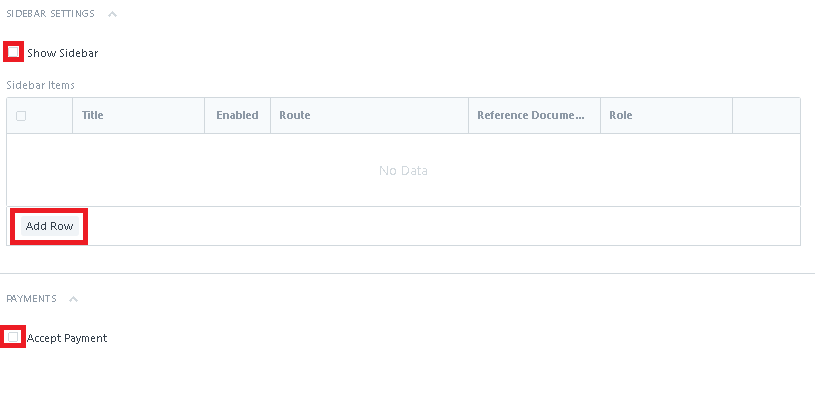
8. In the Sidebar Settings section, you can show the sidebar and add a row in the sidebar items. In the Payments section, just click the check box to accept the Payment.
9. In the Advanced section, fill in the Web Page Link Text and Breadcrumbs.

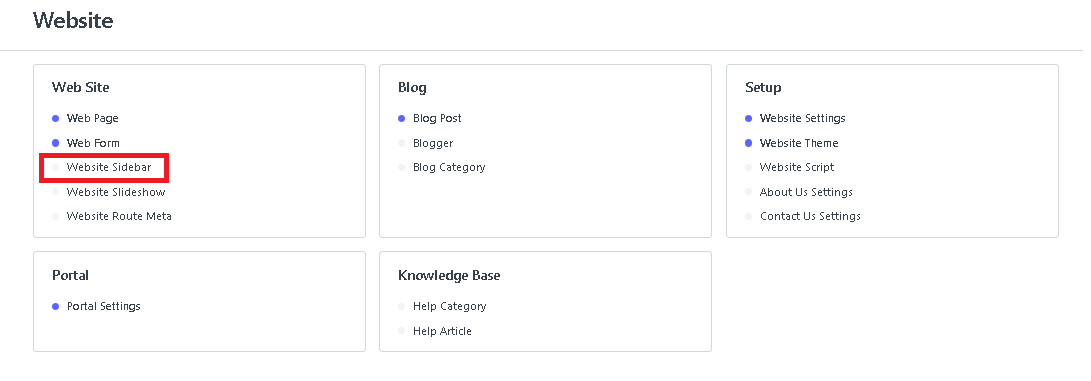
How to Create A Website Sidebar
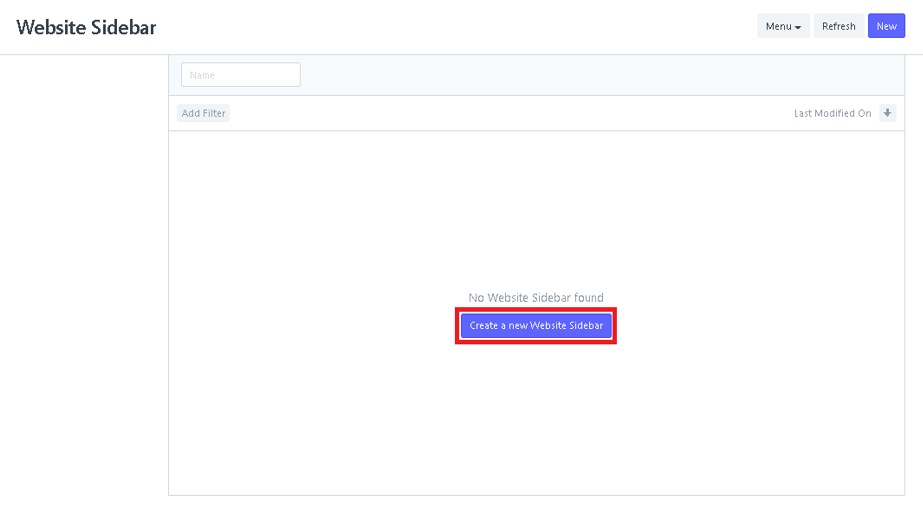
- Click a Website Sidebar.
2. After clicking a Website Sidebar, Click New to create a new Website Sidebar.
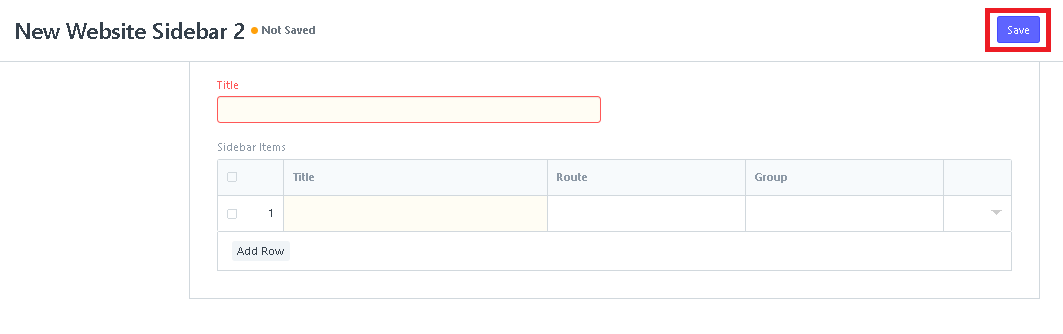
3. Fill in the Title and you can also add a row and fill the Title, Route, and Group.

4. After filling in the Title of the website sidebar, click the Save button to create a new sidebar.
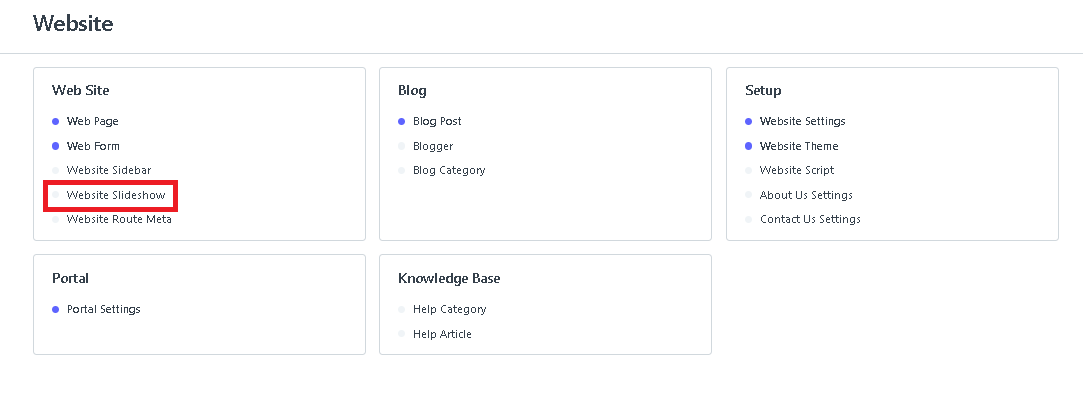
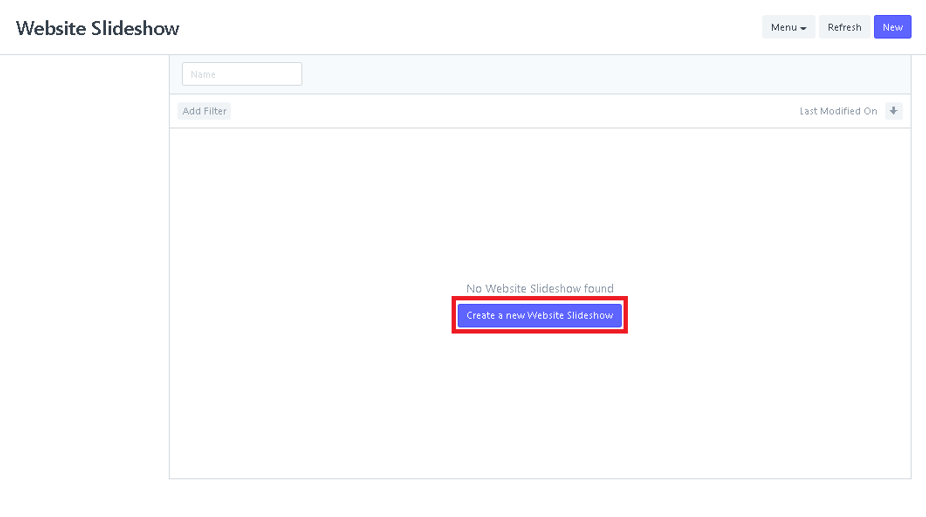
How to Create A Website Slideshow
- Click A Slideshow.
2. After clicking a Website Slideshow, Click New to create a new Website Slideshow.
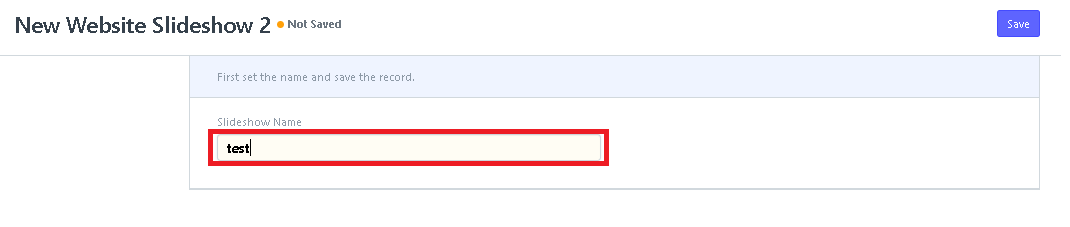
3. Fill in the Slideshow Name and Click Save to create a new slideshow.

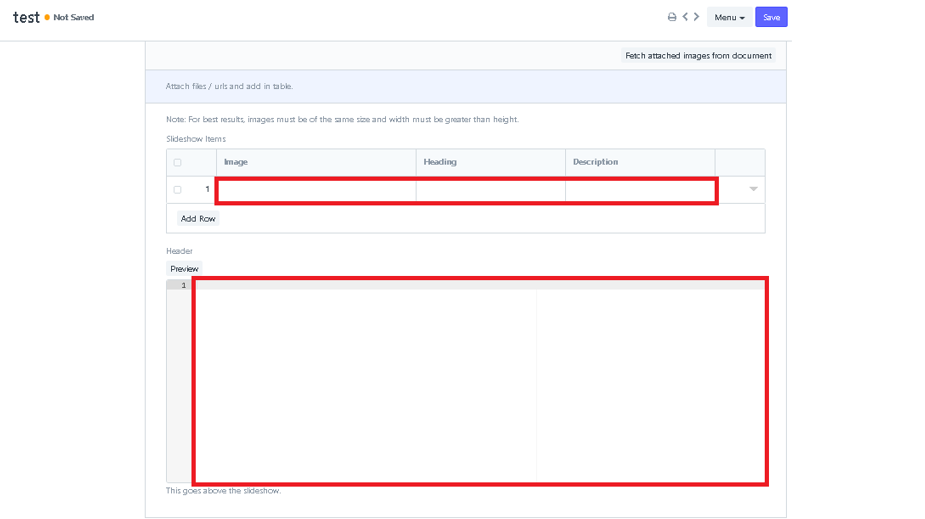
4. After clicking the Save button, click the Fetch attached images from document.
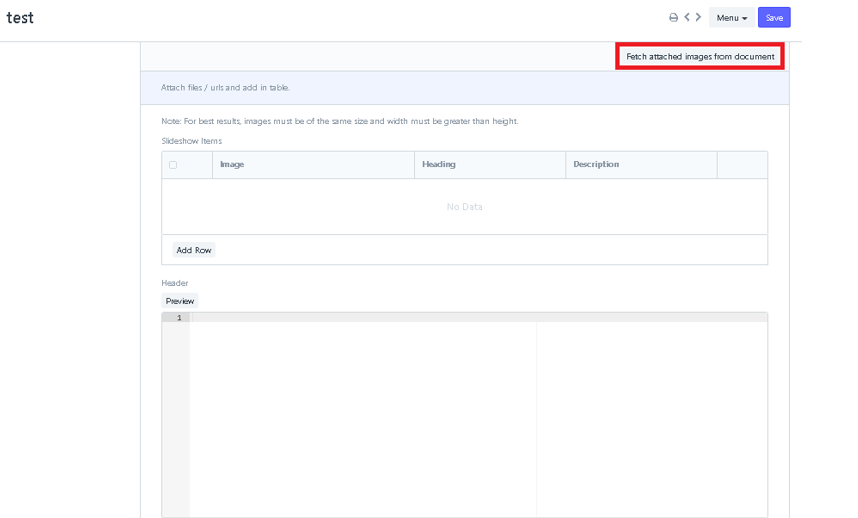
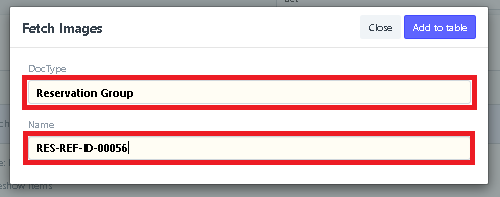
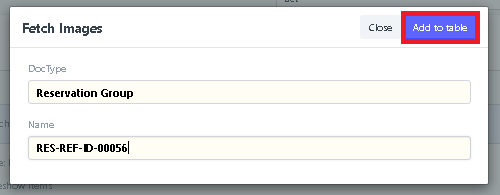
5. After clicking the Fetch attached images from document, select what DocType and Name of the fetch images and click Add to table.
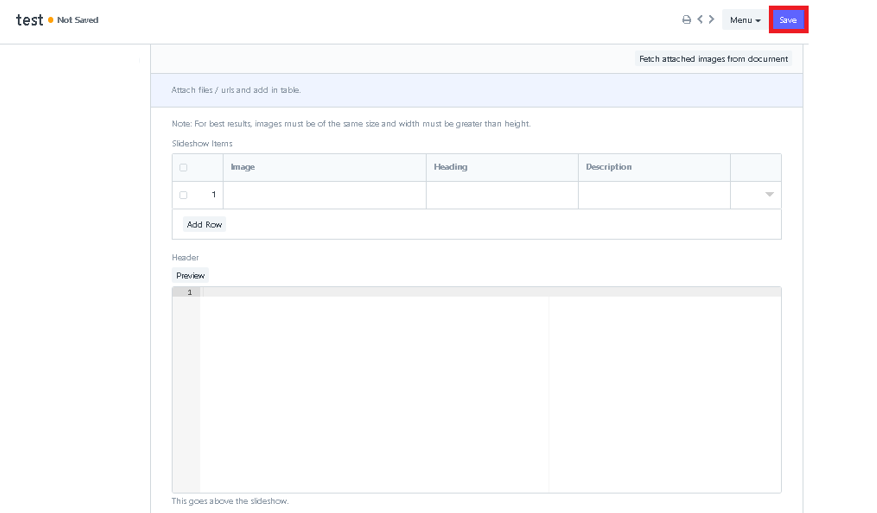
6. After clicking Add to table in Fetch images, input an Image, Heading, and Description in slideshow items. And Input a Header on the slideshow and click Save.
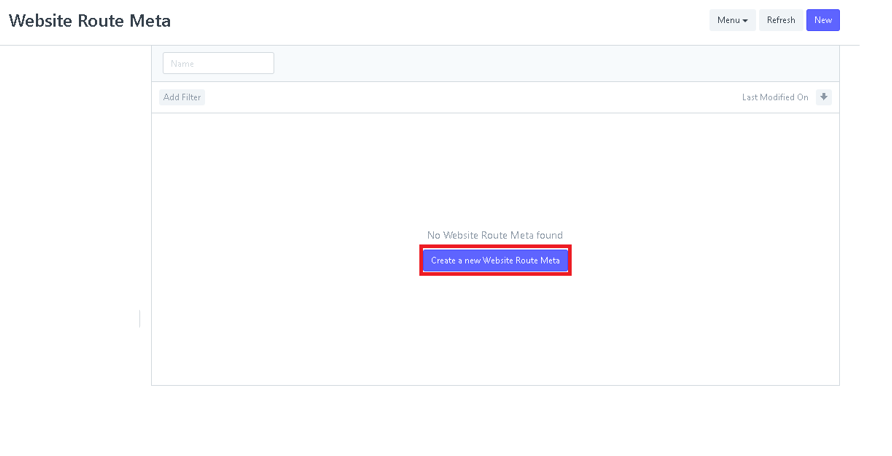
How to Create A Website Route Meta
- Click a Website Route Meta.
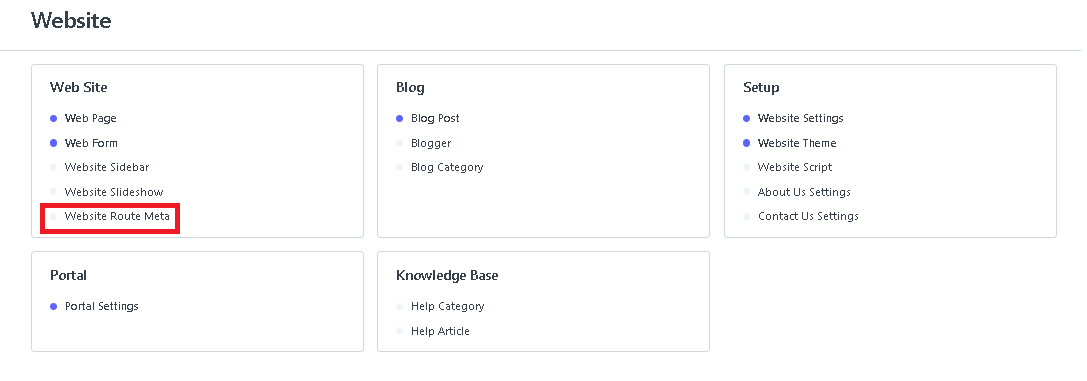
2. After clicking a Website Route Meta, Click New to create a new Website Route Meta.
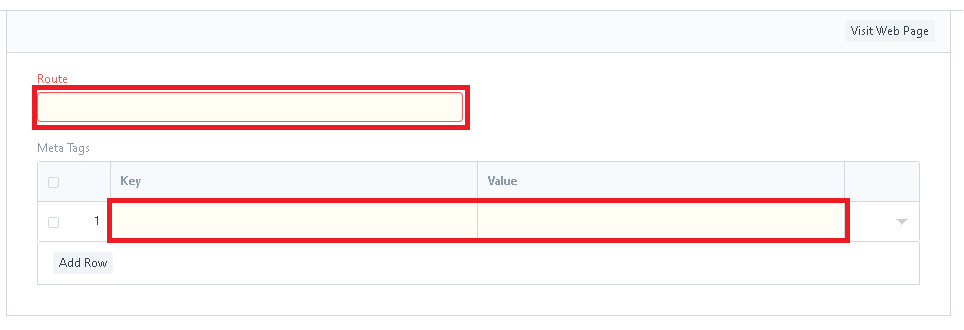
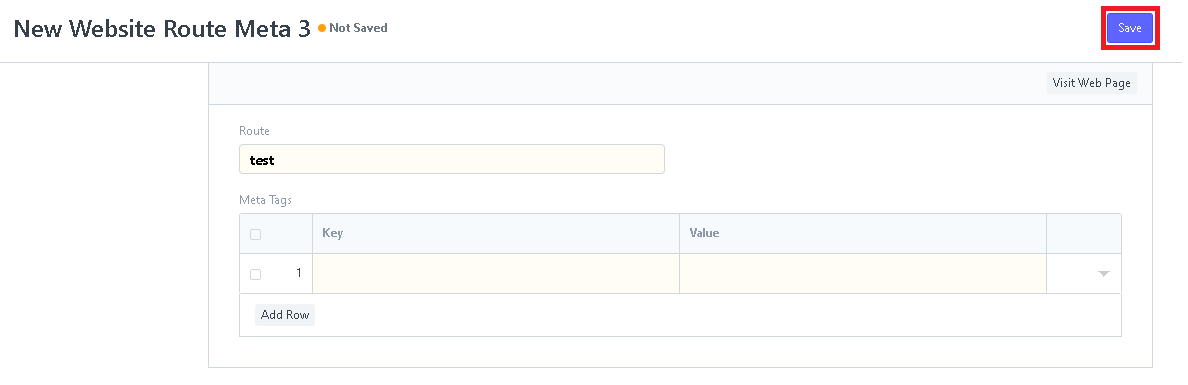
3. In creating a new Route Meta, just fill in the Route. And also fill in the Key, Value in Meta Tags.
4. After filling in the Route name and Meta Tags, click Save.
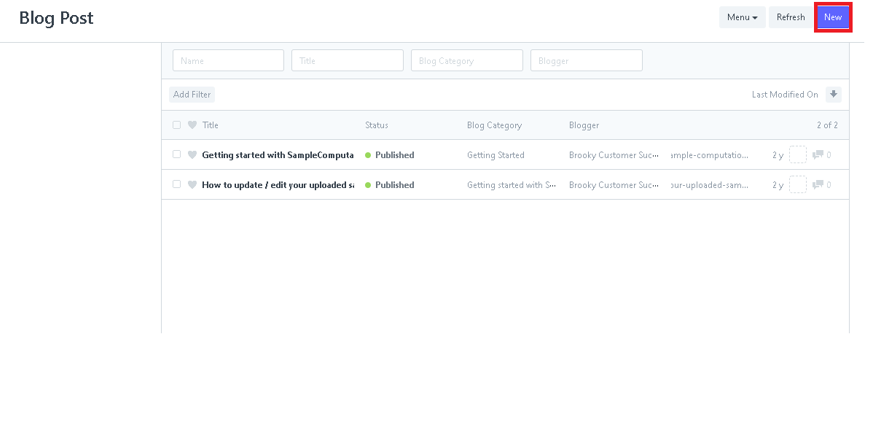
How to Create A Blog Post
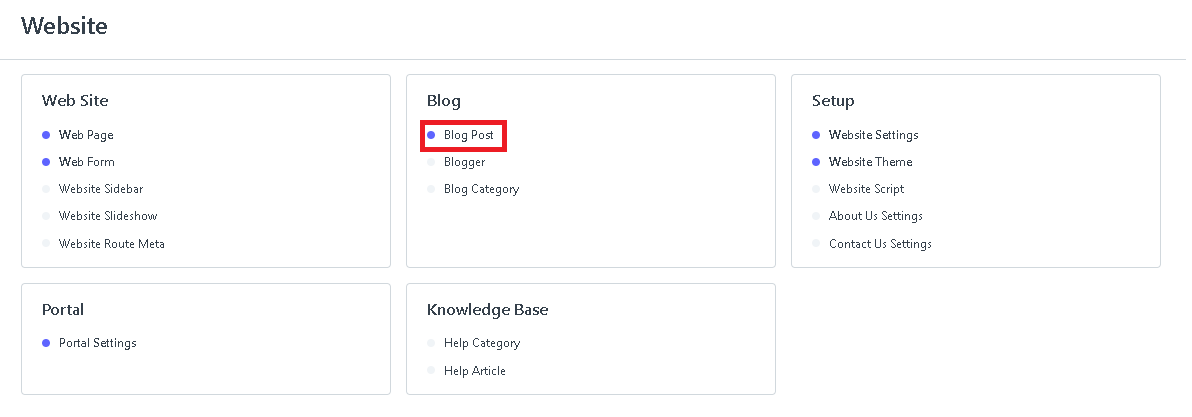
- Click the Blog Post.
2. Click the New button to create a New Blog Post.
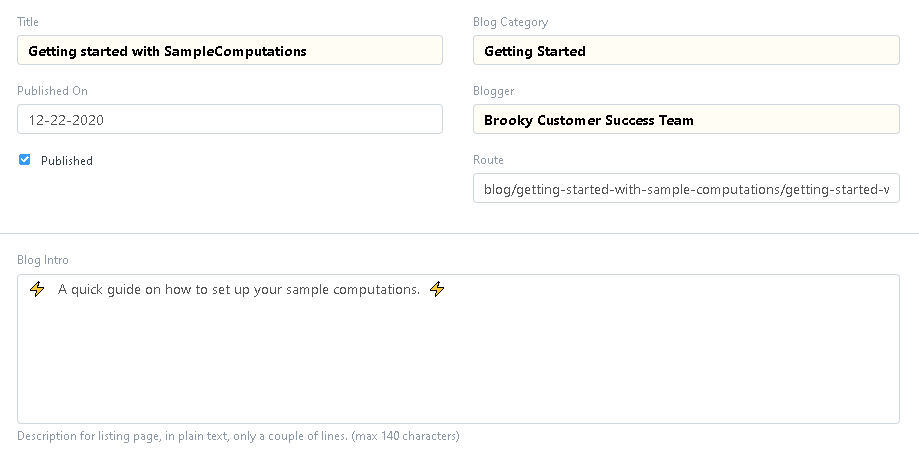
3. To create a Blog Post, fill in the Title, Published On, Blog Category, Blogger, Route, and Intro of the Blog.
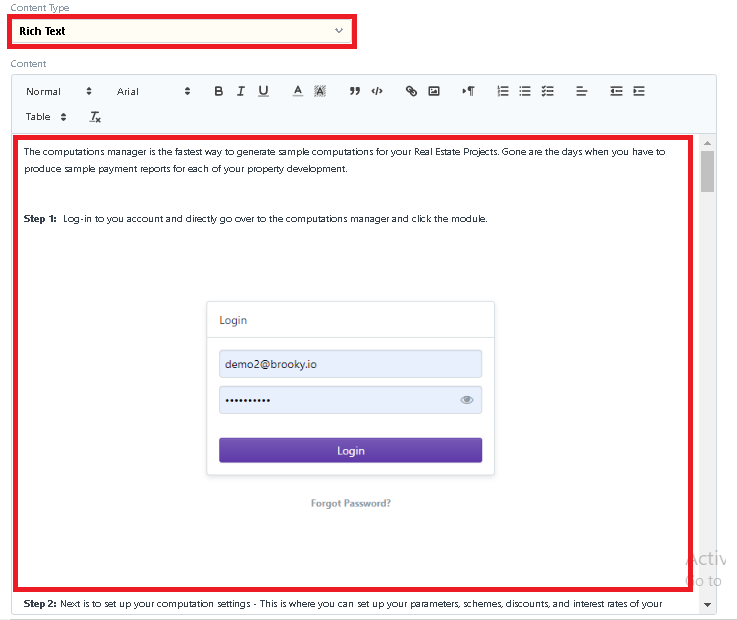
4. Just click the drop-down and select what Content-Type and create Content just like the example below.
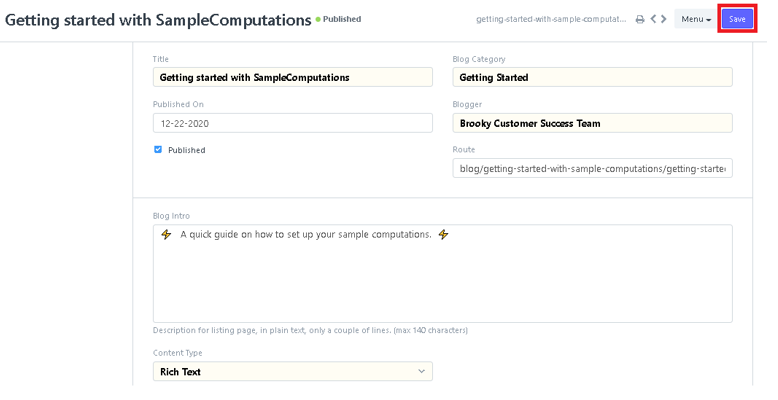
5. Click Save if you are done creating a Blog Post.
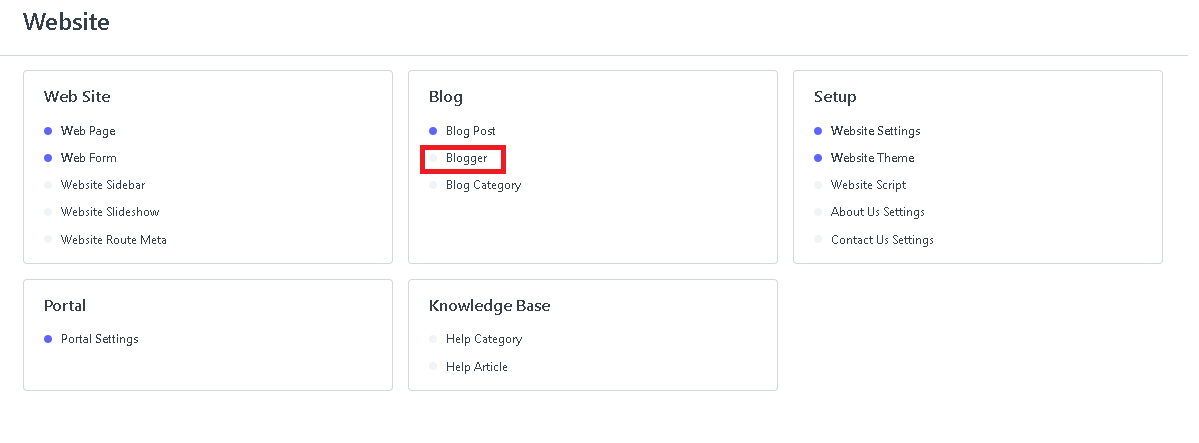
How to Create A Blogger
- Click the Blogger.
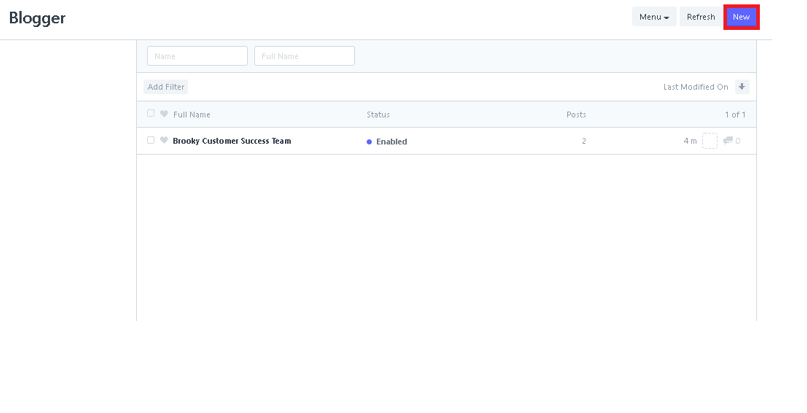
2. Click the New button to Create a New Blogger.
3. To create a new Blogger, just fill in the Short Name, Full Name, User, and also the Bio.
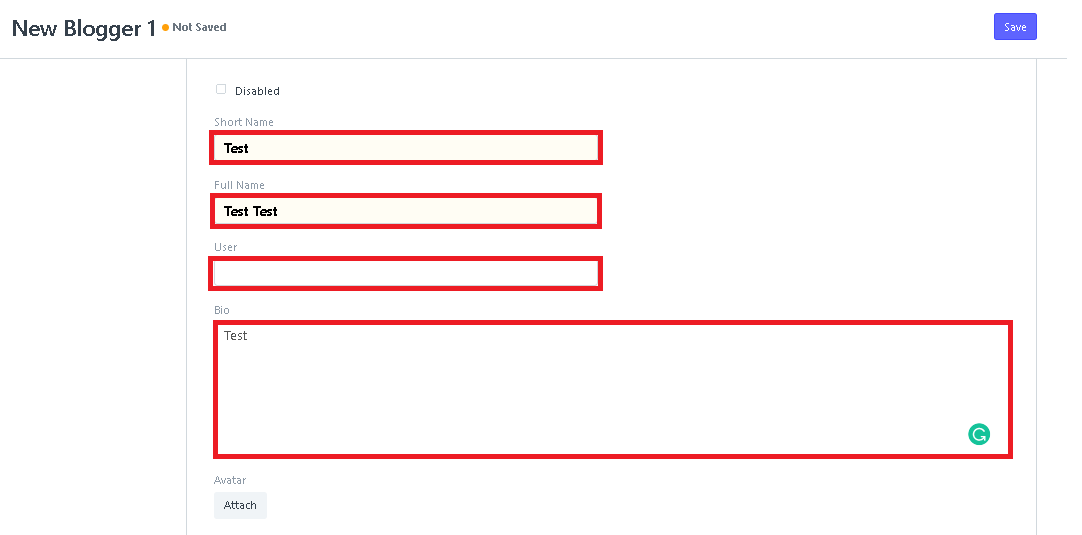
4. Add Avatar by attaching a photo or file.

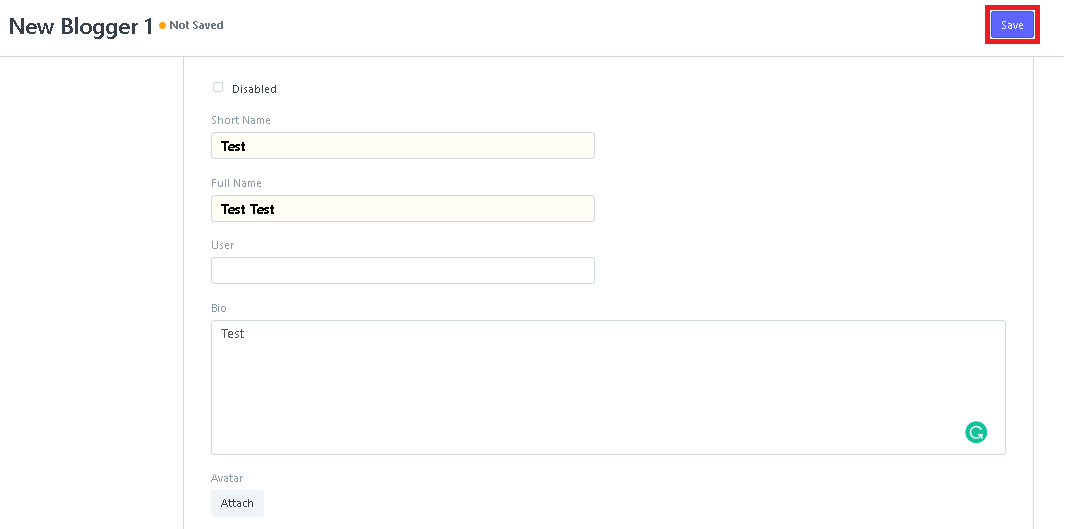
5. After filling in all the info, click Save.
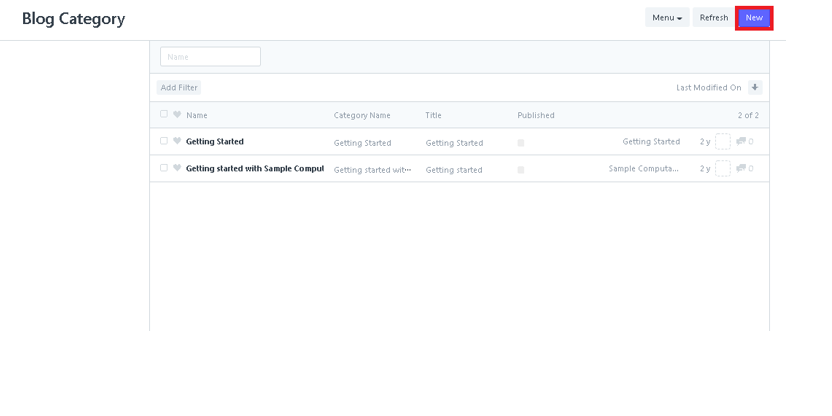
How to Create A Blog Category
- Click the Blog Category.
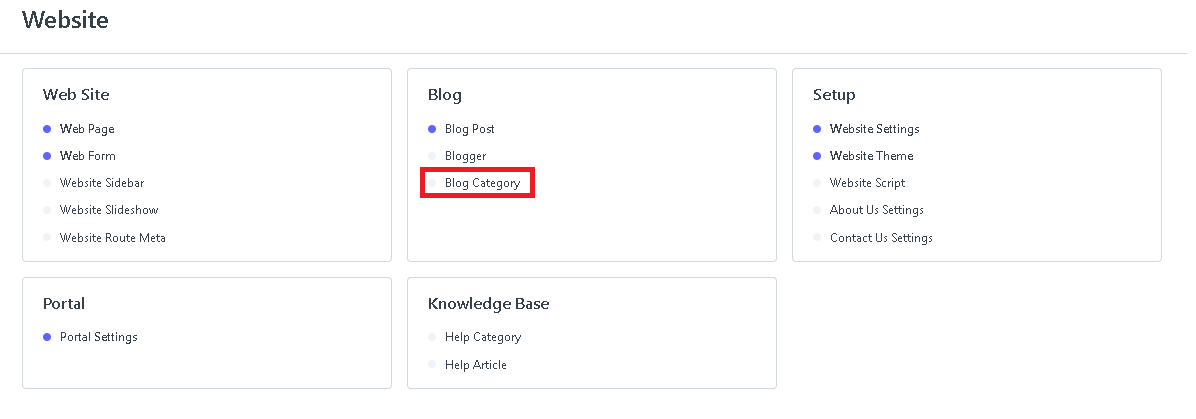
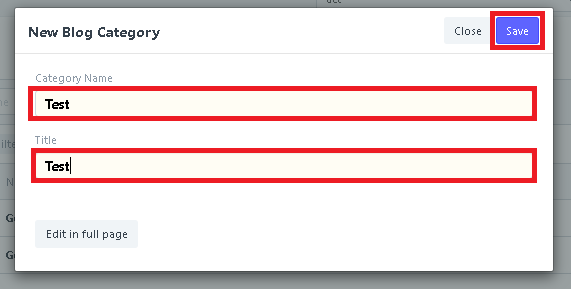
2. After clicking a Blog Category, Click New to create a new Blog Category
3. To create a new Blog Category, you just input the Category Name, Title, and click Save.
Set Up
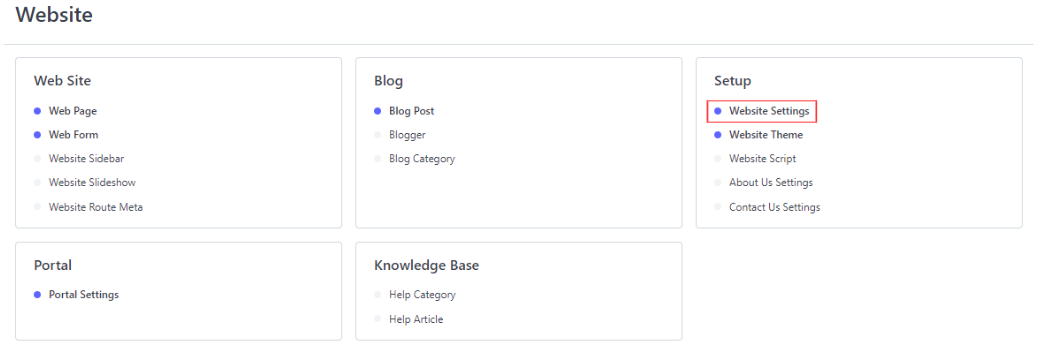
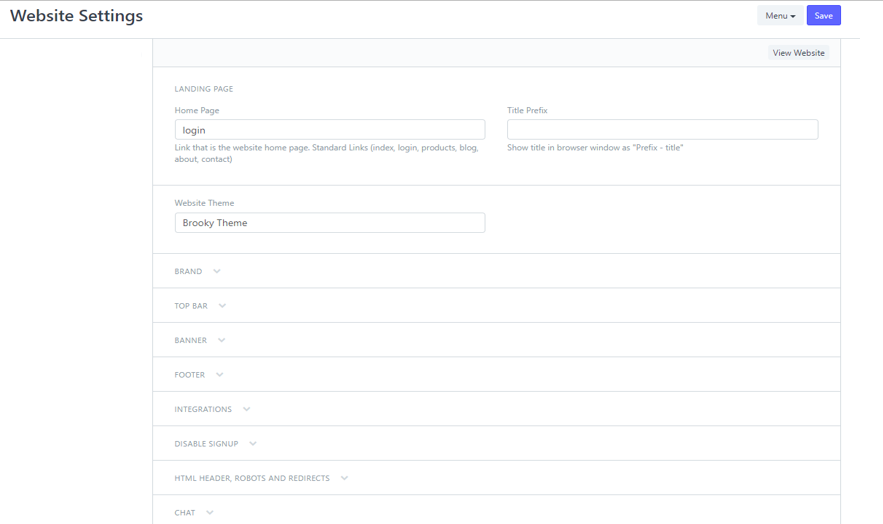
How to set up website setting
- On the demo web app dashboard, you will see WEBSITE under the 'place' group, then click it.
2. On the right side of this page, under the setup click the WEBSITE SETTING.
3. This is now the setting of the Website, here, you can now edit the things you want to update and/or edit. drag down for more fields.
4. after you edit and/or update, you can click the SAVE button on the upper right corner of this page.
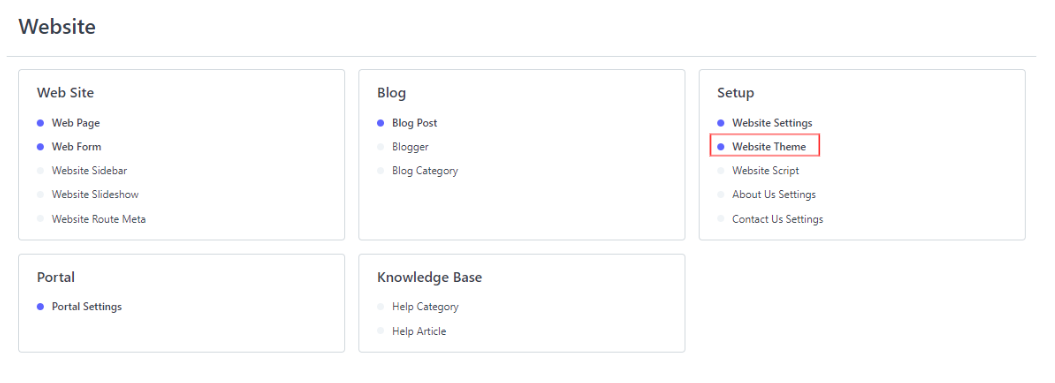
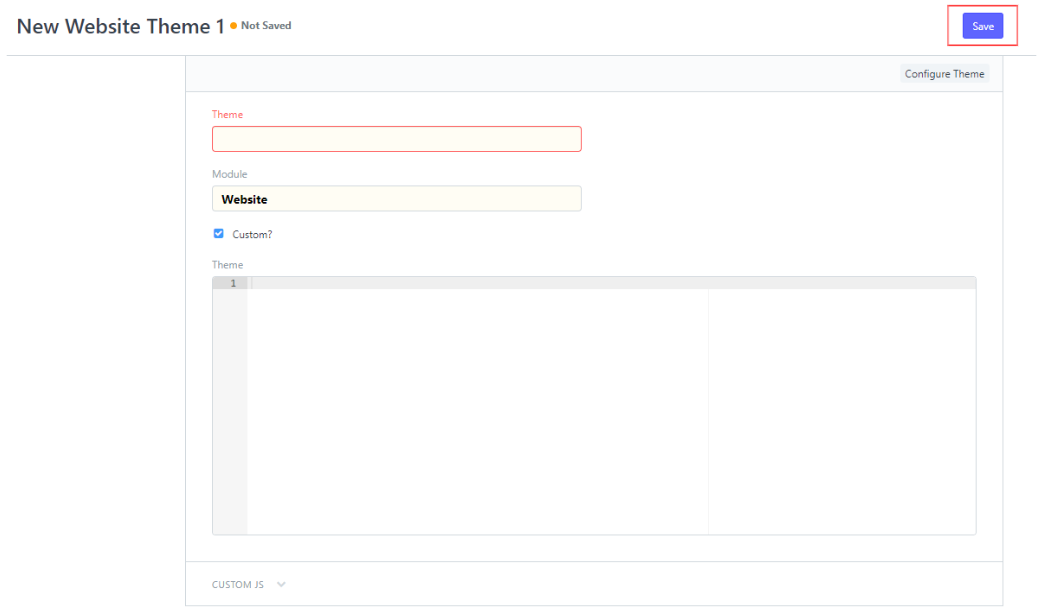
How to edit Website Theme
- Inside the WEBSITE, you will find on the center-right of the page, name WEBSITE THEME, click it.
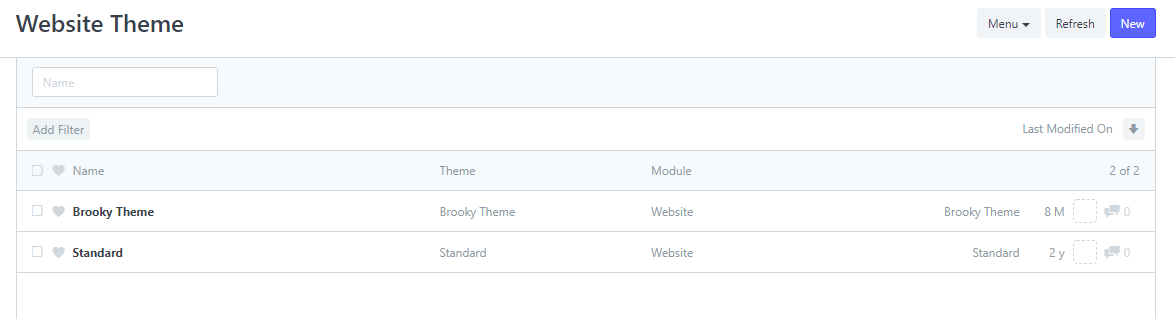
2. This is now the WEBSITE THEME, this is the portion where you can create a NEW theme or edit the current theme.
-Click one of the current created themes, inside you will find some of the fields that you might want to update. after doing so, you can click the SAVE on the upper right corner of the page.
3. create NEW themes by clicking the NEW on the upper right corner of the page.
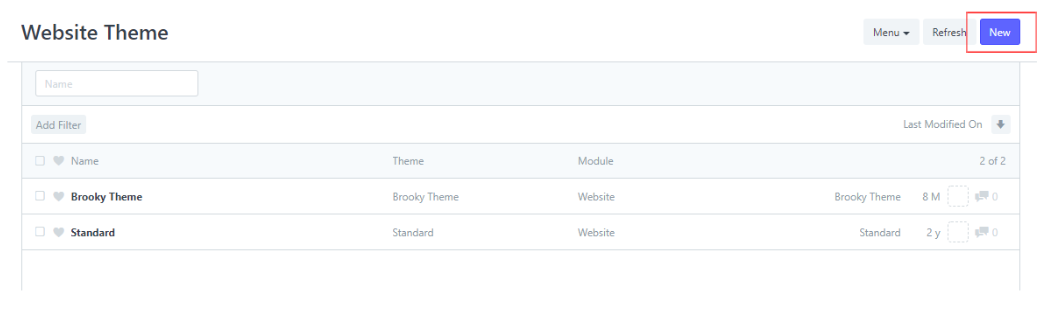
4. Fill out the necessary requirement on this area: Theme name, Module, Theme code for the custom build design.
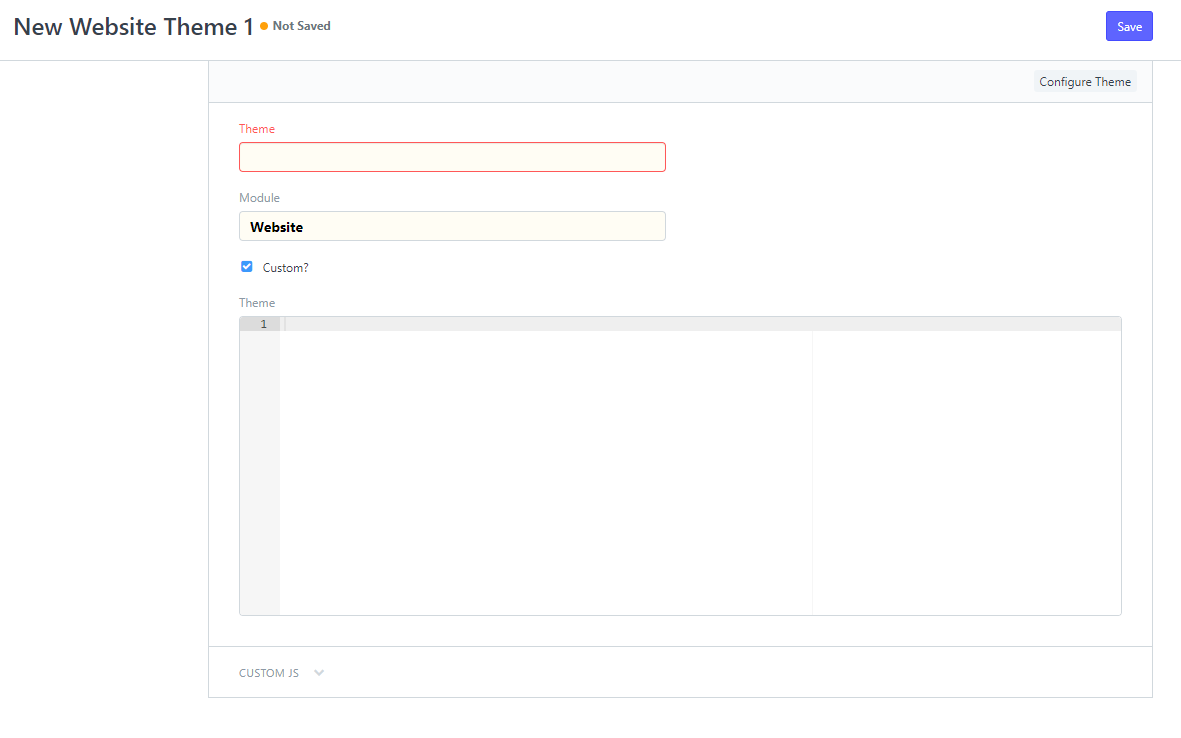
5. After you fill out the necessary fields, click the SAVE button to save your newly created theme.
Portal
How to setup portal setting
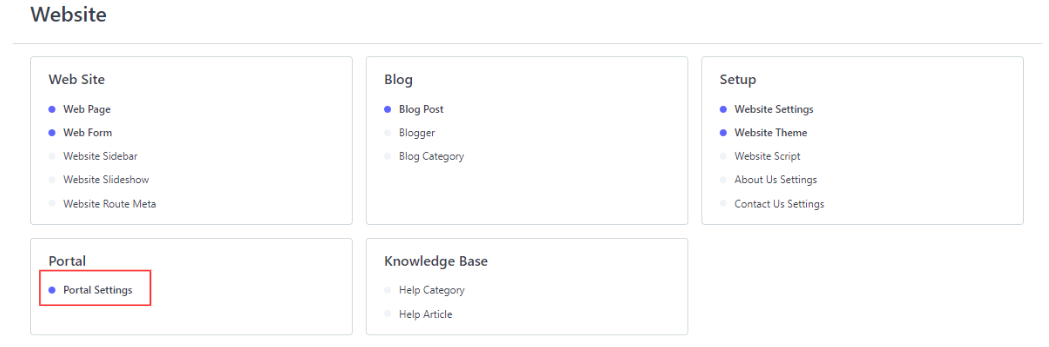
- On the demo web app dashboard, you will see WEBSITE under the 'place' group, then click it.
2. Under the Website group, you will see the Portal>Portal Setting and click it.
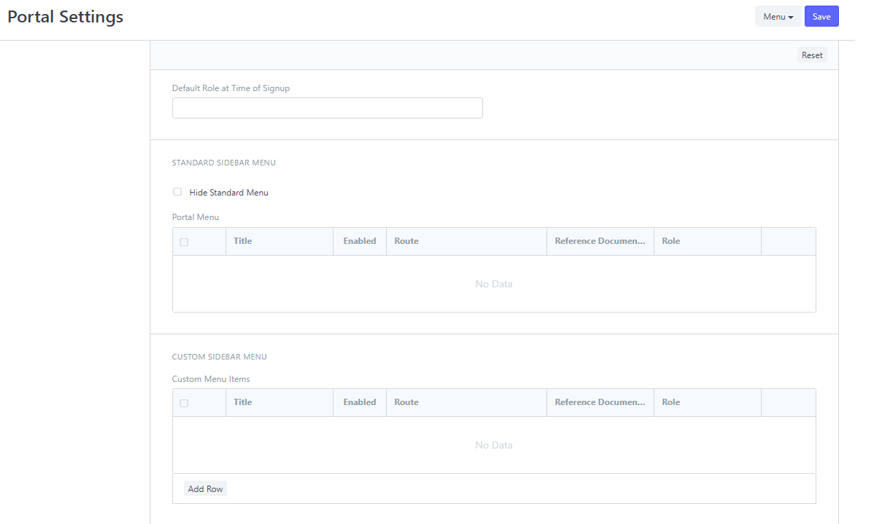
3. Now, you can update the portal on which you can custom the portal of each menu seen on every page. after updating the necessary fields, click SAVE.
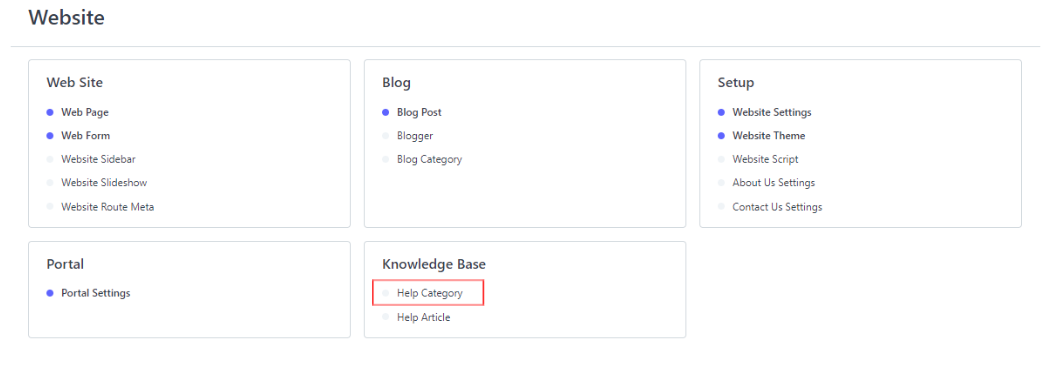
Knowledge Base
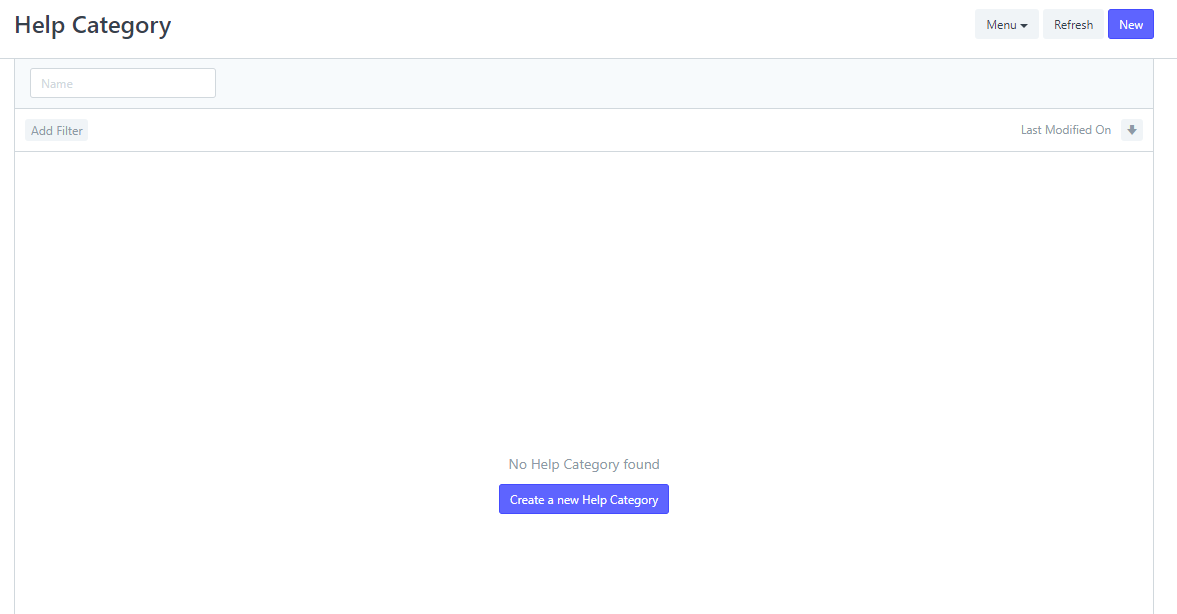
How to Create a New Help Category
- Inside the WEBSITE module, lower center of the page, click the help category.
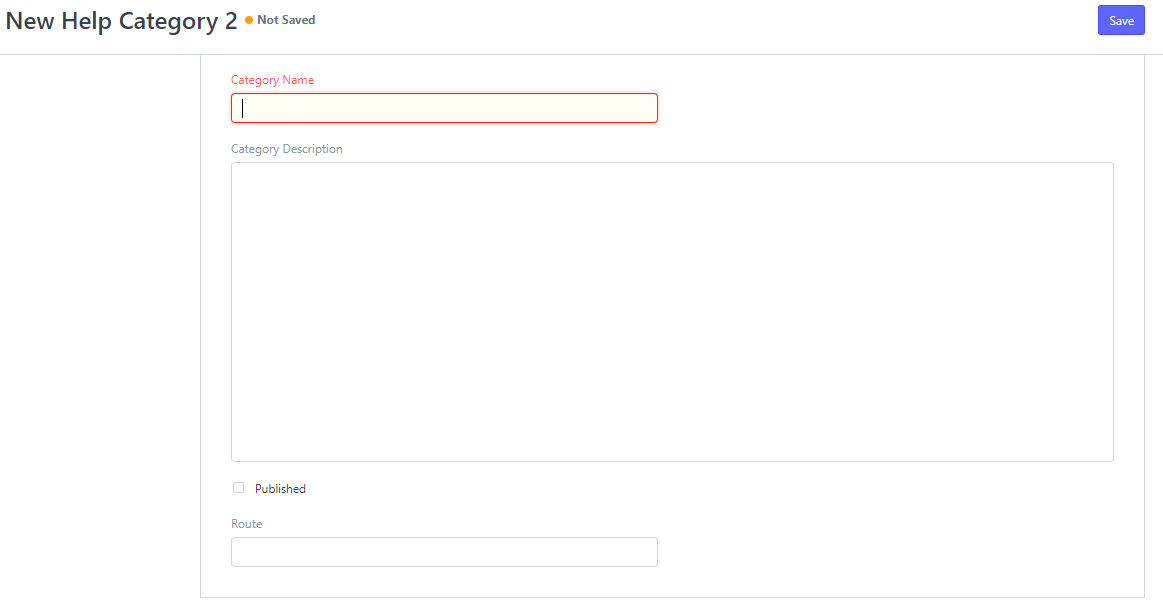
2. Click the CREATE A NEW HELP CATEGORY or NEW on the upper right corner to create a new help category.
3. Fill out the necessary fields on this page to create a new help category. then click SAVE.
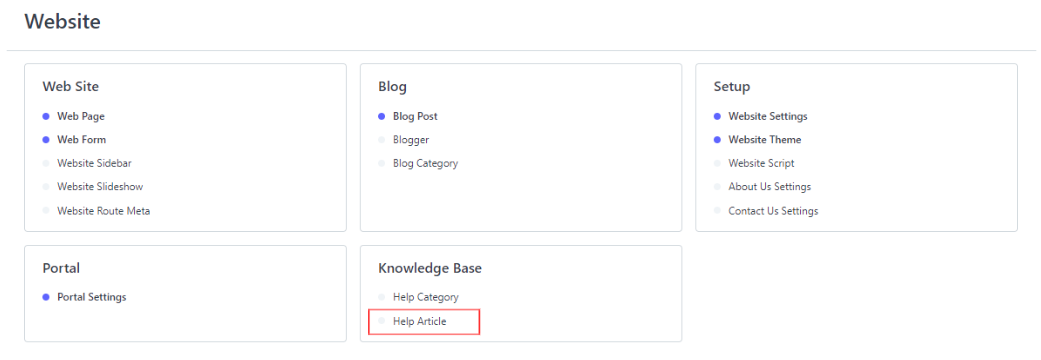
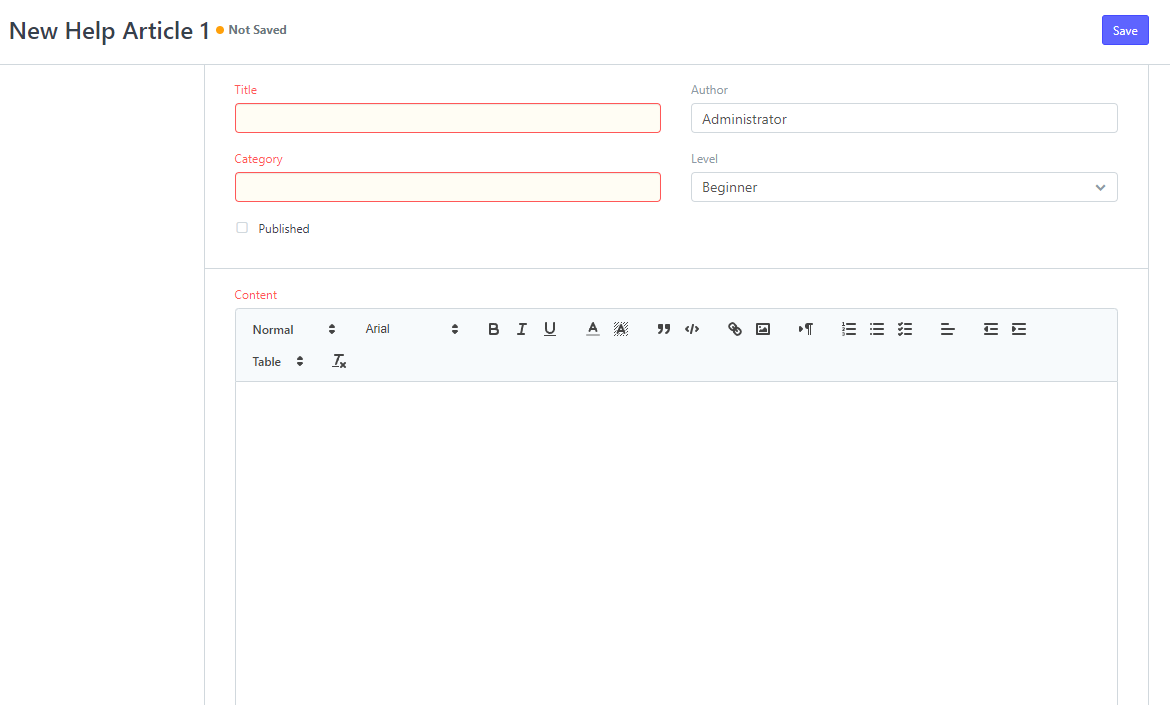
How to Create New Help Article
- Inside the WEBSITE module, lower center of the page, click the help article.
2. Click the CREATE A NEW HELP ARTICLE or NEW on the upper right corner to create a new help category.
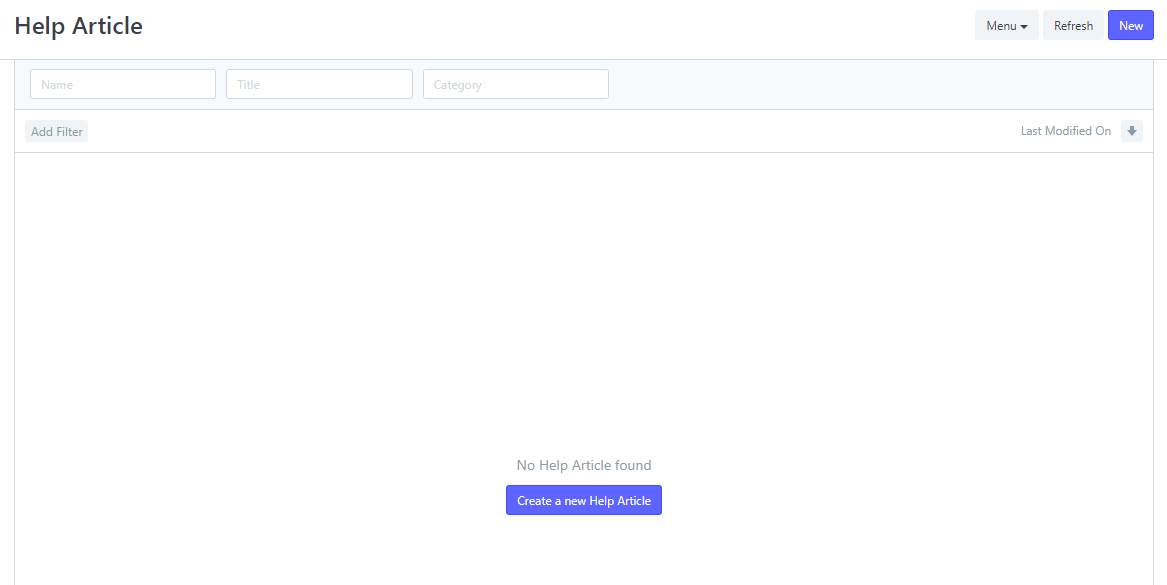
3. Fill out the necessary fields on this page to create a new help category, then click SAVE.
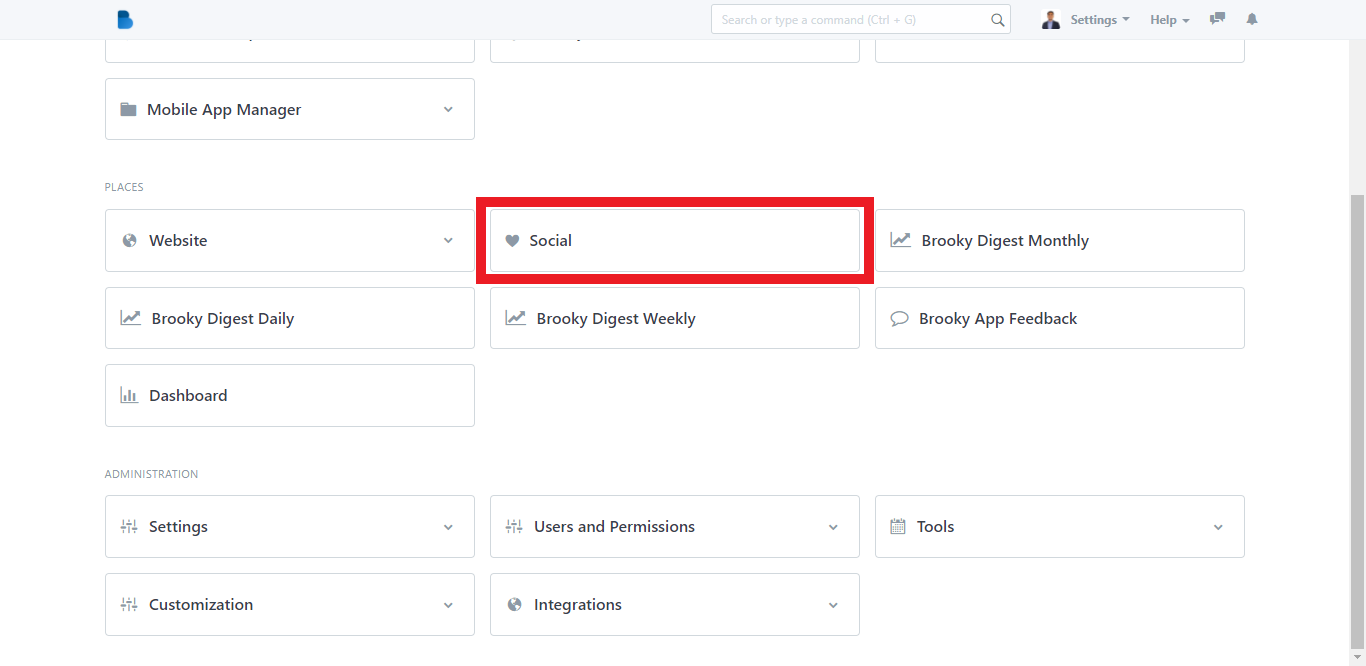
Social
How to Use Social
1. Open the Brooky Portal and login your credentials.
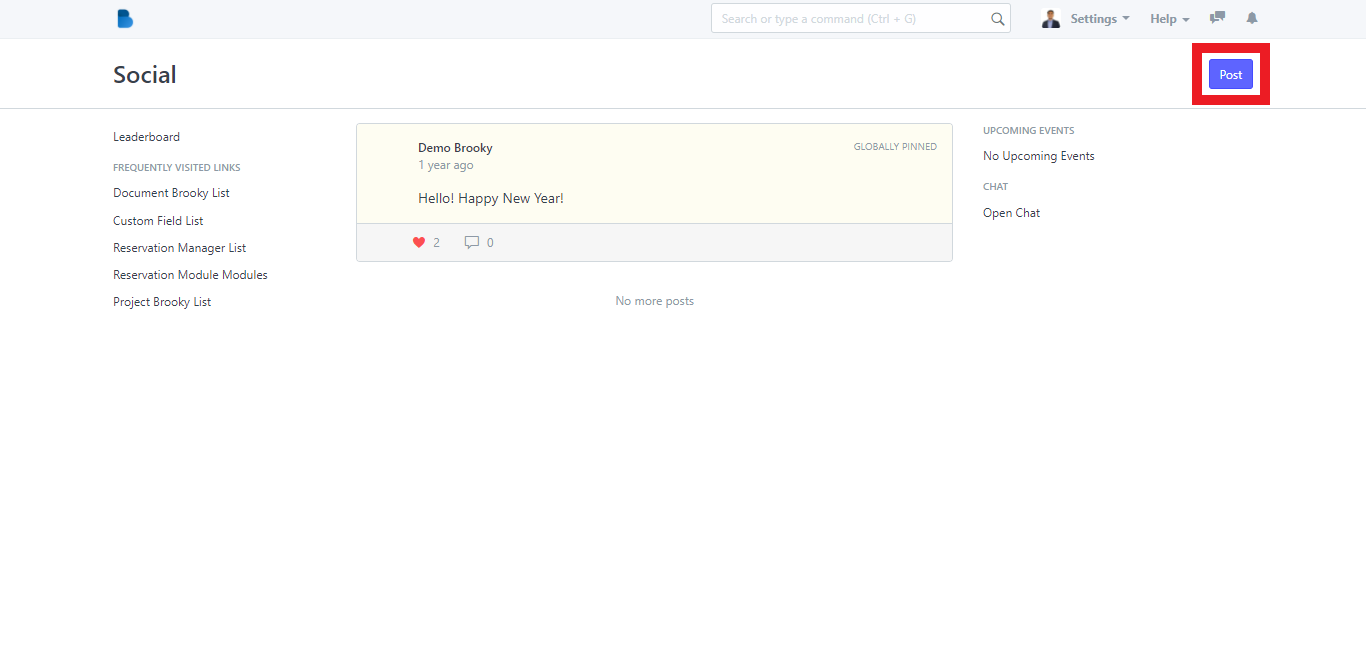
2. On the Brooky Admin Portal homepage, click on the Social and it will redirect you to its page.
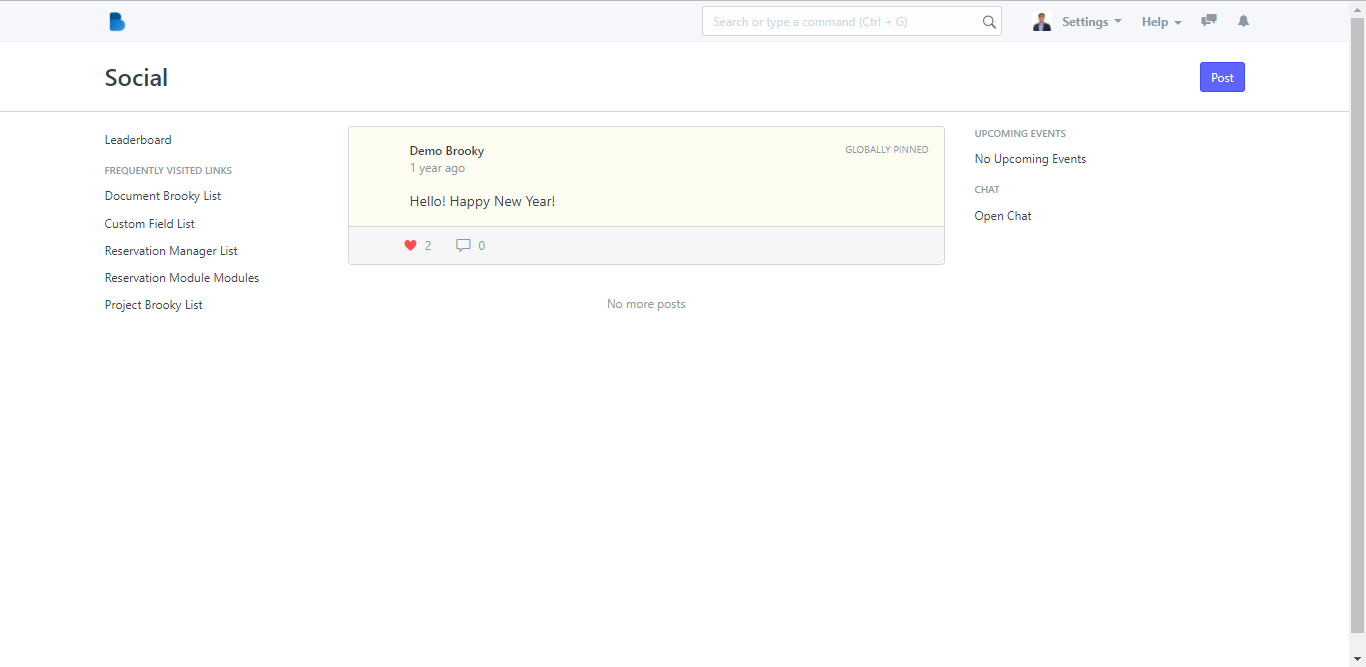
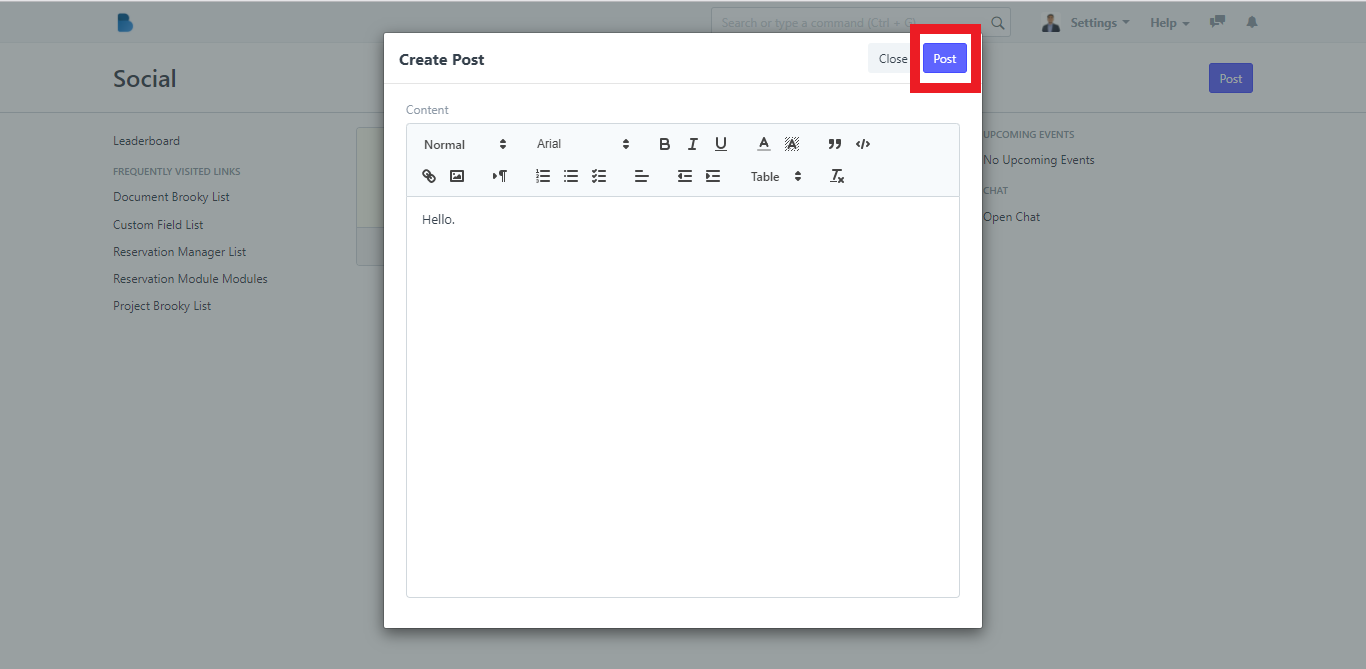
3. You can post on the Social page by clicking the Post button.
4. You can pin the post globally by clicking the dropdown button in the posted status and choose Pin Globally . You can also delete the post by clicking Delete.
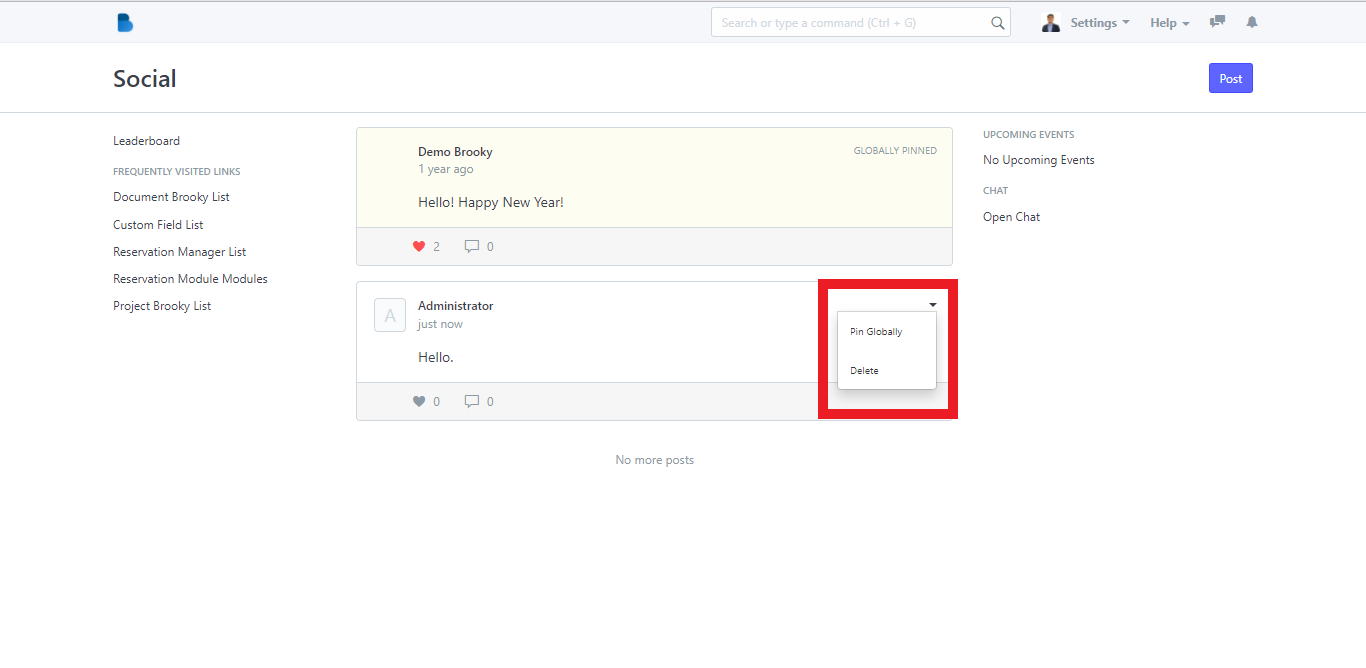
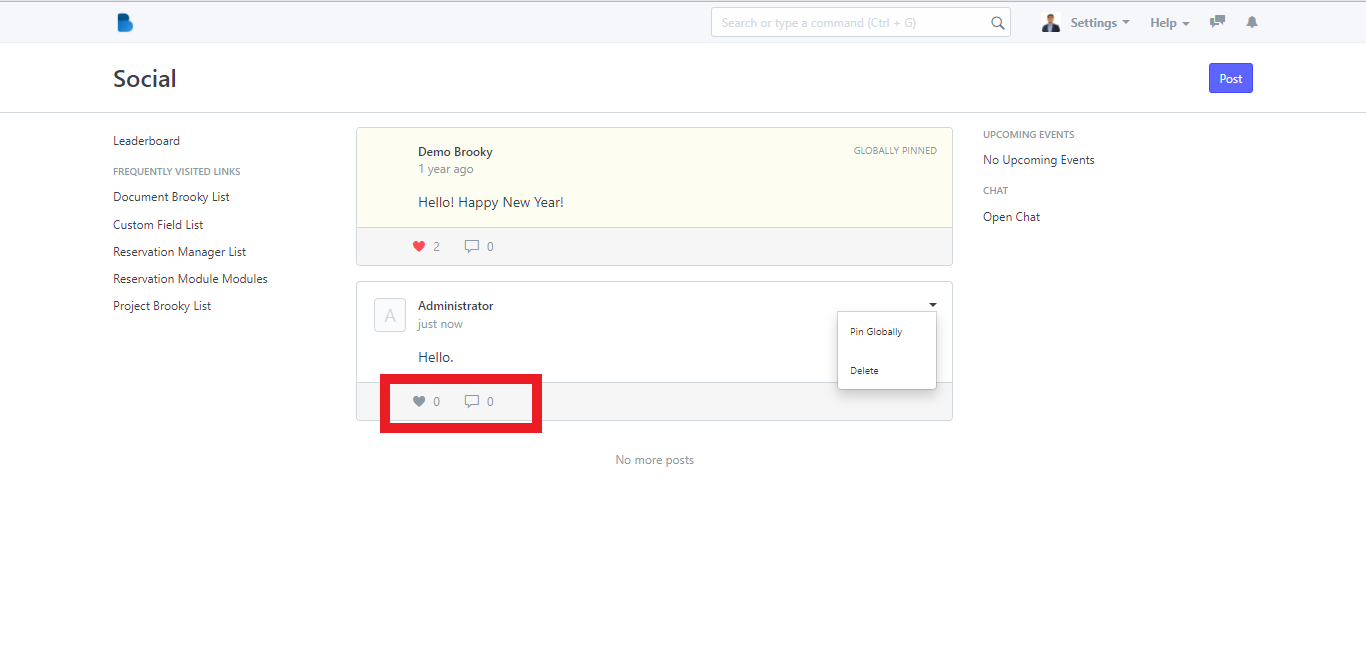
You can also favorite the post or add a comment on it.
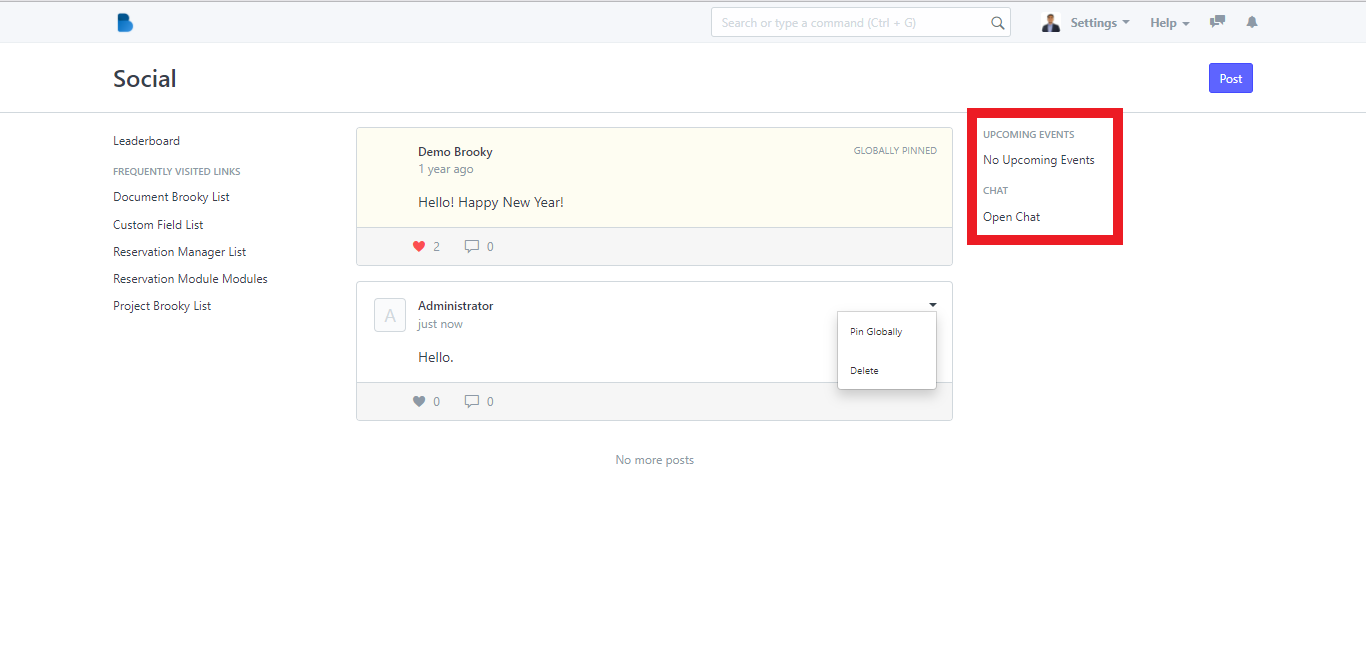
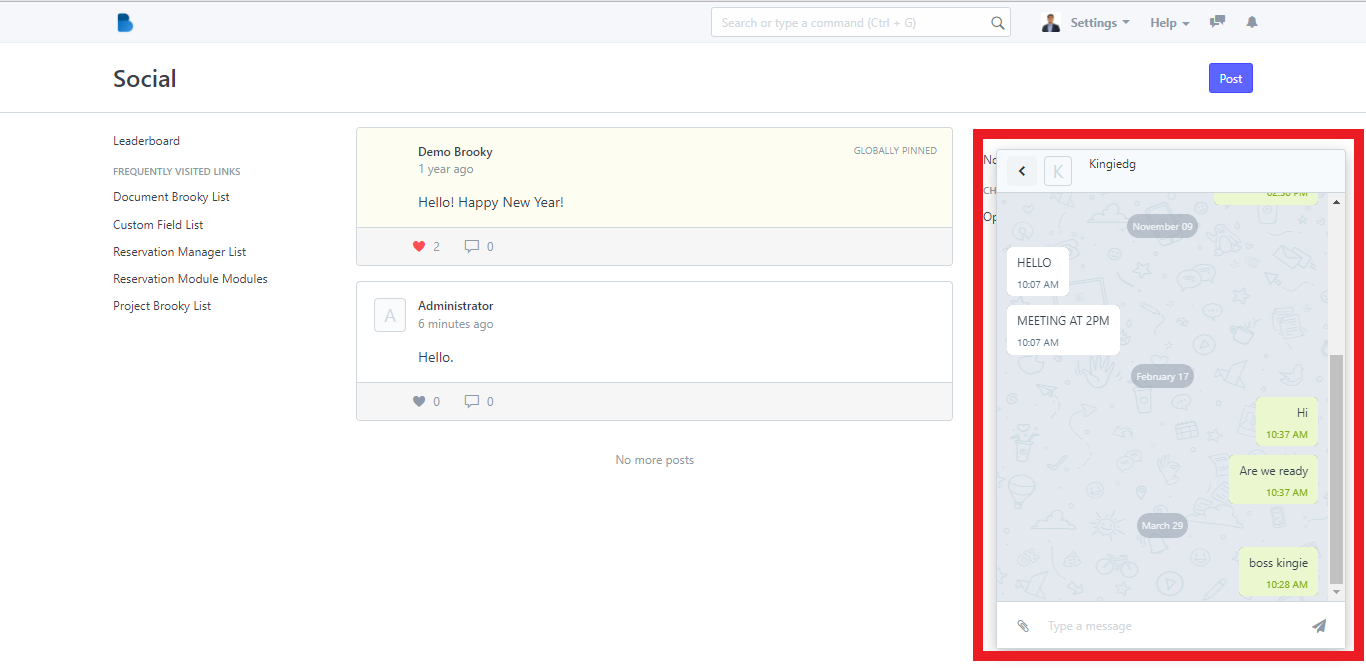
5. You can also check if there are upcoming events on the right side of the Social page. You can also start a conversation by clicking Open Chat.
6. The sidebar on the Social page contains many hyperlinks that can be accessed by clicking on each word.
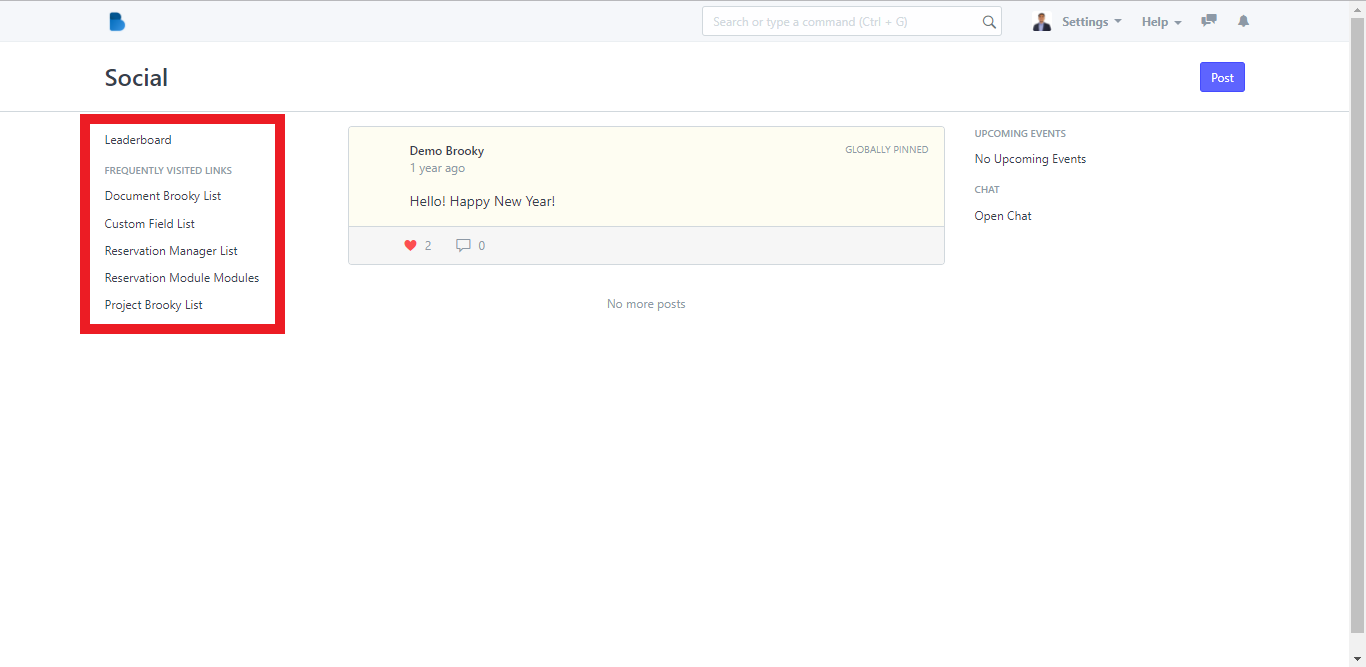
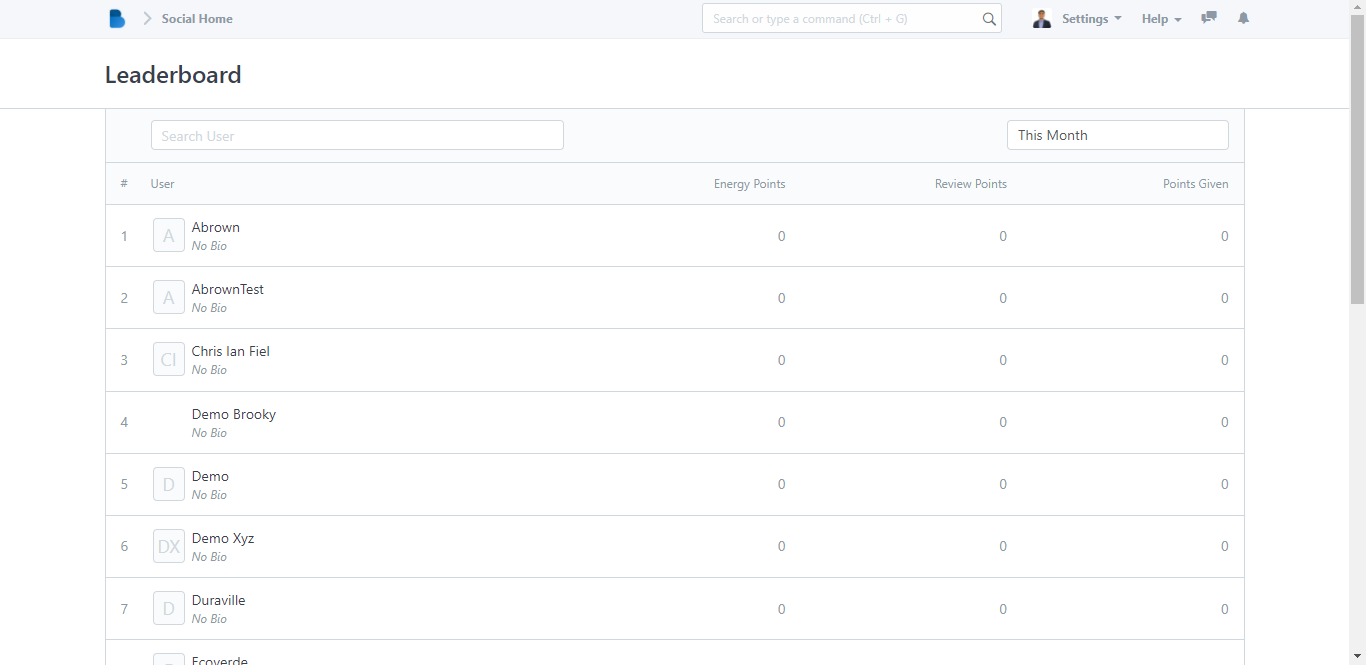
If you click Leaderboard, it will redirect you to this page where you can see all the users.
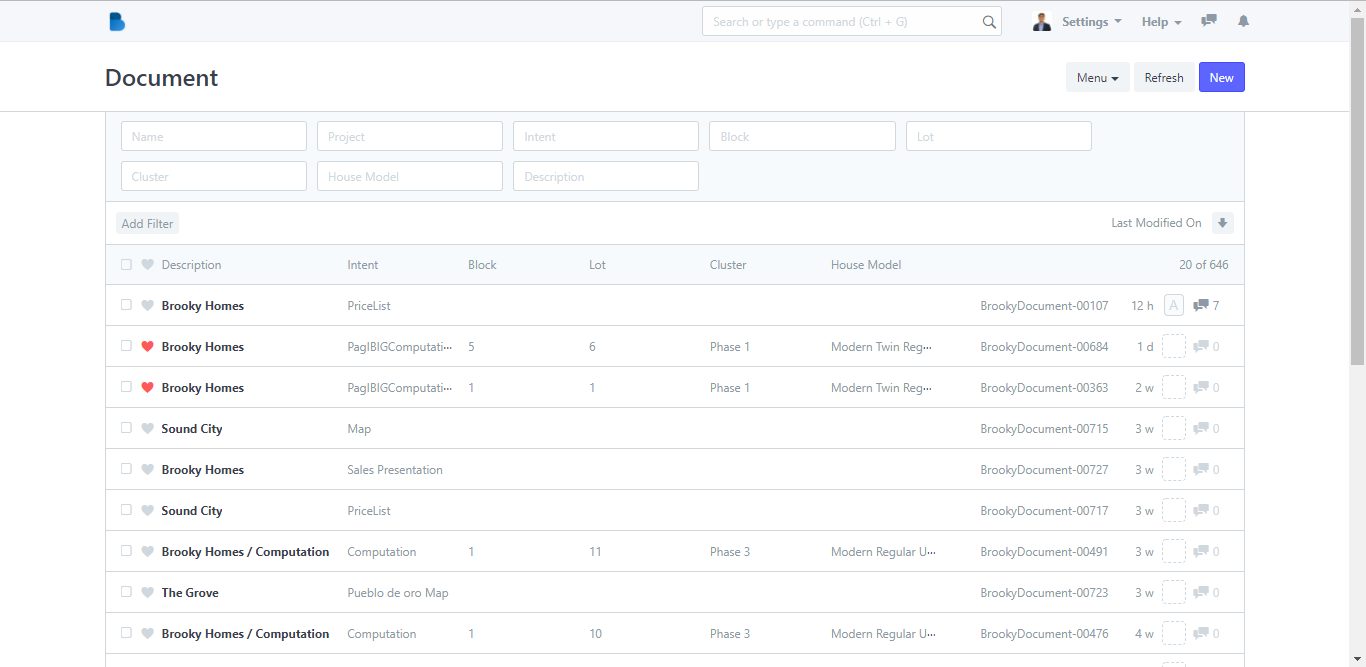
If you click Document Brooky List, it will redirect you to its page.
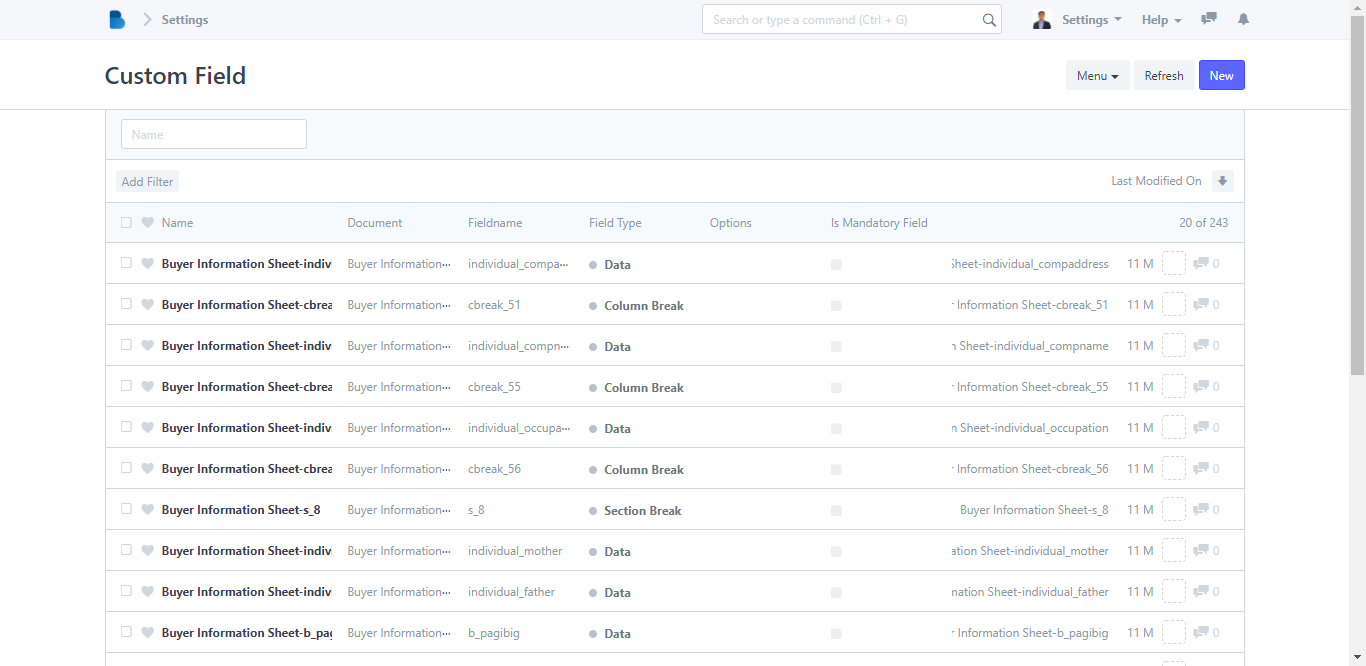
If you click Custom Field List, it will redirect you to its page.
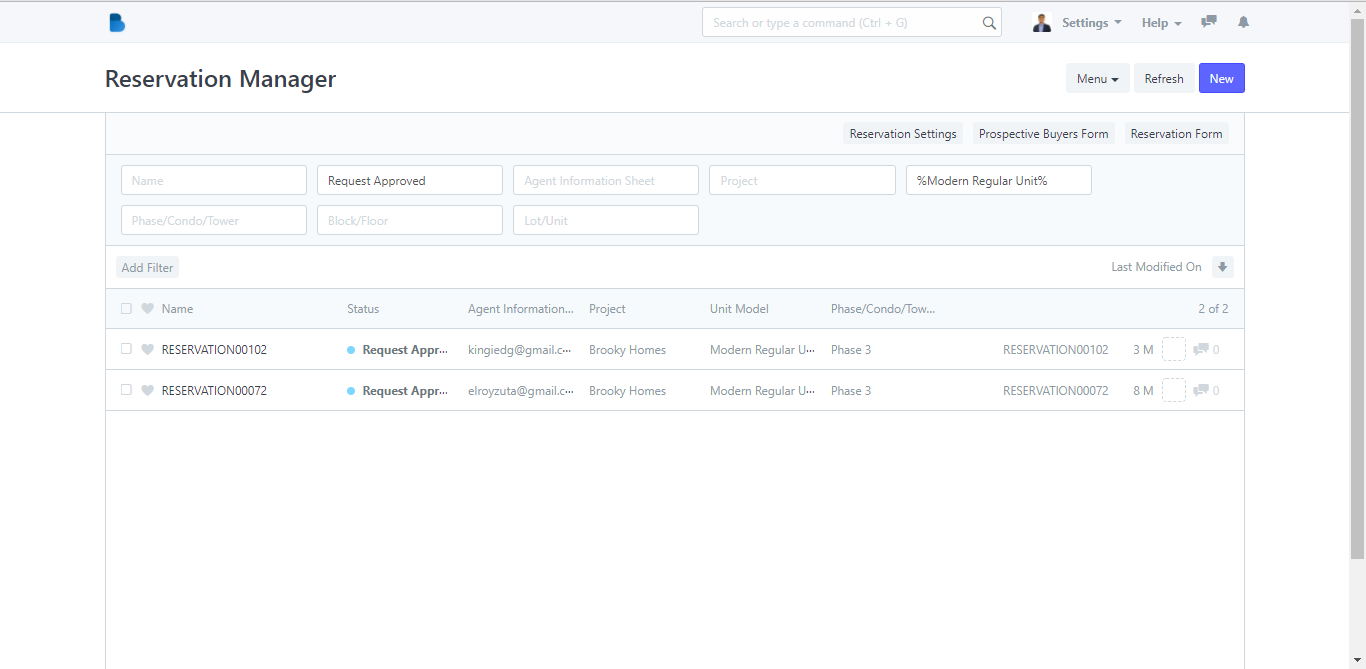
If you click the Reservation Manager List, it will redirect you to its page.
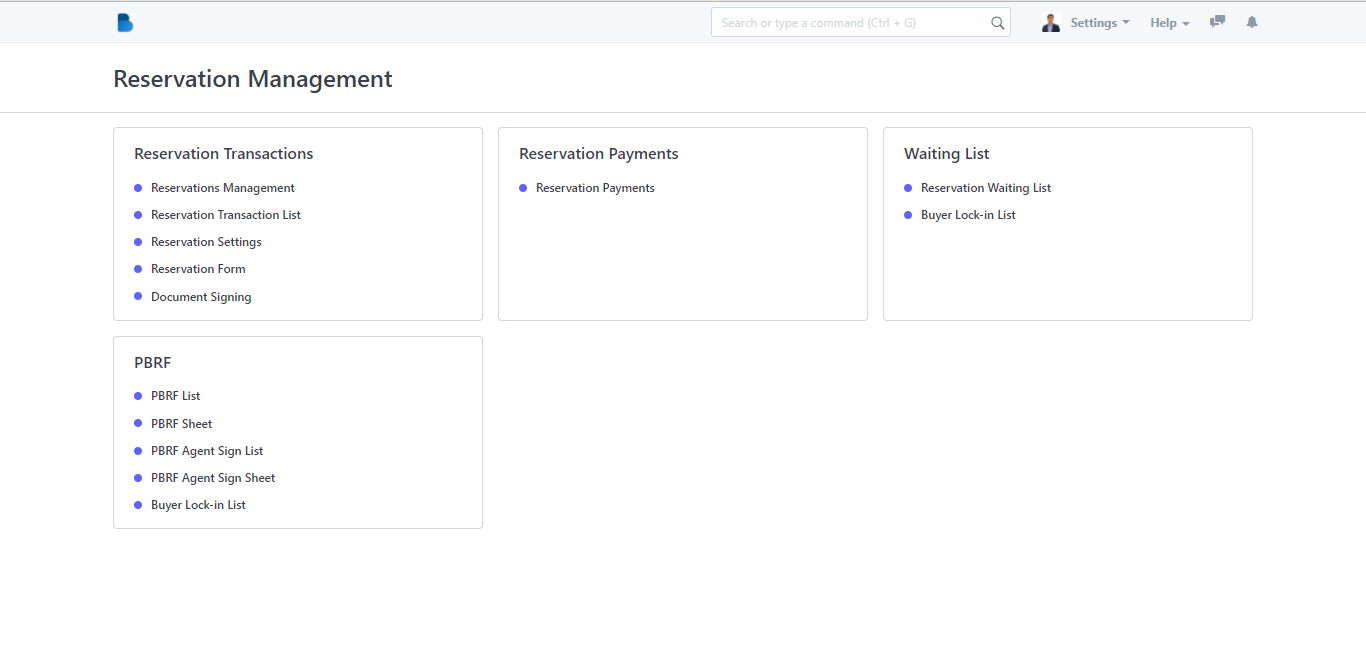
If you click Reservation Module Modules, it will redirect you to its page.
If you click Project Brooky List, it will redirect you to its page.
Brooky App Feedback
How to Feedback
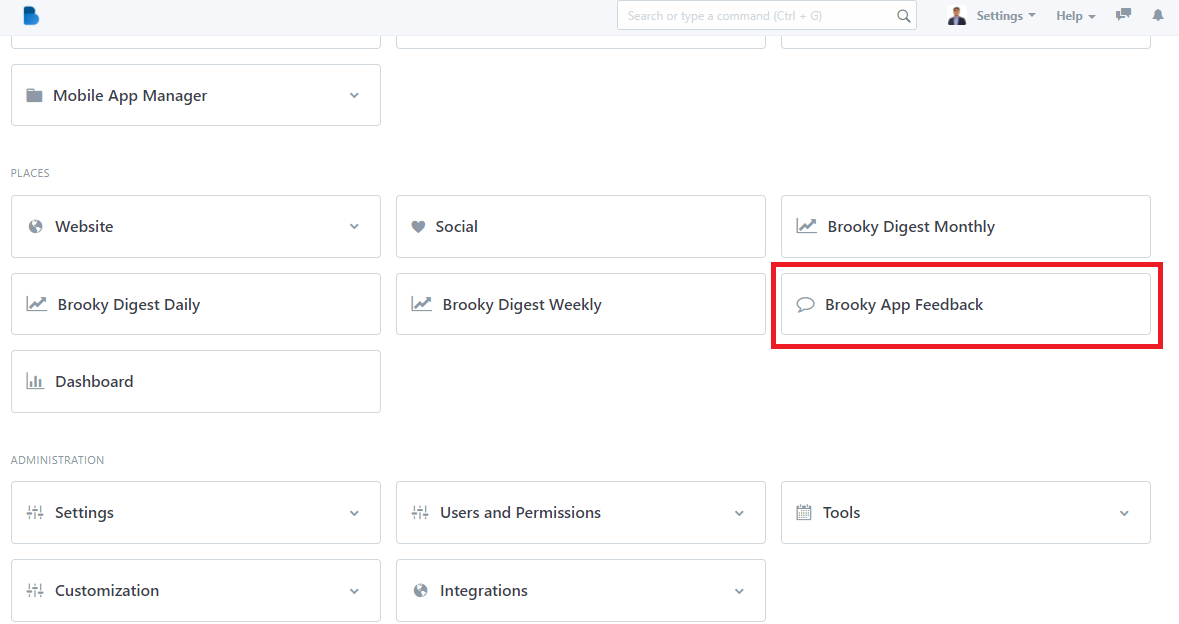
- On Brooky Administrator View click "Brooky App Feedback".
2. In here, you can see all the agents comments, issues, and suggestions(sent from the mobile app). Click the ‘Name' that you want to view/edit and it will redirect you to view/edit page of that specific data.
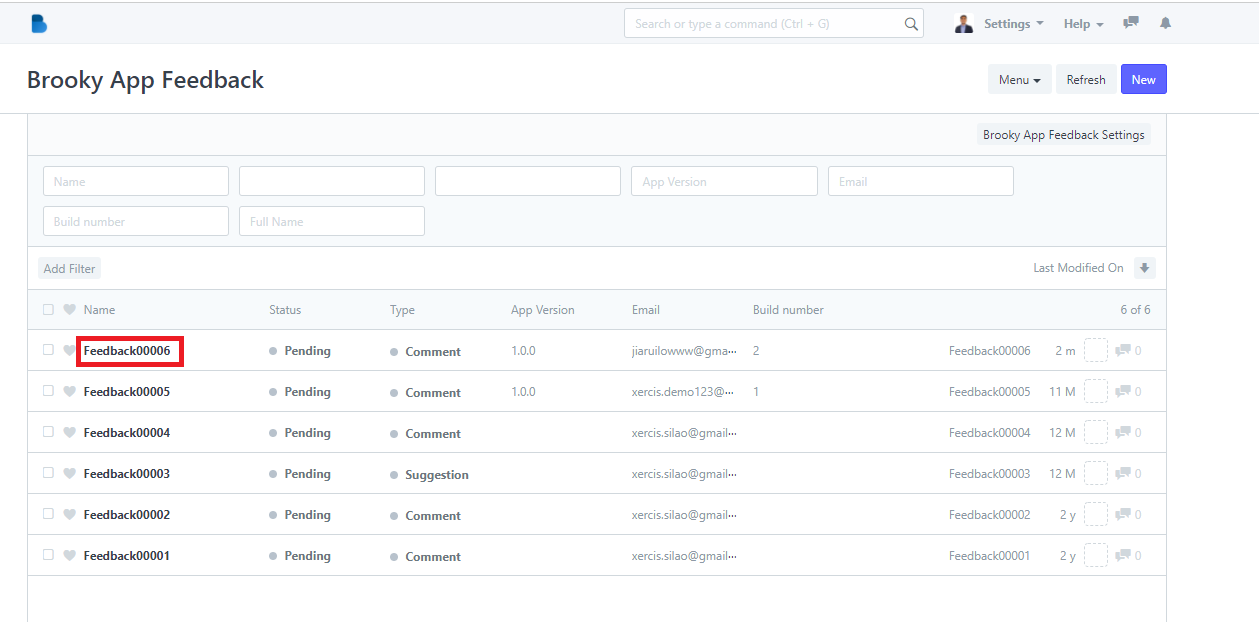
3. You can check, and edit status of the feedback you chose. If you had any changes/updates click 'Save'. In 2.1 you can change the status to done when this feedback is resolved or fixed. In 2.2 You can see the user's screenshot(but for this example the agent did not attached any screenshots)

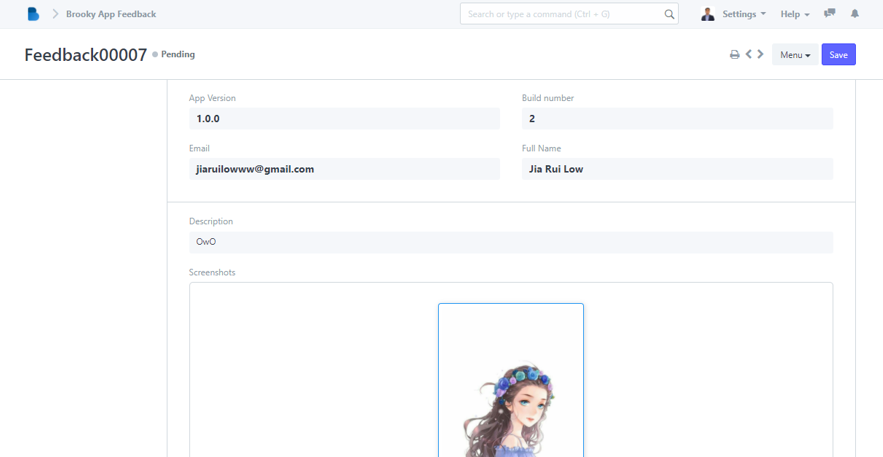
4. This is how it looks like when an agent attached a photos when sending a feedback.
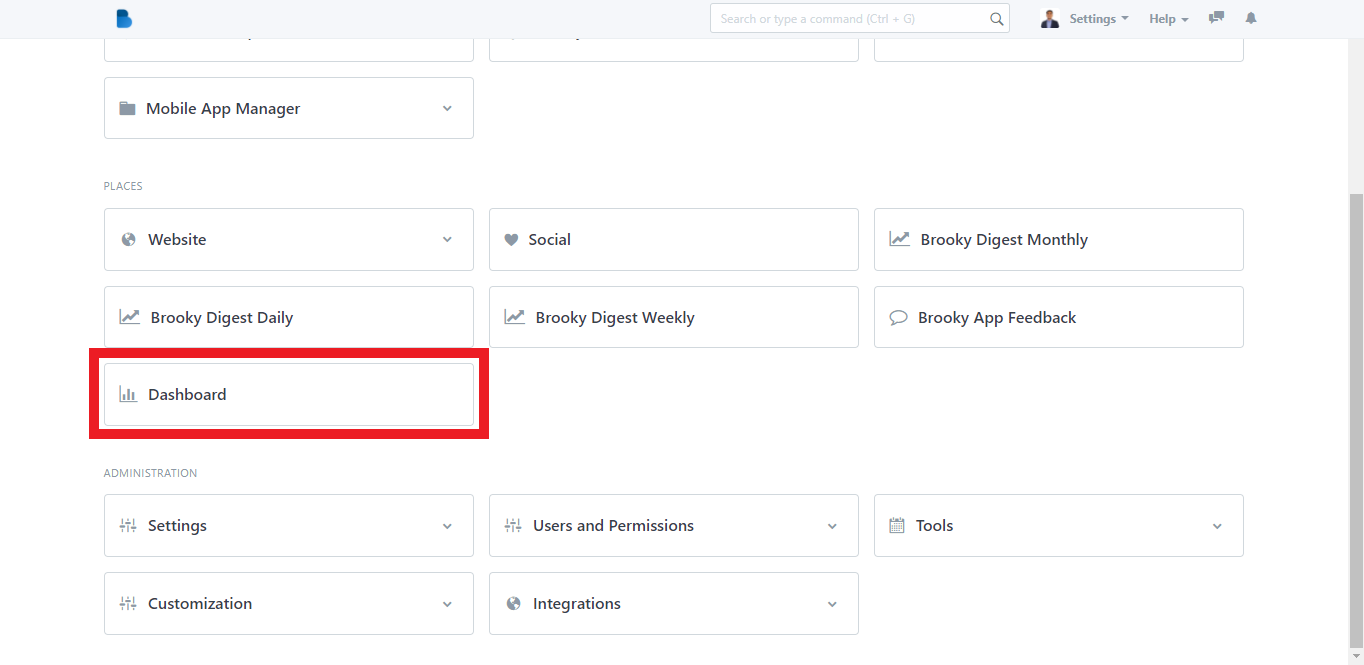
Dashboard
How to Use Dashboard
1. Open the Brooky Portal and login your credentials.
2. On the Brooky Admin Portal homepage, click on the Dashboard and it will redirect you to its page.
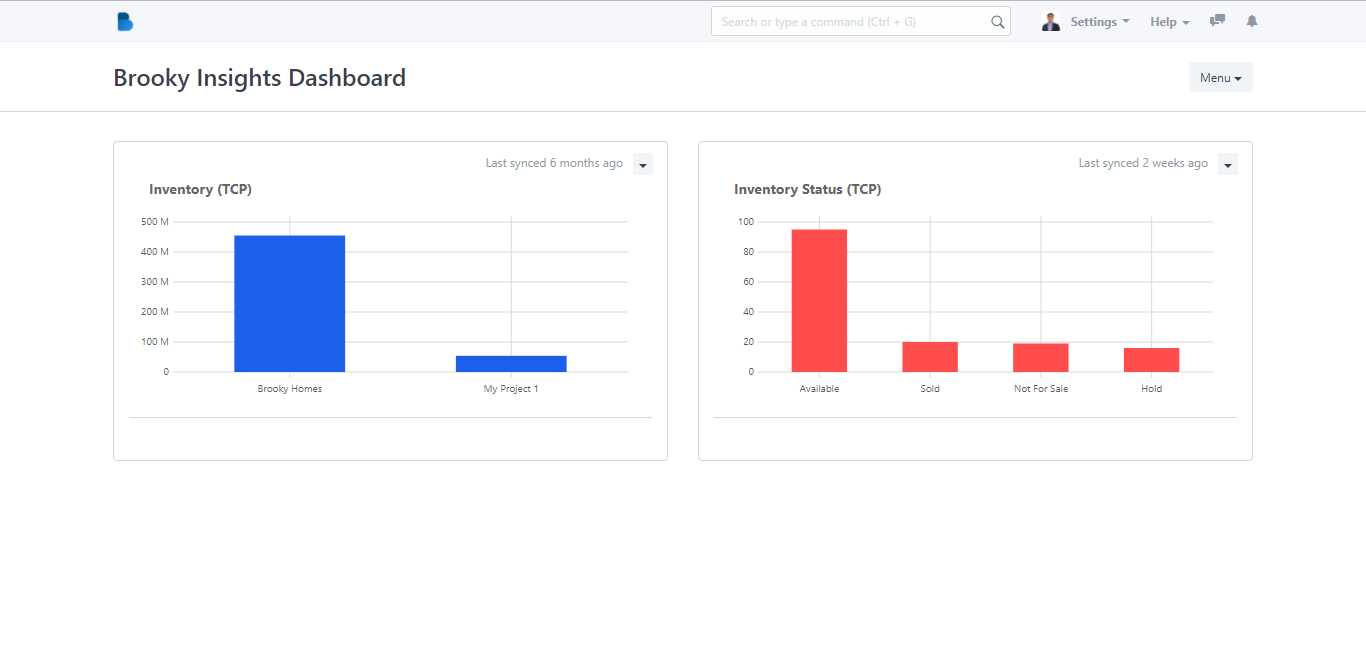
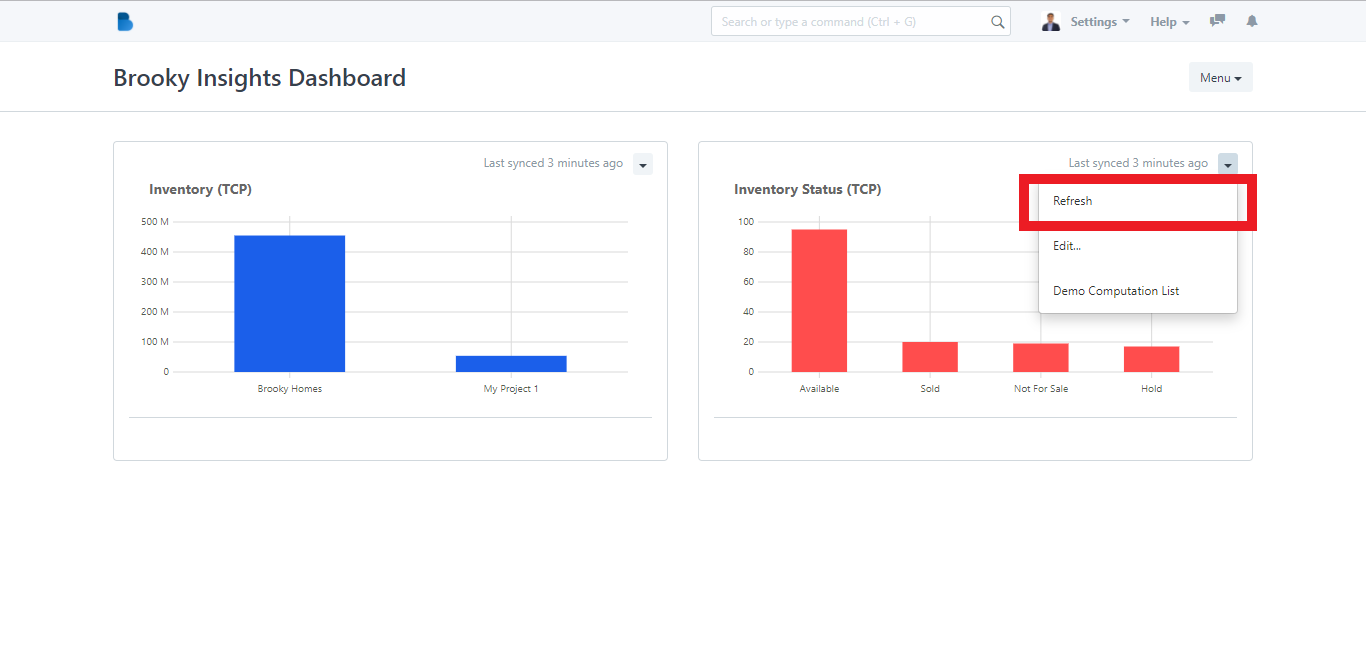
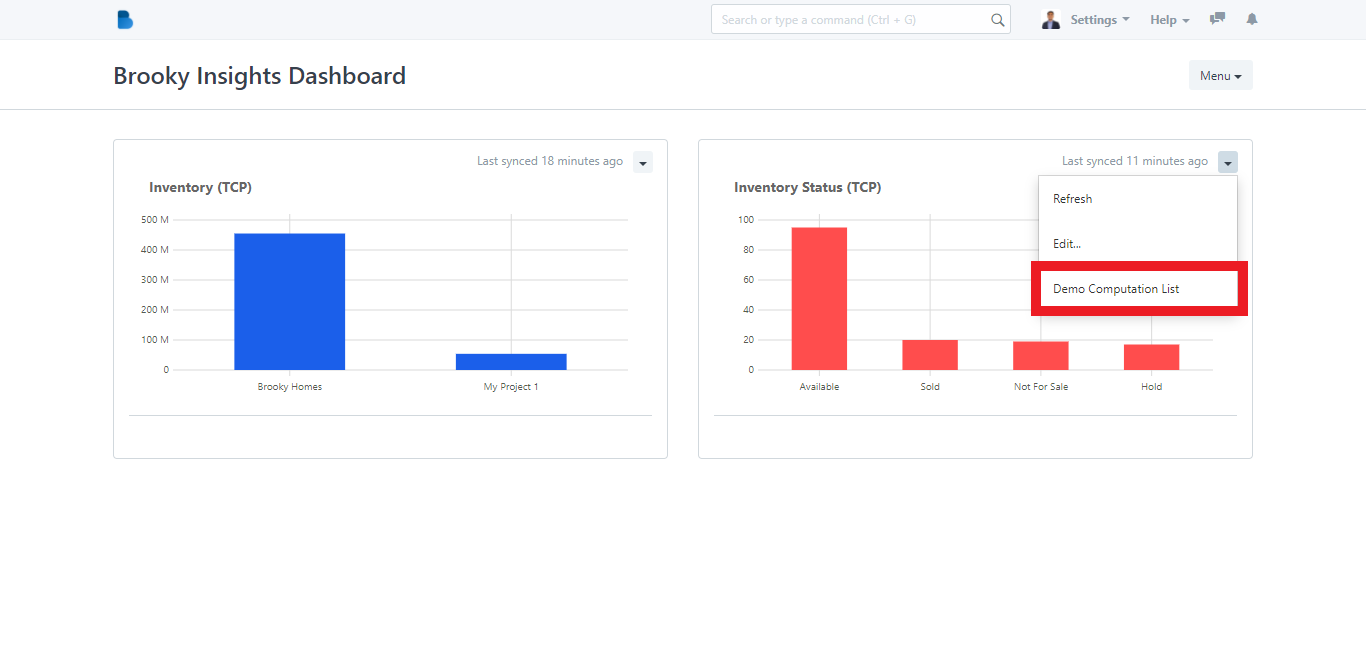
3. In the Brooky Insights Dashboard page, it will show the Inventory (TCP) and the Inventory Status (TCP) that indicates how many properties are Available, Sold, Not for Sale and on Hold. In the Inventory (TCP) and Inventory Status (TCP) categories, there is a dropdown button with the options Refresh, Edit, and Computation List.
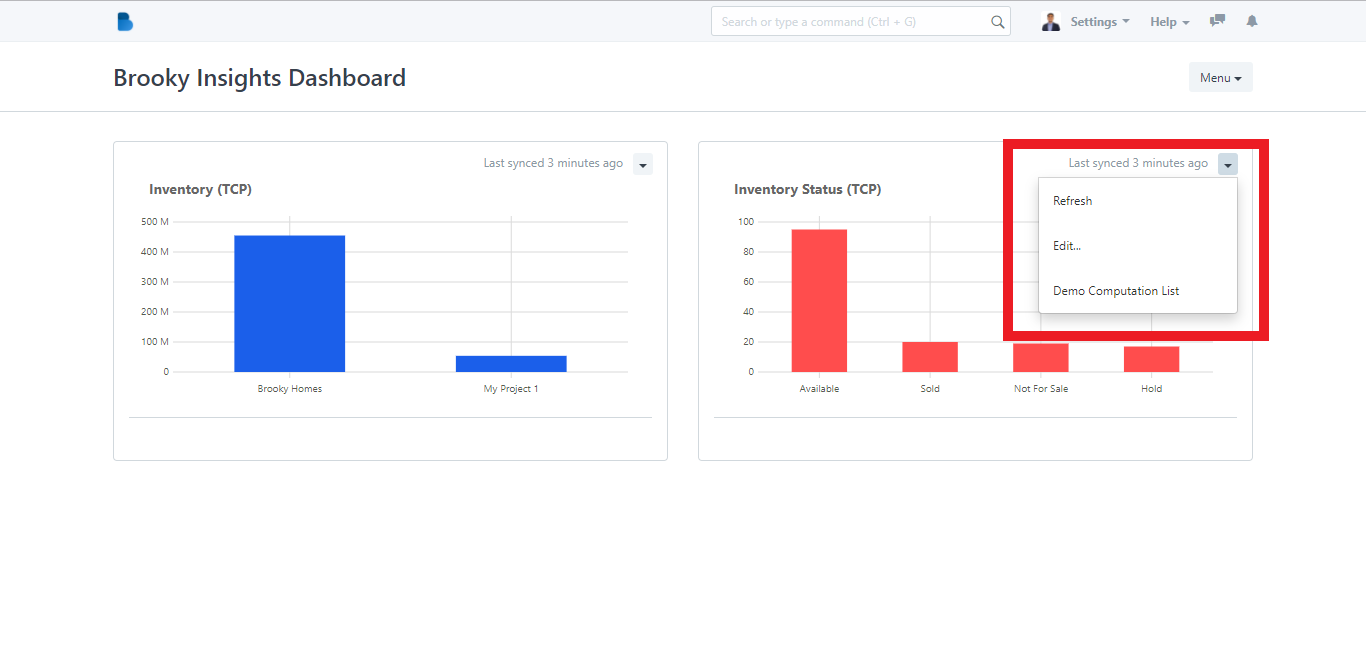
Refreshing the dashboard will sync the new information.
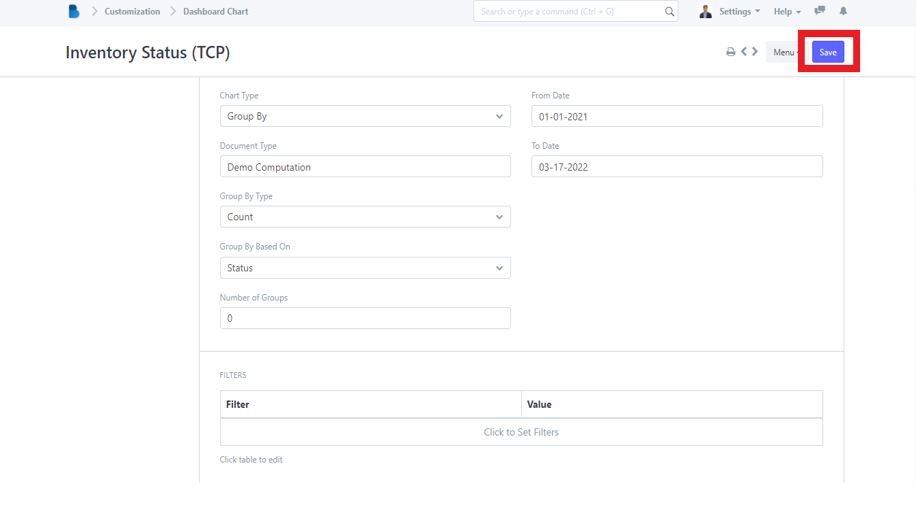
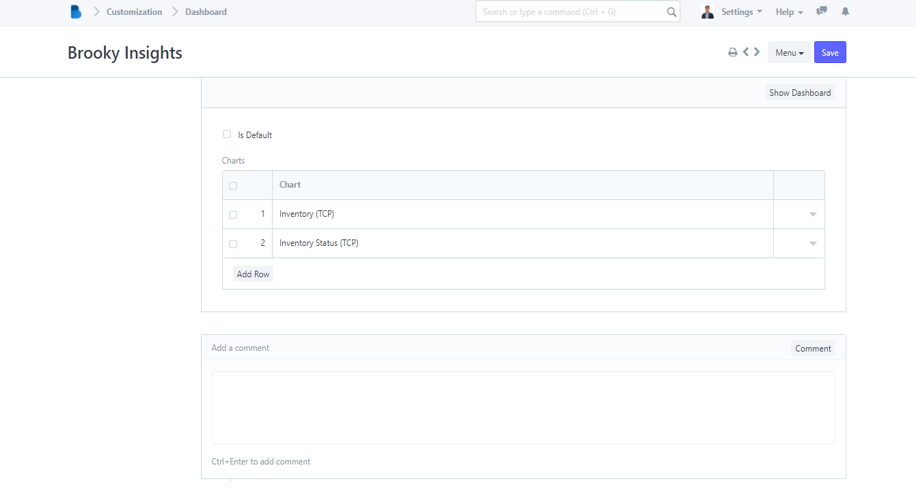
If you click Edit, it will redirect you to the Dashboard Chart where you can customize the details. Click Save if you're done with the customization.
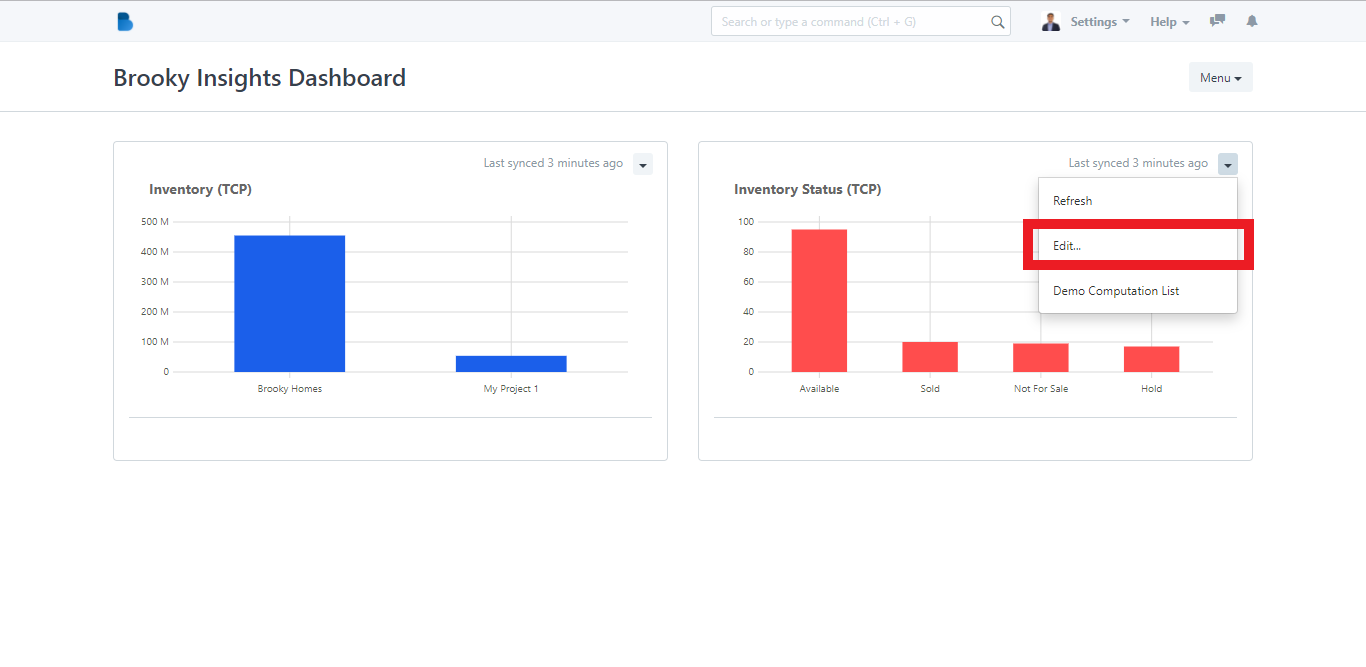
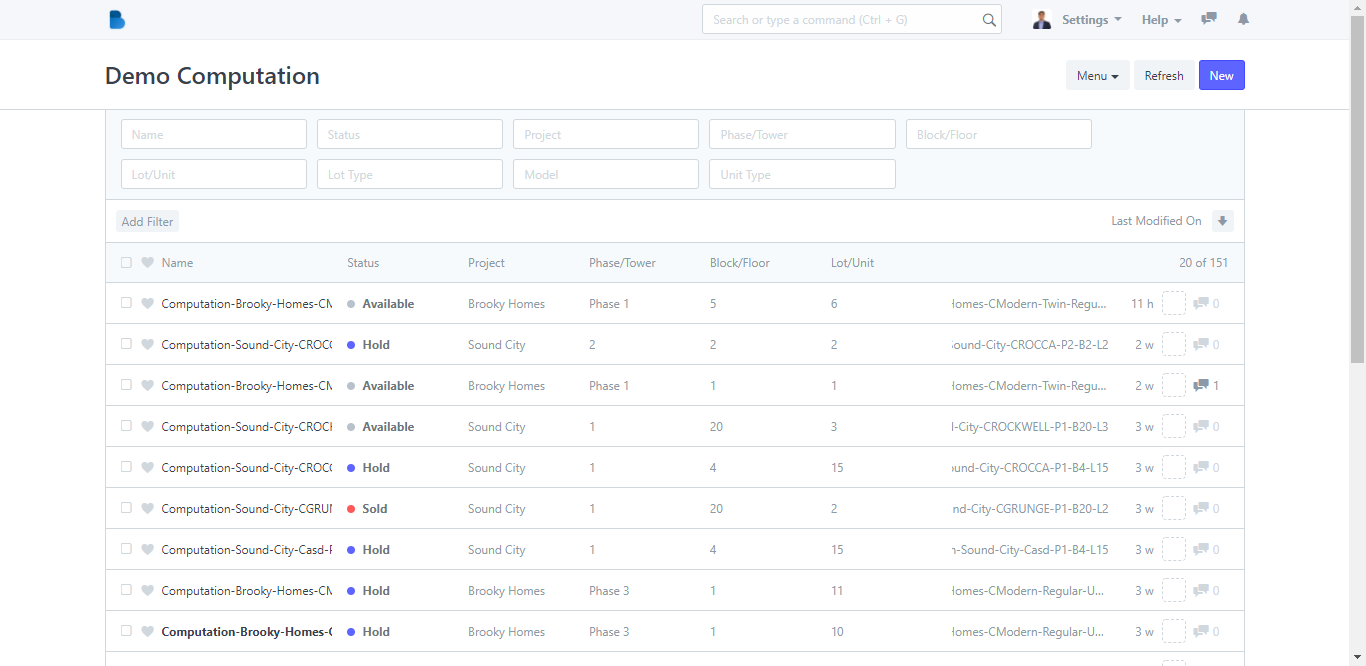
If you click the Computation List, it will redirect you to its page.
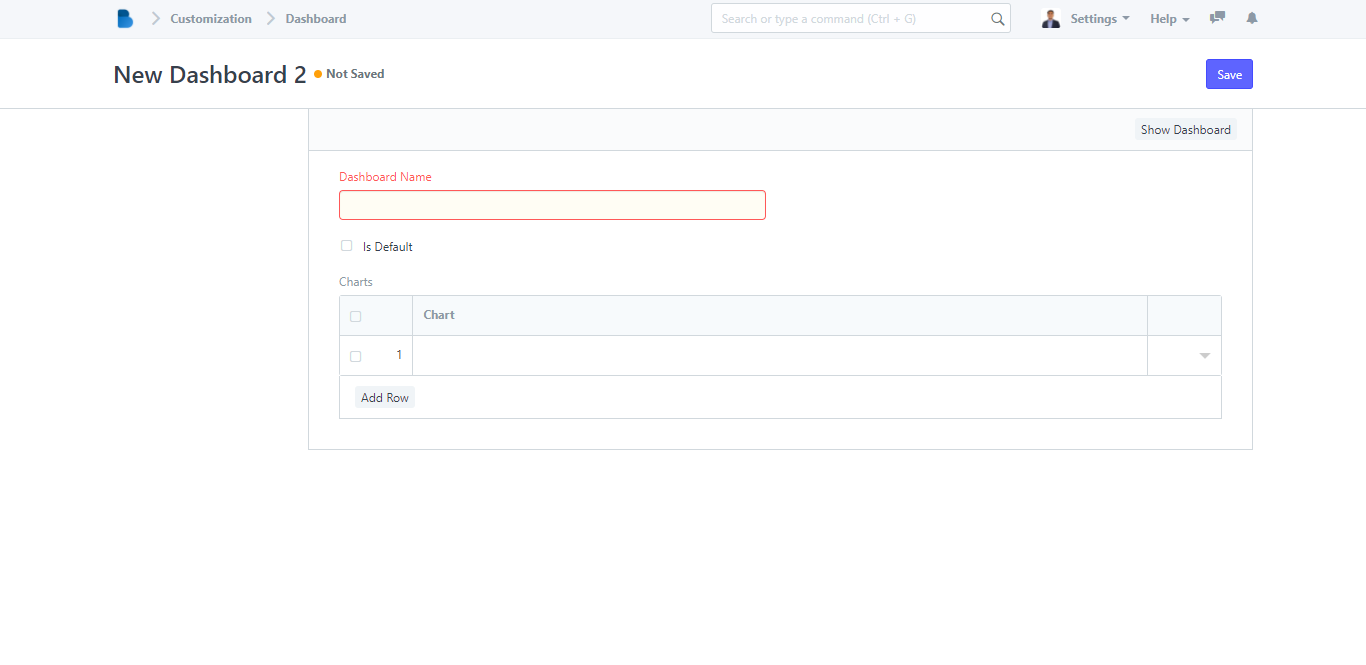
4. Going back to the Brooky Insights Dashboard, there is also a Menu dropdown button which has the options Edit, New and Refresh All.
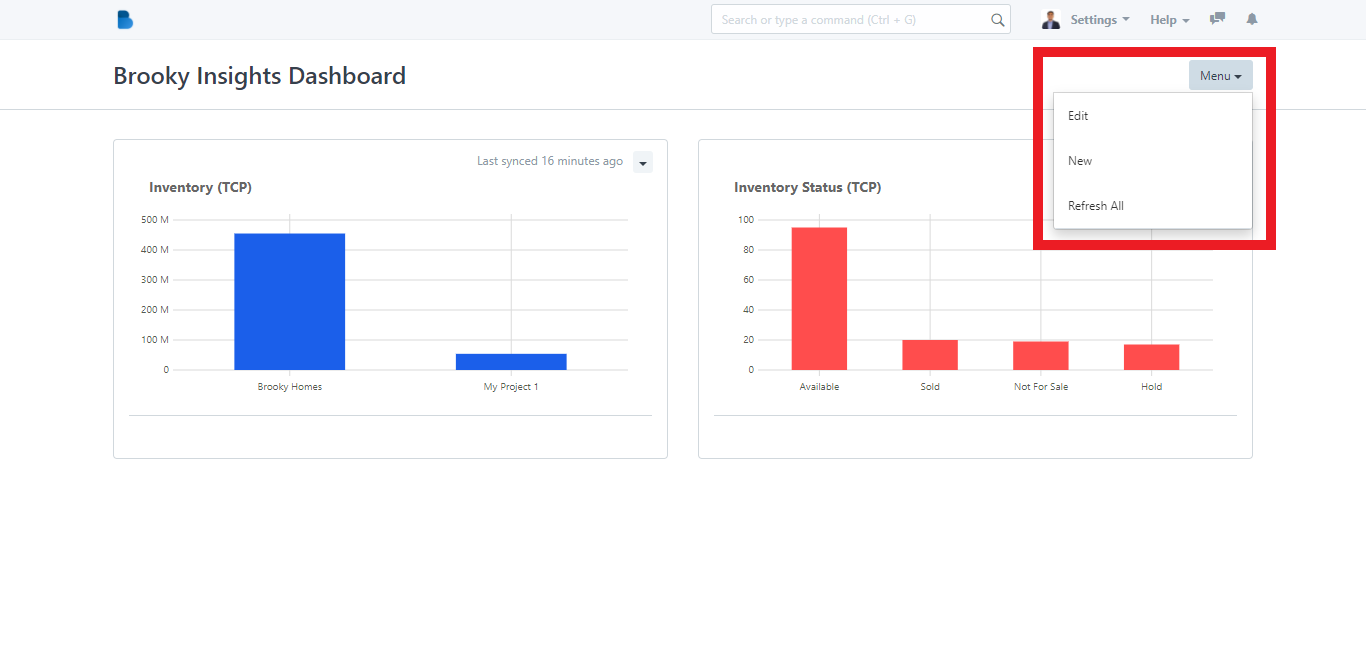
If you click Edit, it will let you edit the charts in the Dashboard.
If you click New, it will let you create a new Dashboard.