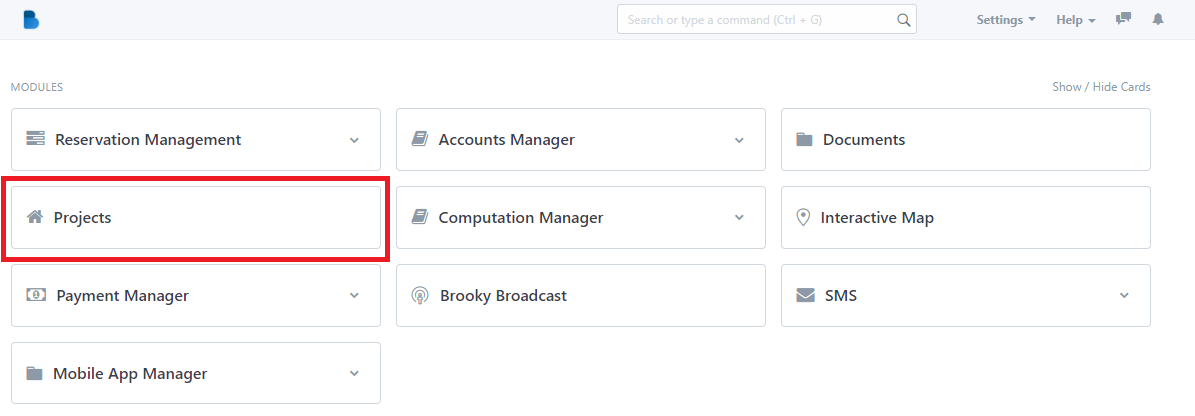
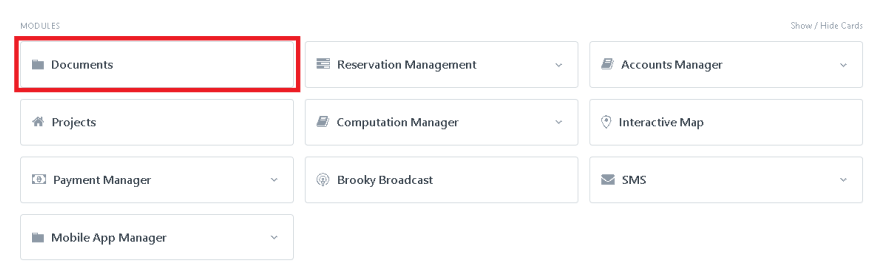
(MODULES) Projects, Reservation Management, Documents, & Interactive Map
Projects
How to Create Projects
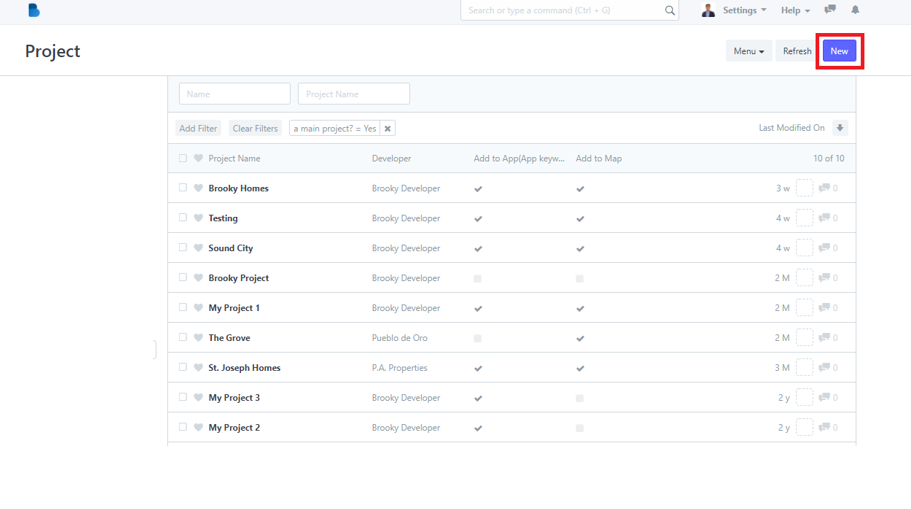
- On Brooky Administrator View click "Projects".

2. Click the ‘New' button to create a project.
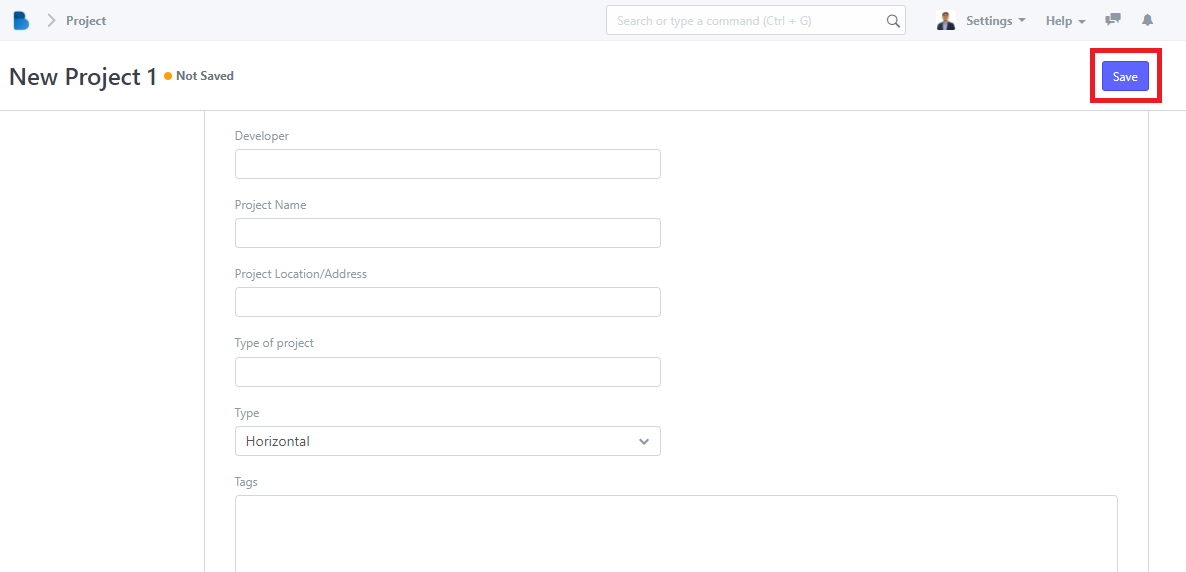
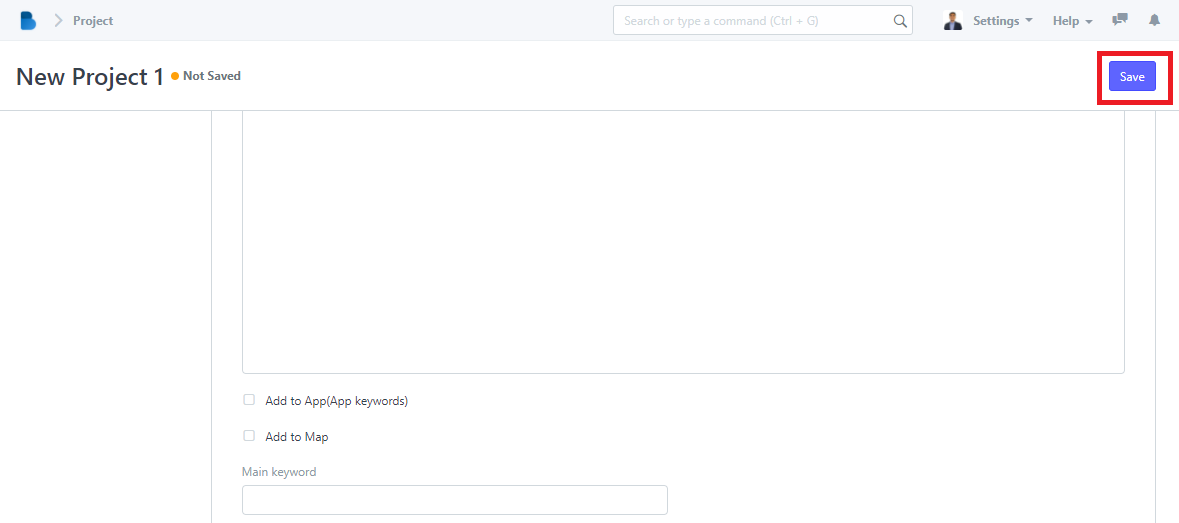
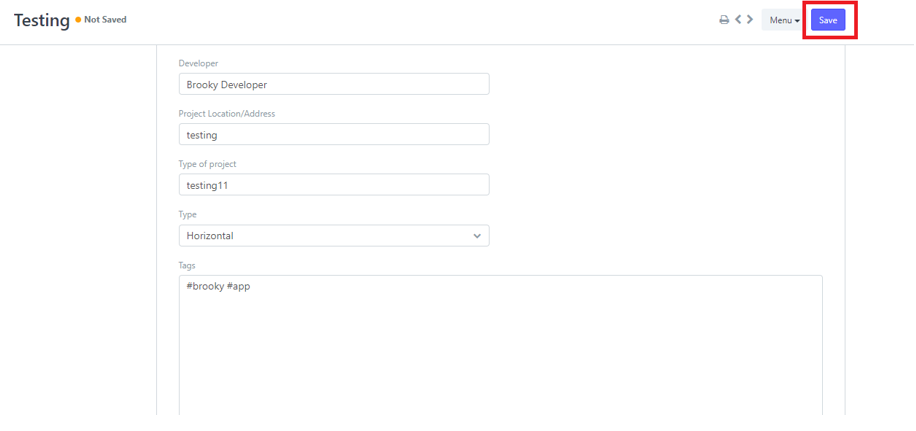
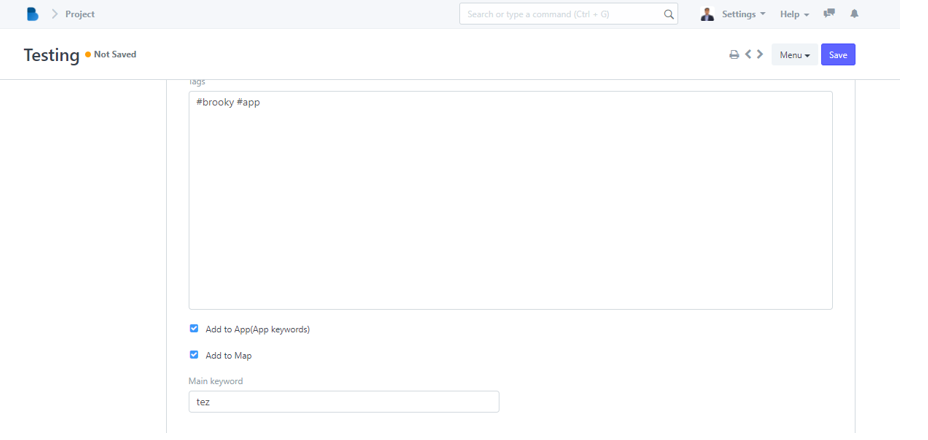
3. To create a projects fill up necessary information and click 'Save'. You can also check the Add to App(App keywords) so the project you made will appear in the mobile app and also you can check the Add to Map if you want this project appear on the Map.
How to View and Edit Projects
- On Brooky Administrator View click "Projects".
2. Click the ‘Name' that you want to view/edit and it will redirect you to view/edit page of that specific data.
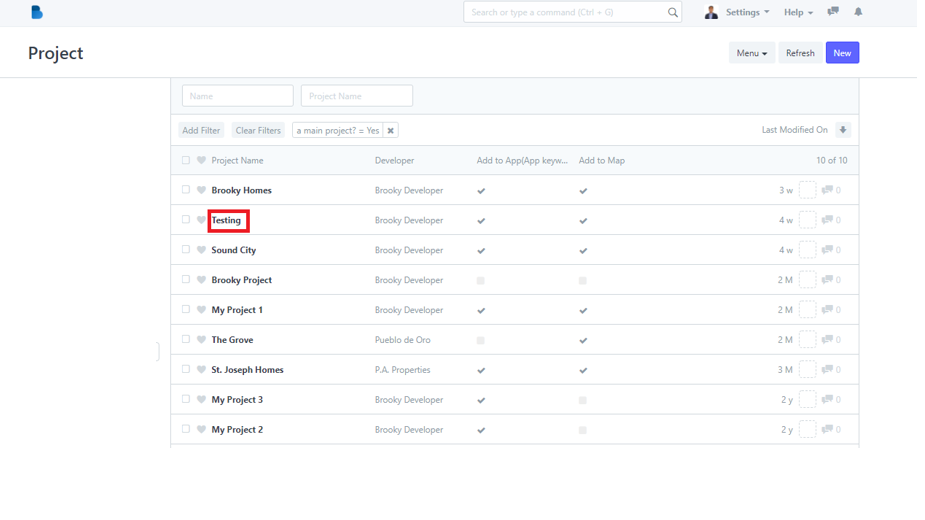
3. You can check, and edit data of the projects you selected. If you had any changes/updates click 'Save'.
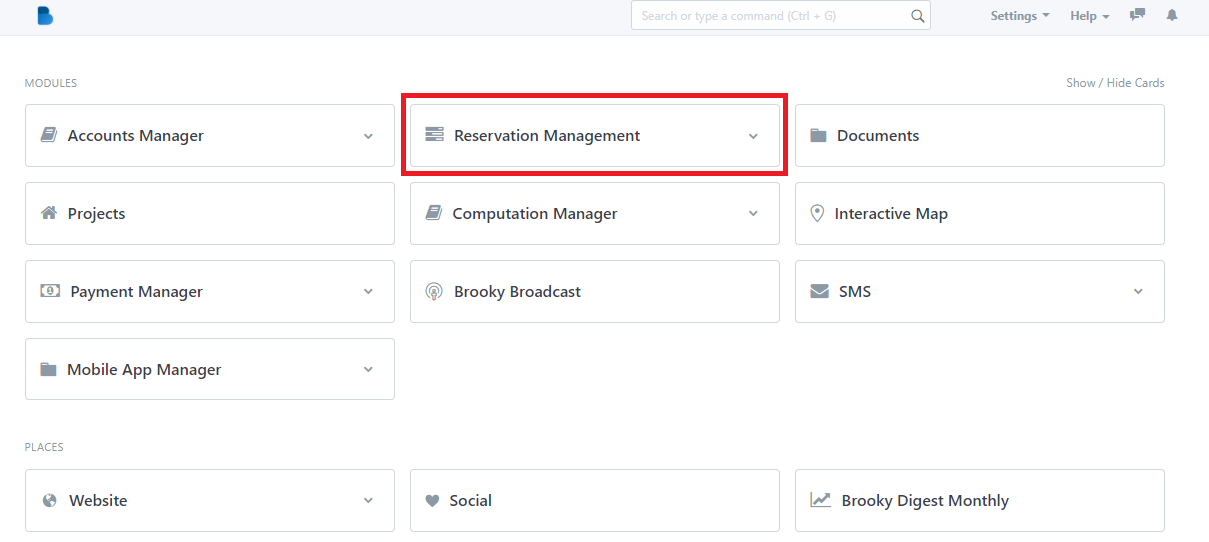
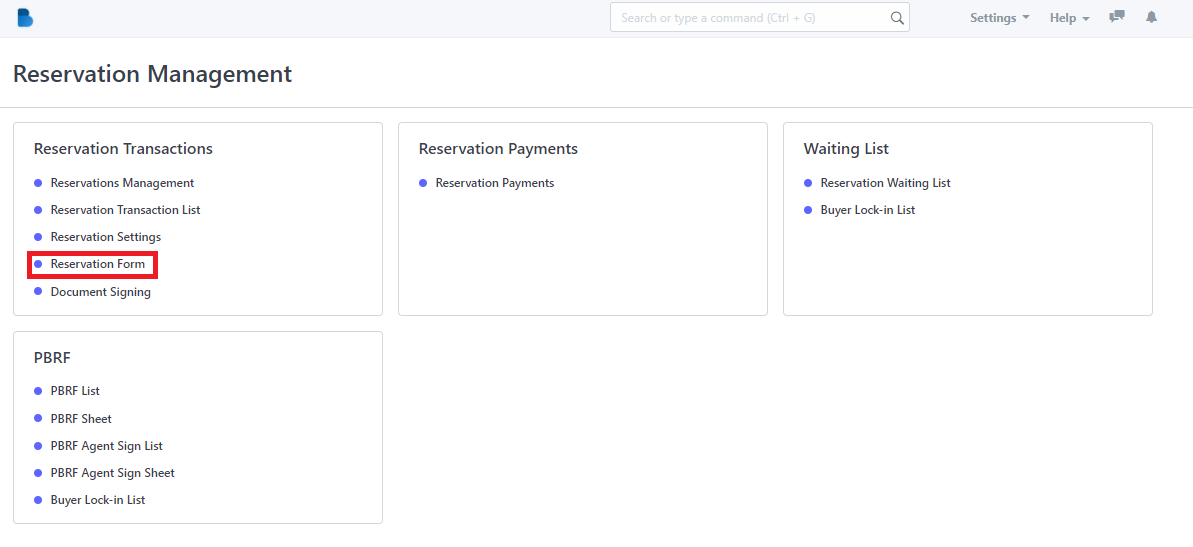
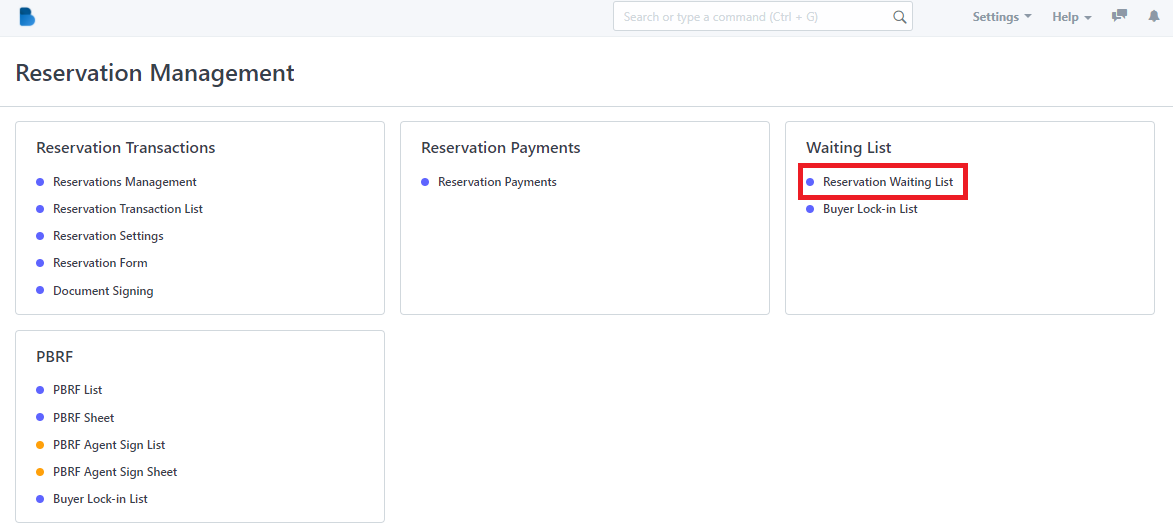
Reservation Management
How to create a reservation
- On Brooky Administrator View click "Reservation Managements".
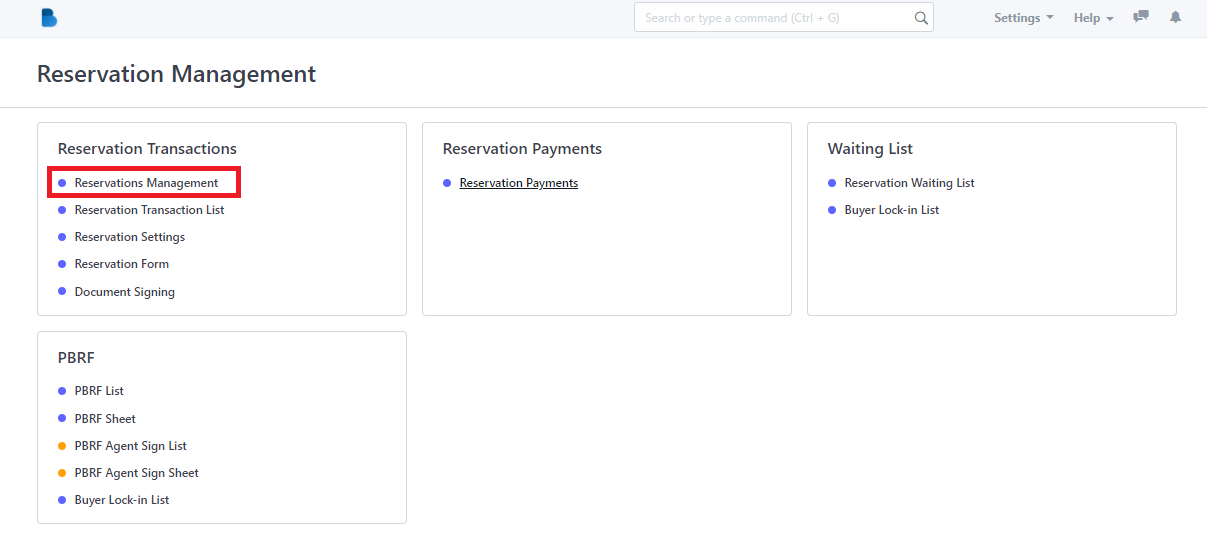
2. You will see Reservation Management features, We will first focus on Reservation Transactions ‘Click Reservations Management’.
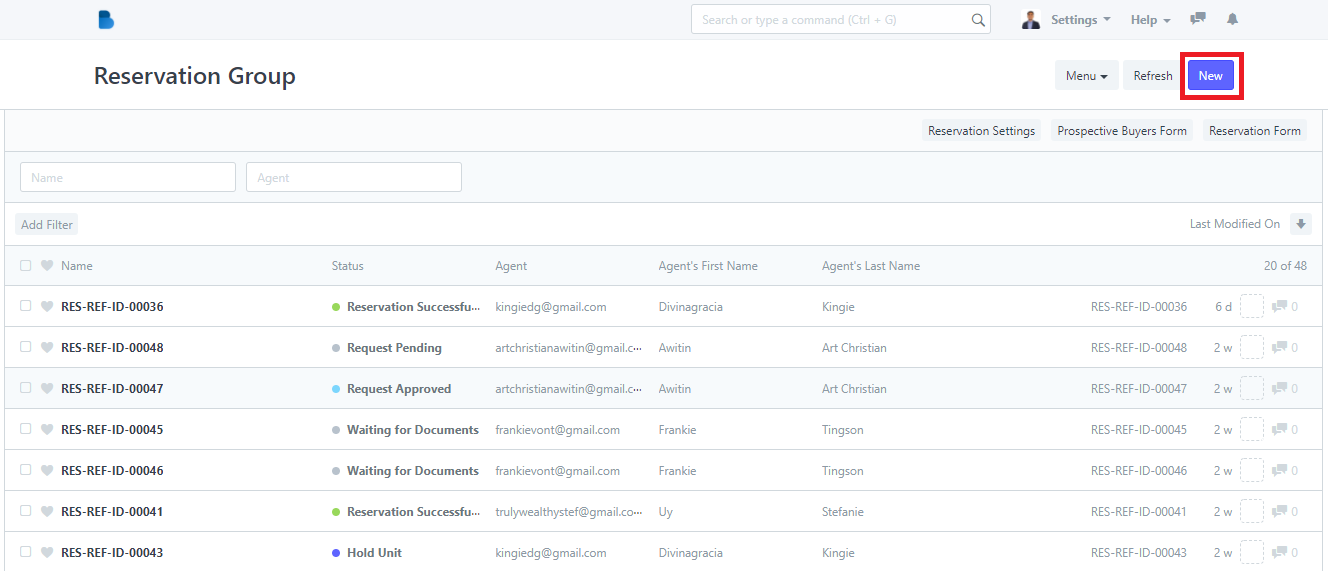
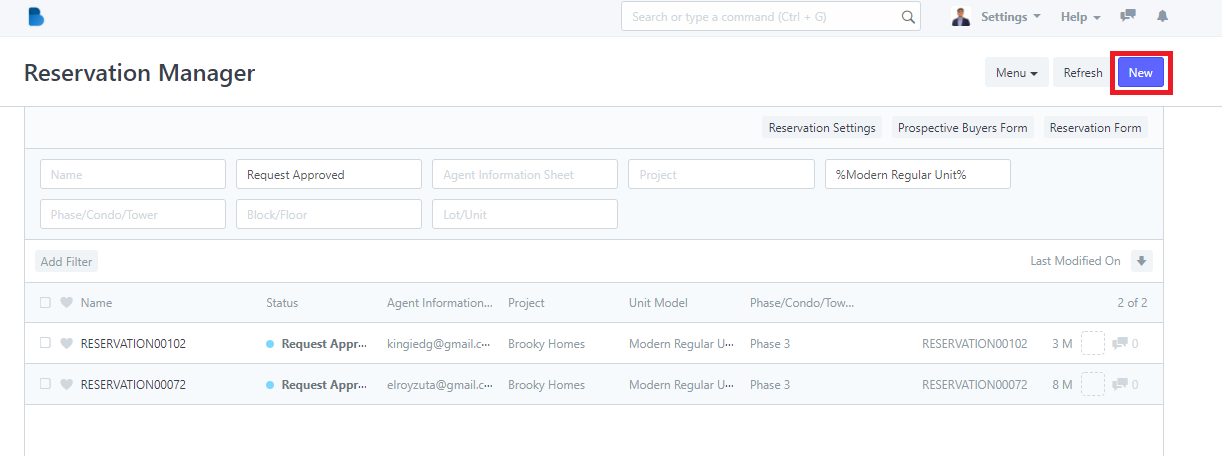
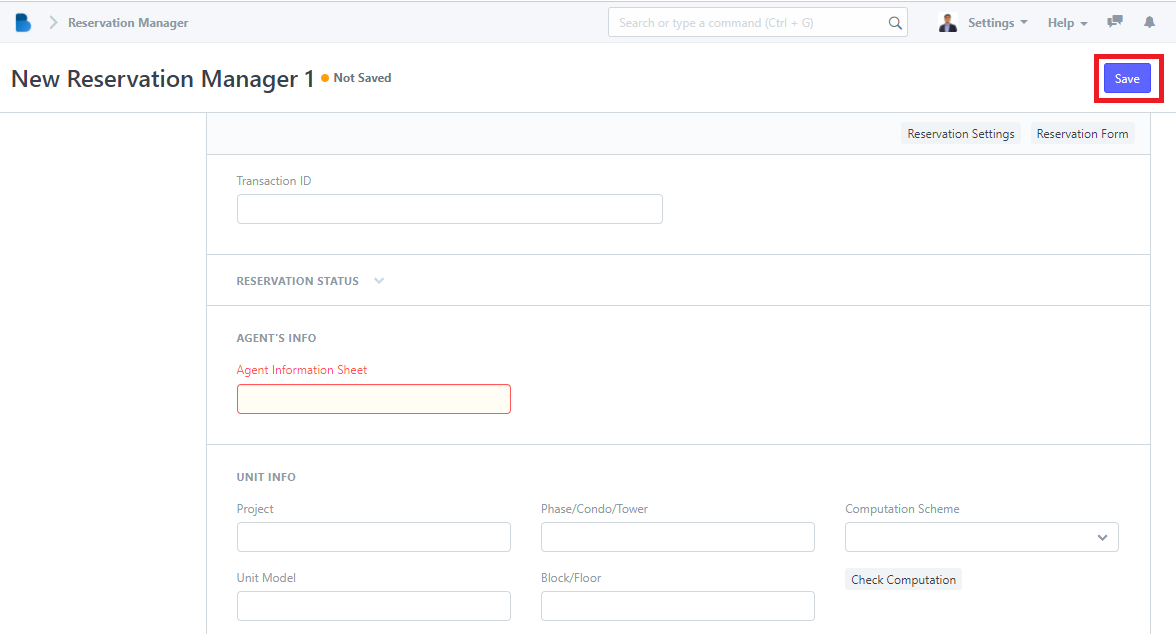
3. Click the ‘New' button to create a reservation’.
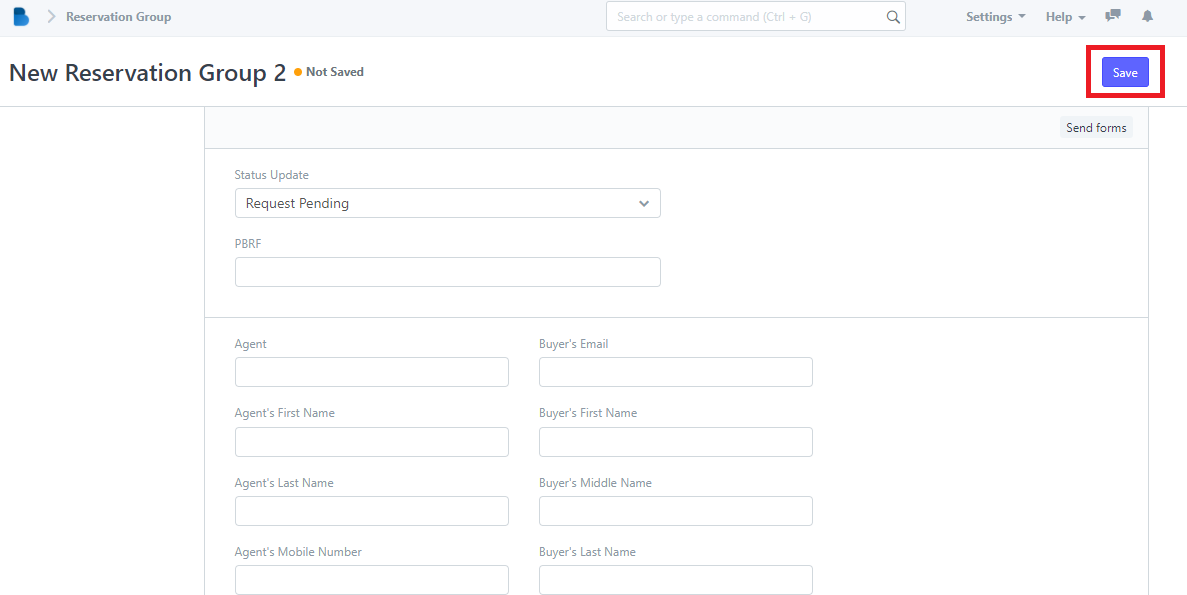
4. To create a reservation fill up necessary information and click 'Save'.
How to View and Edit Reservations Management
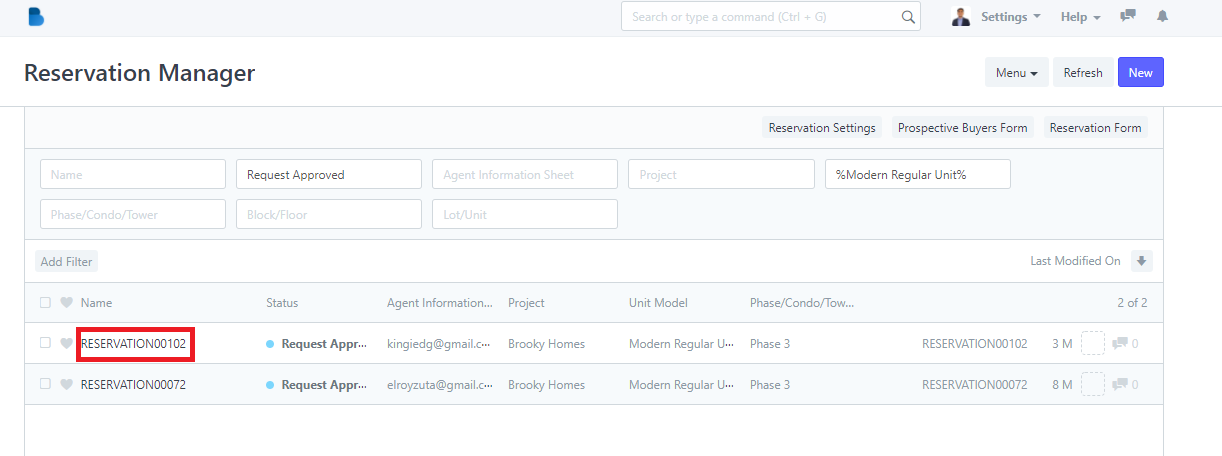
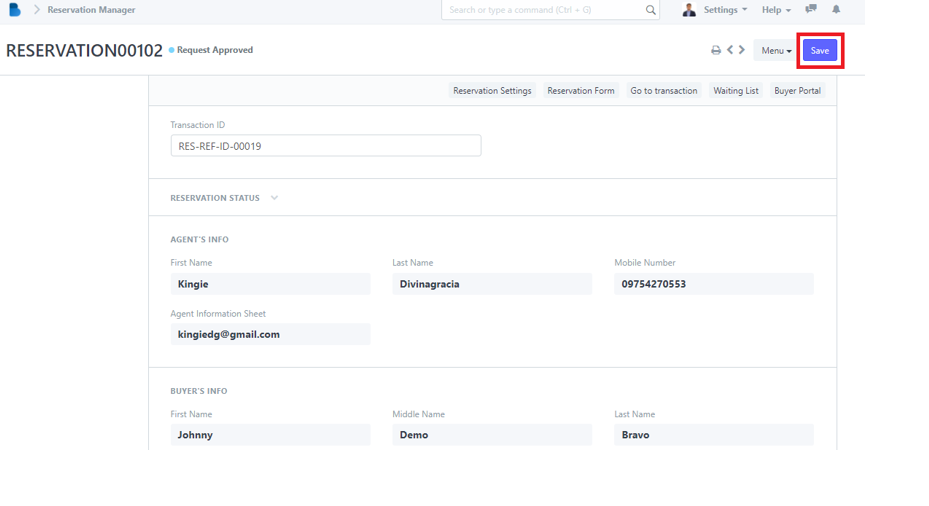
1. You will see Reservation Management features, We will first focus on Reservation Transactions ‘Click Reservations Management’.

2. Click the ‘Name' that you want to view/edit and it will redirect you to view/edit page of that specific data.
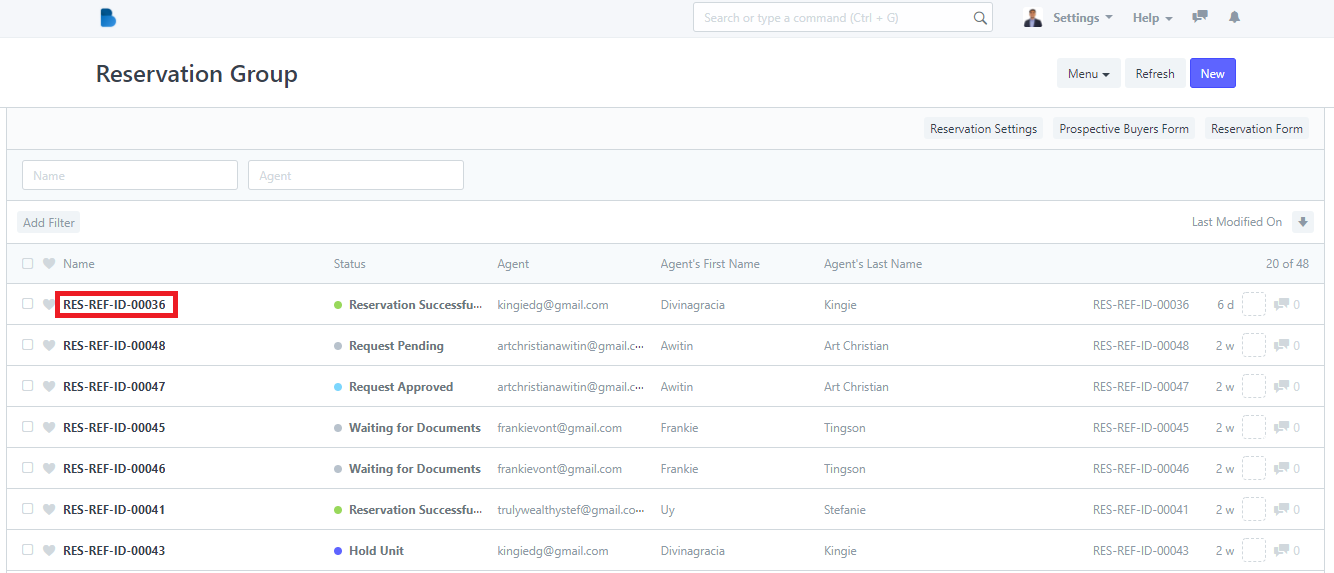
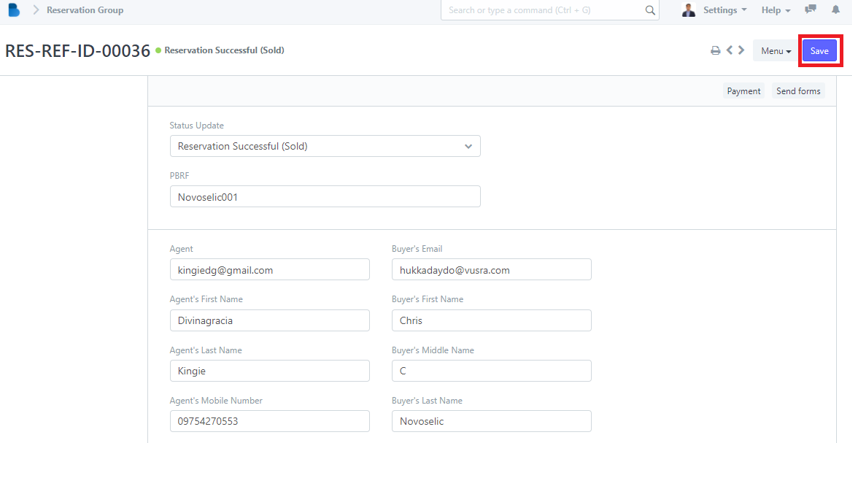
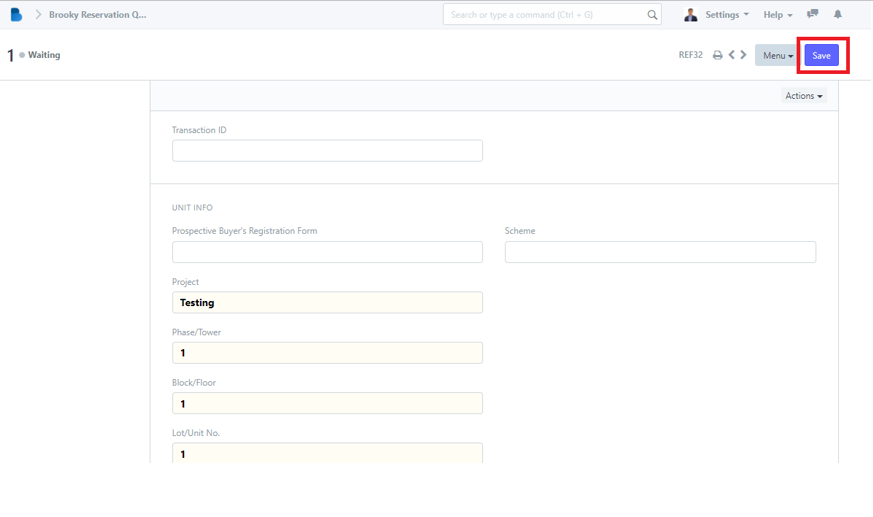
3. You can check, edit data, and edit status of the person who had a reservation. If you had any changes/updates click 'Save'.
How to Create a Transaction List
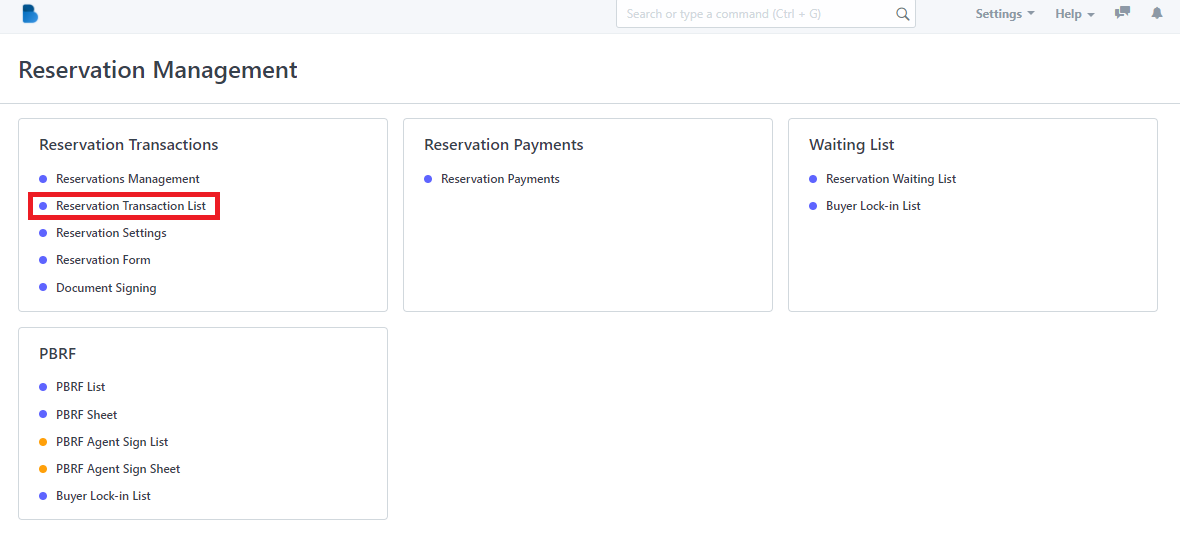
- In the Reservation Management Module under Reservation Transactions Click 'Reservation Transaction List'.
2. Click the ‘New' button to create a Reservation Transaction List’.
3. To create a reservation transaction fill up necessary information and click 'Save'.
How to View and Edit Transaction List
- In the Reservation Management Module under Reservation Transactions Click 'Reservation Transaction List'.

2. Click the ‘Name' that you want to view/edit and it will redirect you to view/edit page of that specific data.
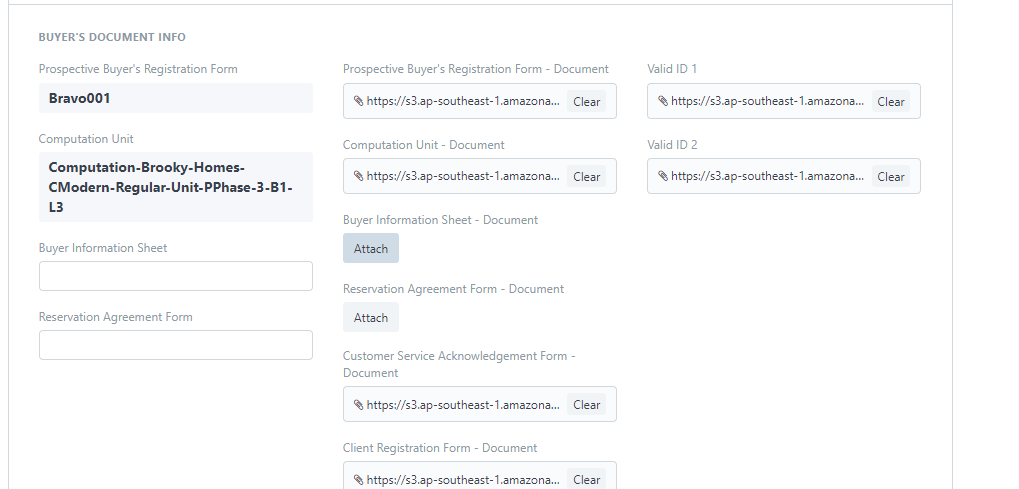
3. You can check, attach, edit data, and edit status of the person who had a reservation. If you had any changes/updates click 'Save'.
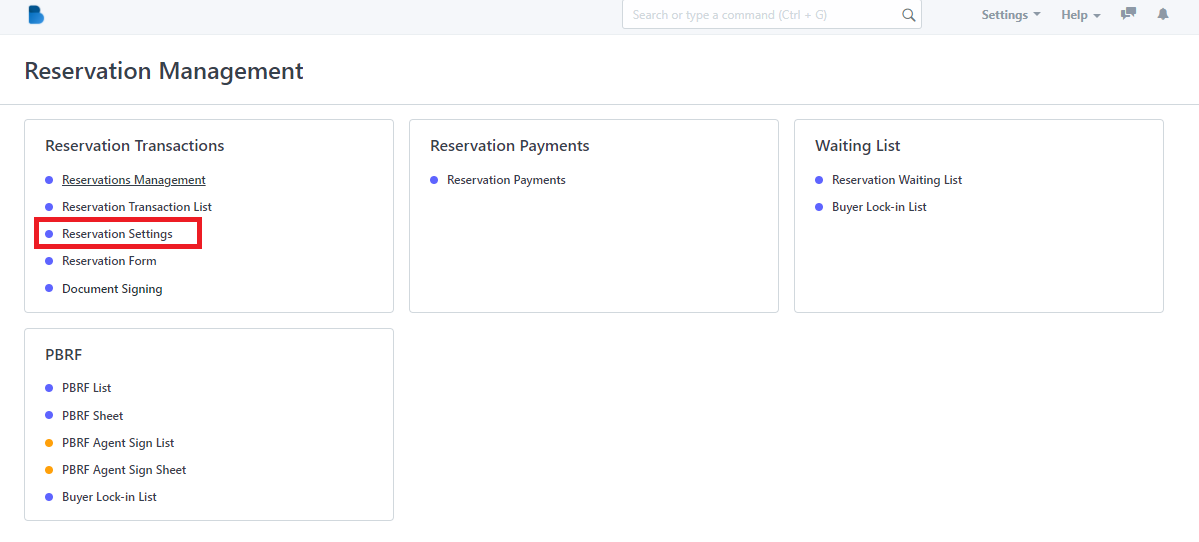
How to Use Reservation Settings
- In the Reservation Management Module under Reservation Transactions Click 'Reservation Settings'.
2. You can adjust the settings for reservation such as this highlighted ones.
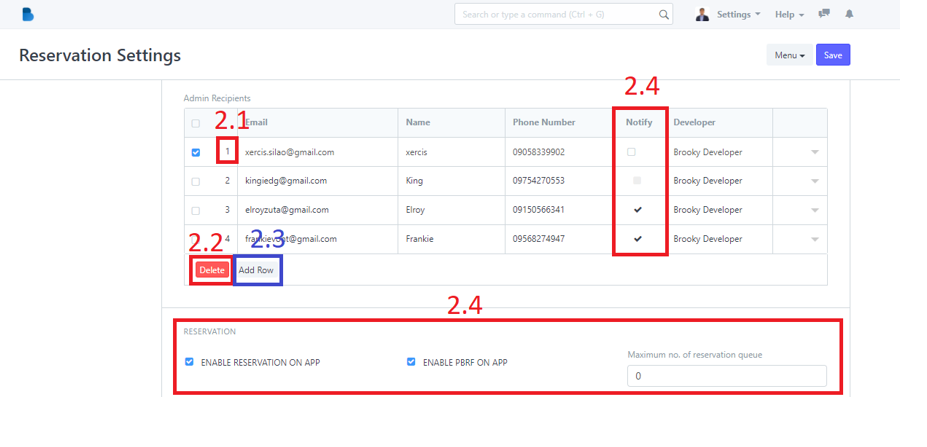
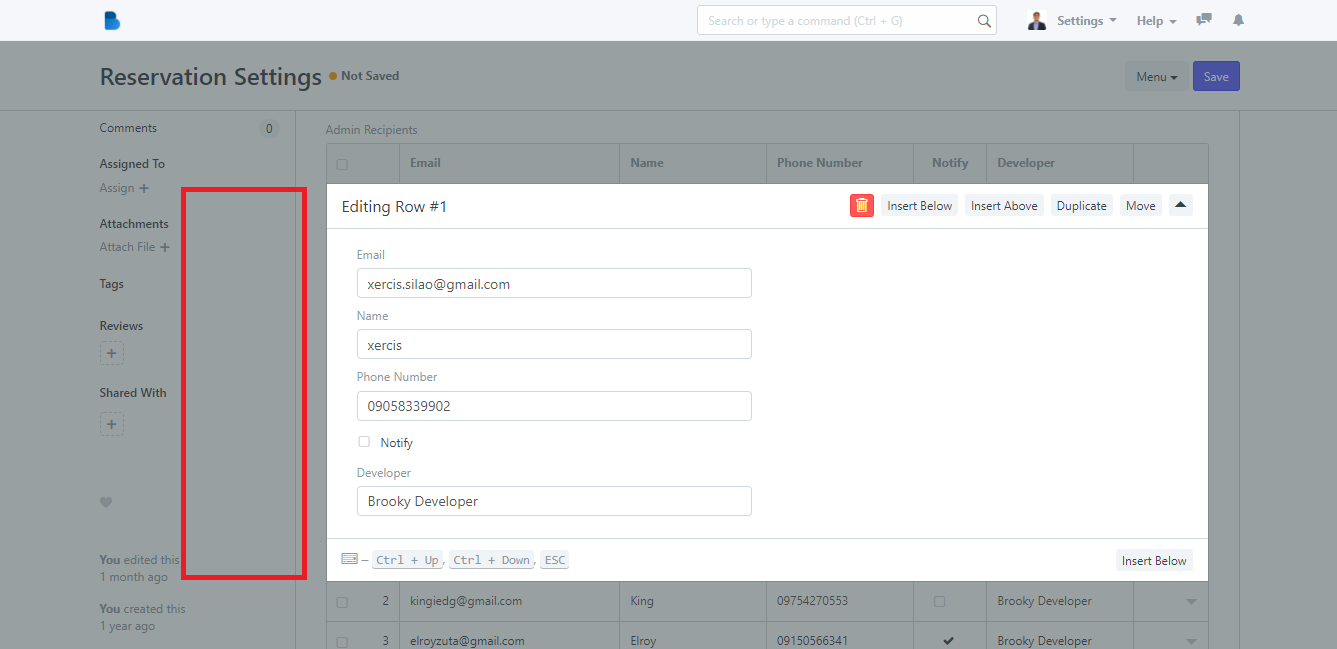
2.1 When you clicked the 2.1 highlight your redirected to Editing row in which you can edit the information of the rows and once your done. Click outside box just like the highlighted part. It will automatically save.
2.2 When you clicked the 2.2 highlight you will be able to delete the row or multiple rows depending on how much row you select. Remember to select a row first by tapping the 'checkbox' so the delete button will appear
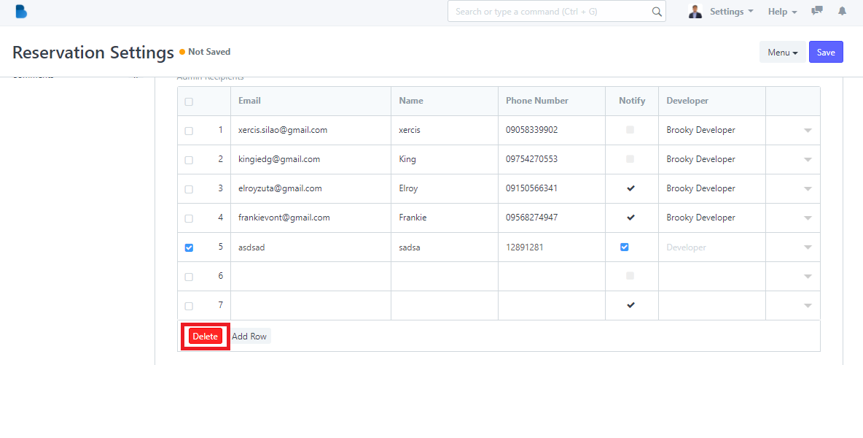
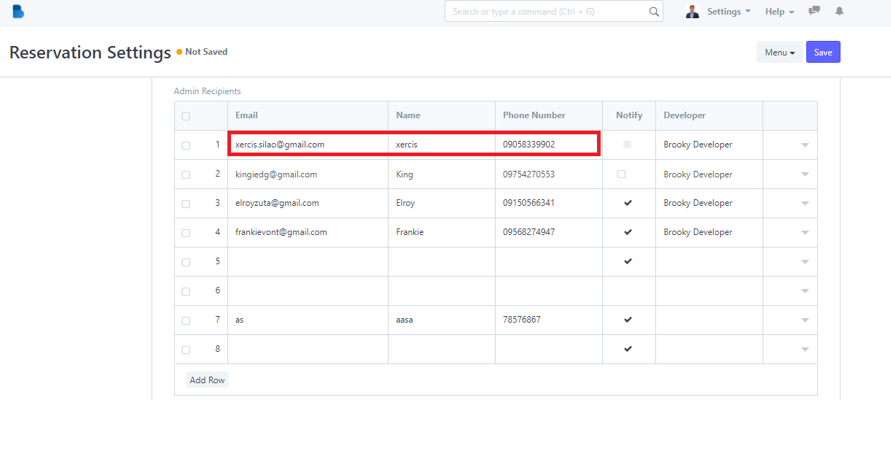
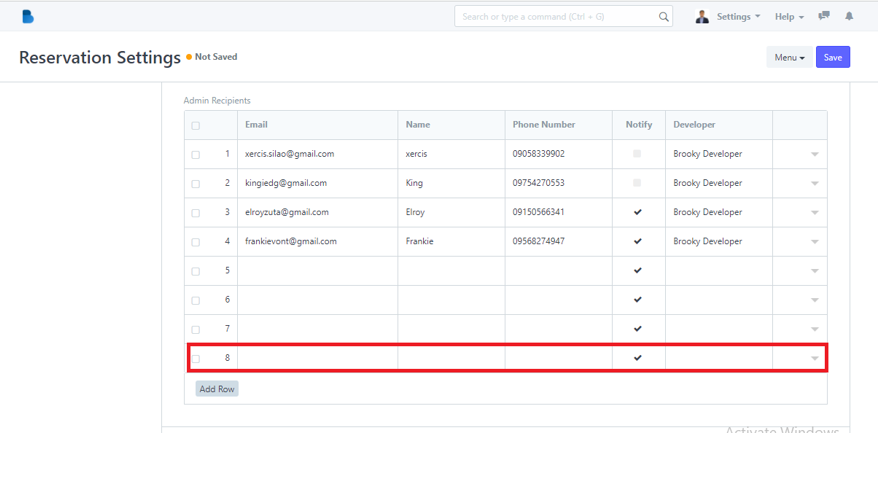
2.3 When you clicked the 2.3 highlight you you will be able to add a new row or multiple rows depending on how many times you click the 'Add Row'. As you can the picture in 2. only has 7 row now its 8 after I pressed the 'Add Row' button.
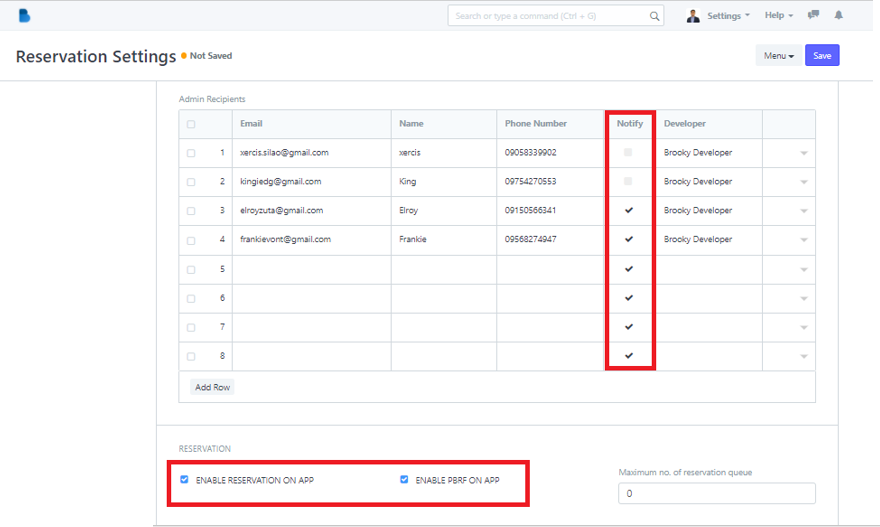
2.4 When you clicked the 2.4 highlight you you will be able to change the settings of the person whether you want him to get notified or you want to enable reservation or PBRF on the app.
3. You can also add rows below for Direct Payment Links and Block Users if you want to block a certain in email from creating a reservation.

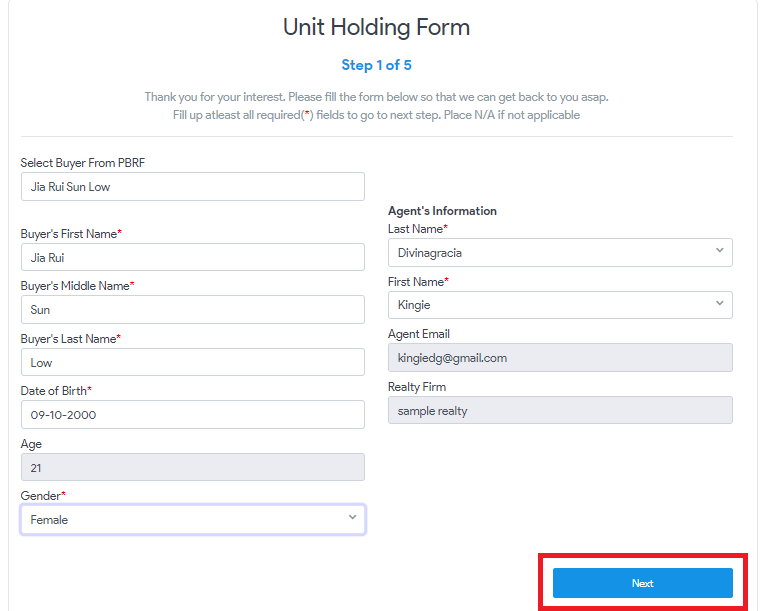
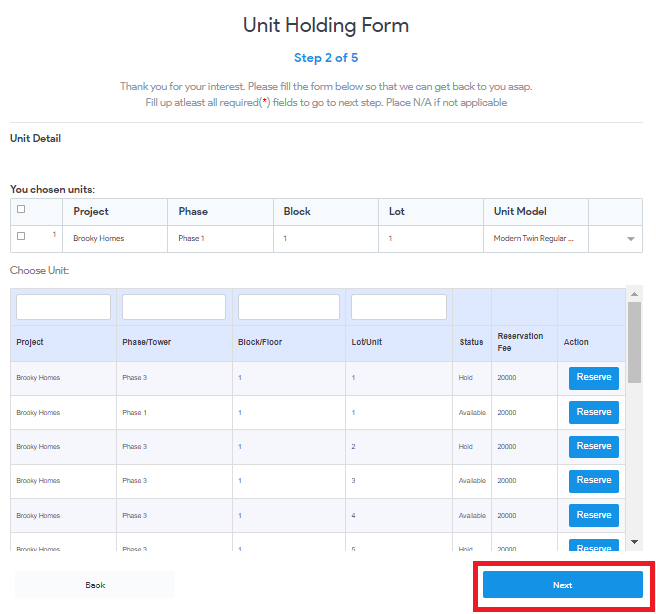
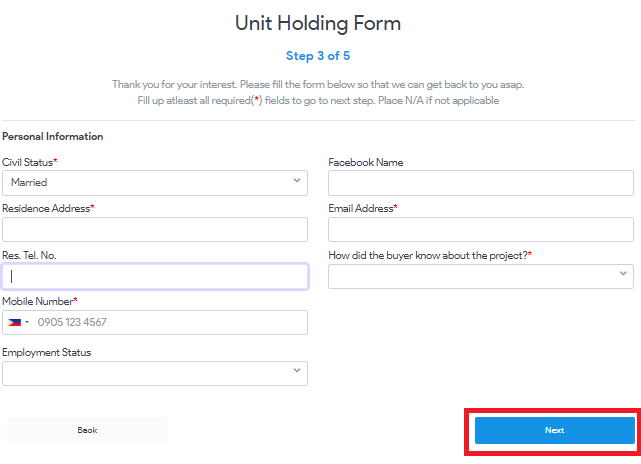
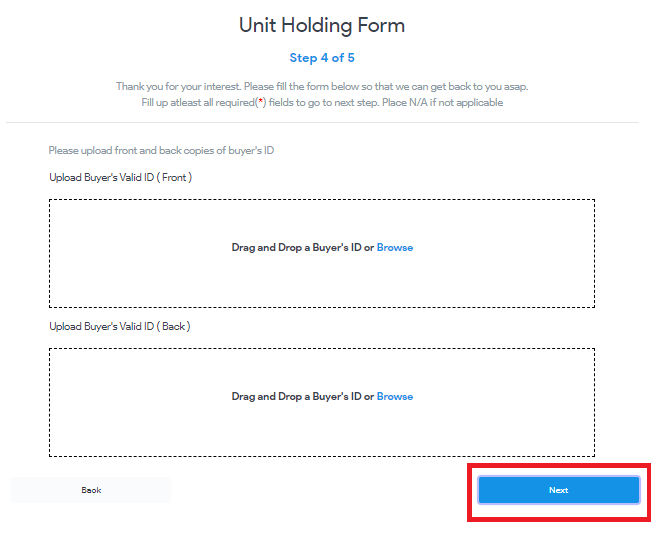
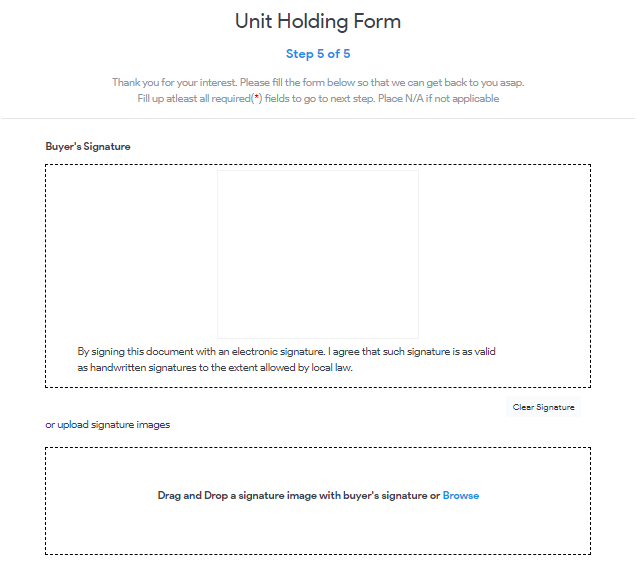
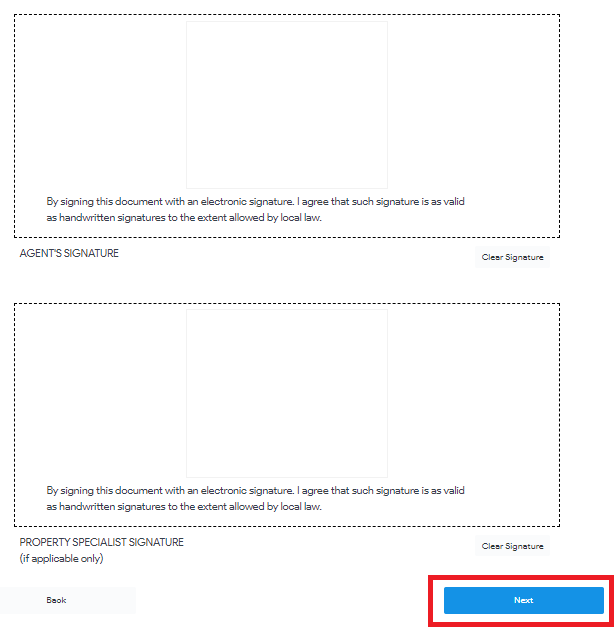
How to Create a Reservation Forms
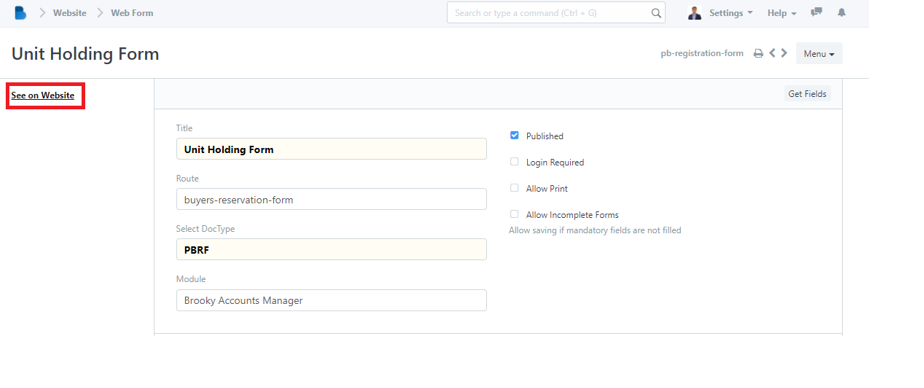
- In the Reservation Management Module under Reservation Transactions Click 'Reservation Form'.

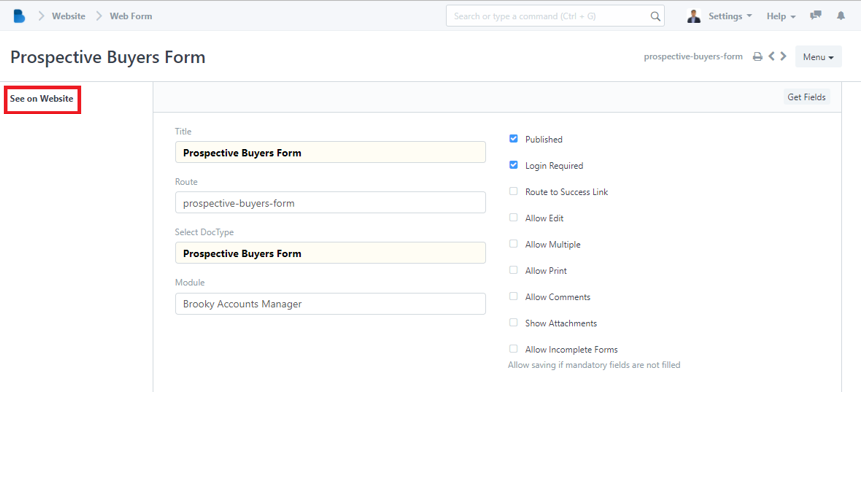
2. You can create a Reservation Form by clicking this highlight 'See on Website'.
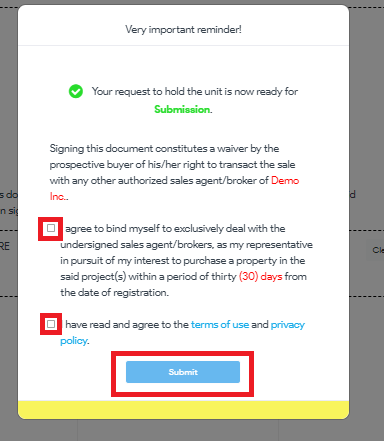
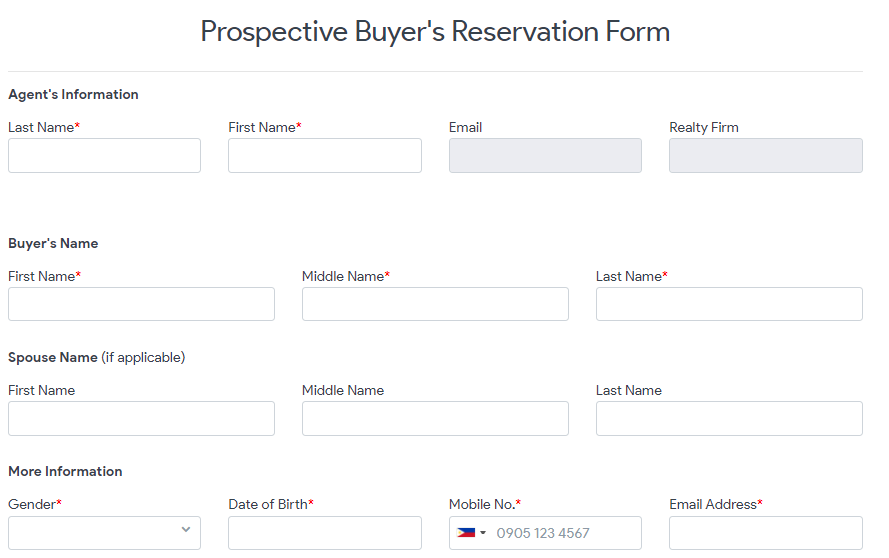
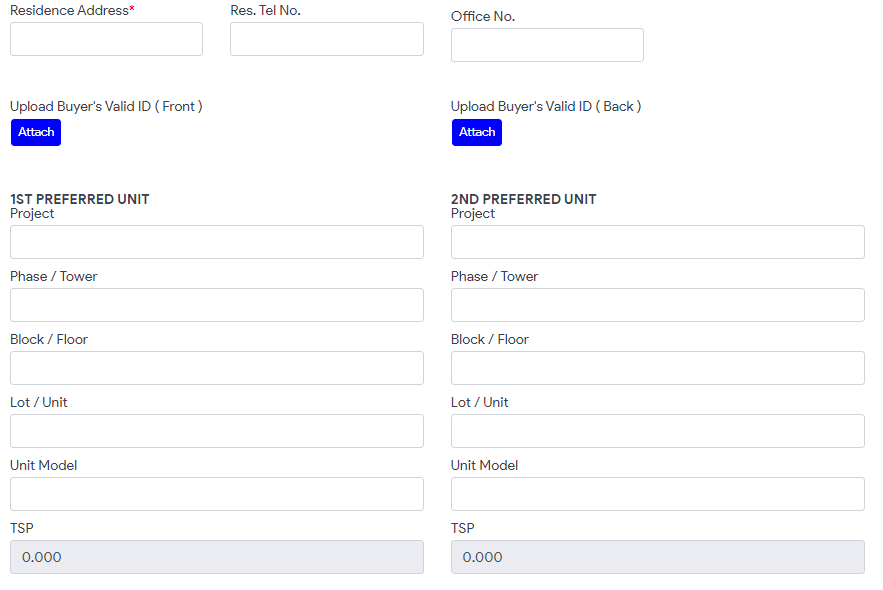
3. Fill up the information and attached necessary data and click 'Next' until you reached step 5 out of 5 and press 'Submit'.
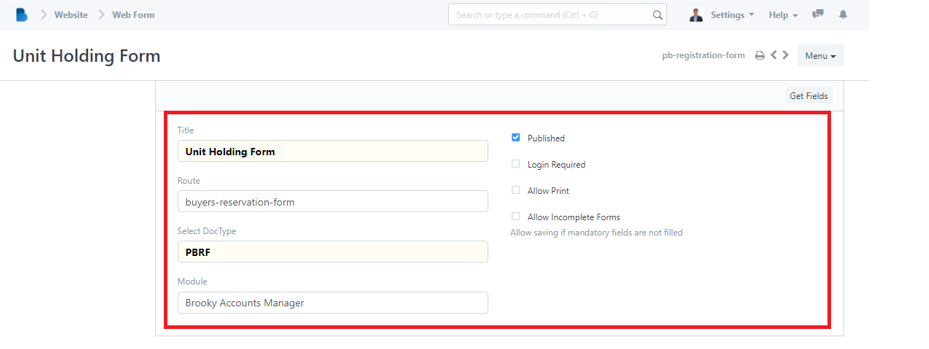
How to View, Edit, and change permission to Reservation Form Settings
- In the Reservation Management Module under Reservation Transactions Click 'Reservation Form'.
2. You can edit the Route and the Module of Reservation/Unit Holding Form. Also it allows the admin to enable/disable permission to published, login required, allow print, and allow incomplete forms.
How to Create a New Document Signing
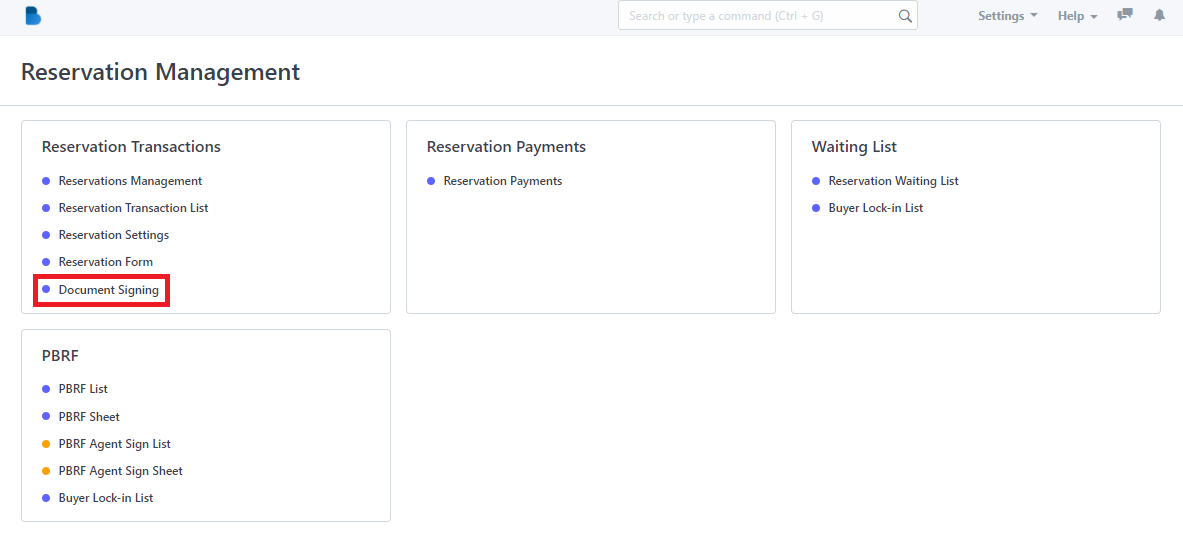
- In the Reservation Management Module under Reservation Transactions Click 'Document Signing'.

2. Click the ‘New' button to create a new Document Signing’.
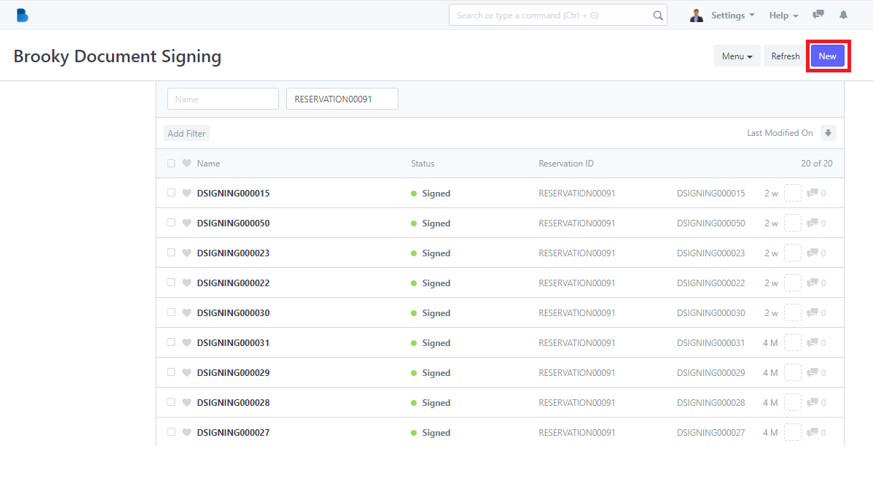
3. To create a document signing fill up necessary information and click 'Save'.
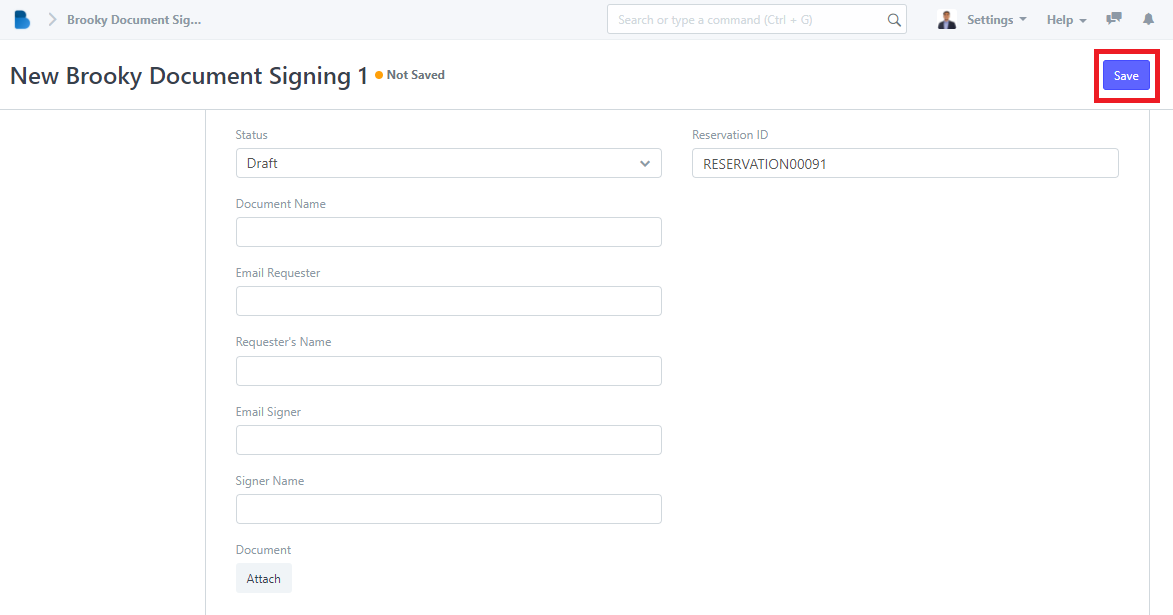
How to View and Edit Document Signing
- In the Reservation Management Module under Reservation Transactions Click 'Document Signing'.
2. Click the ‘Name' that you want to view/edit and it will redirect you to view/edit page of that specific data.
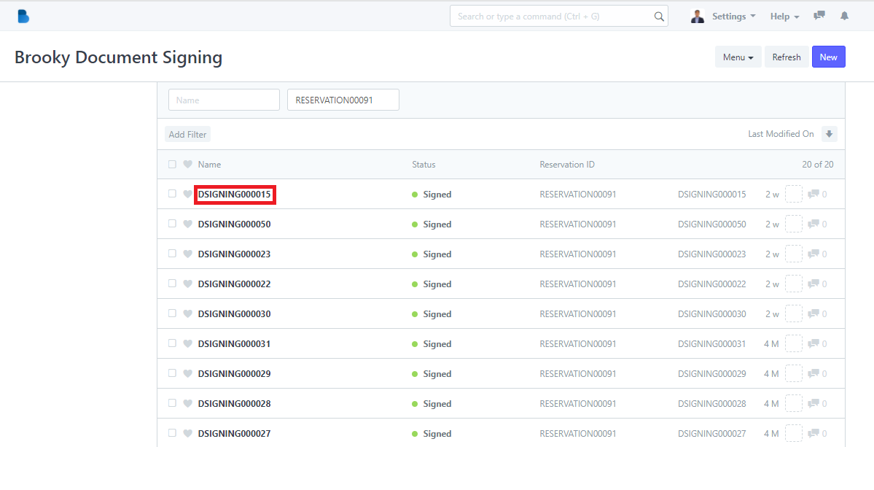
3. You can check, edit data, and edit status of the person. If you had any changes/updates click 'Save'.
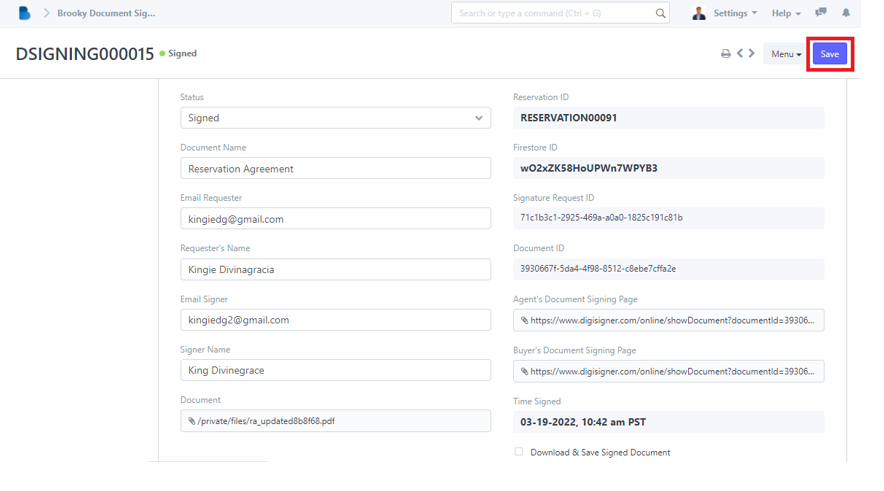
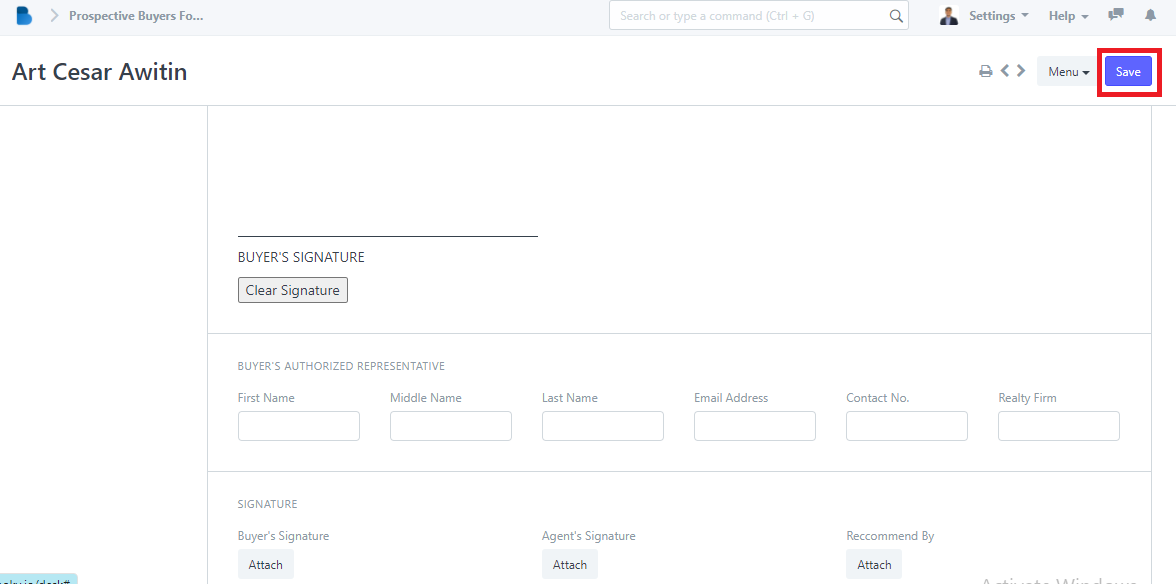
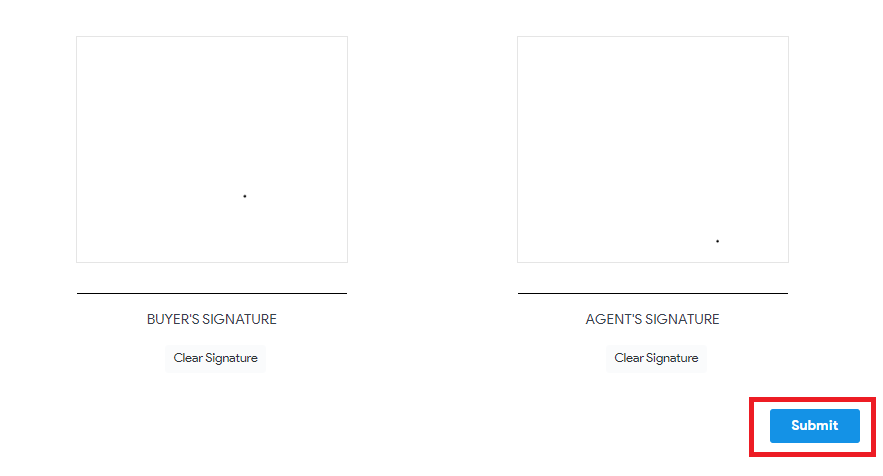
4. At the bottom when selecting and viewing a document signed. You'll be able to see if the buyers and agent signed already their documents and if any changes occurs you can change their status to either 'Signed', 'Waiting to Sign', or 'Draft'.

How to Create a Reservation Payments
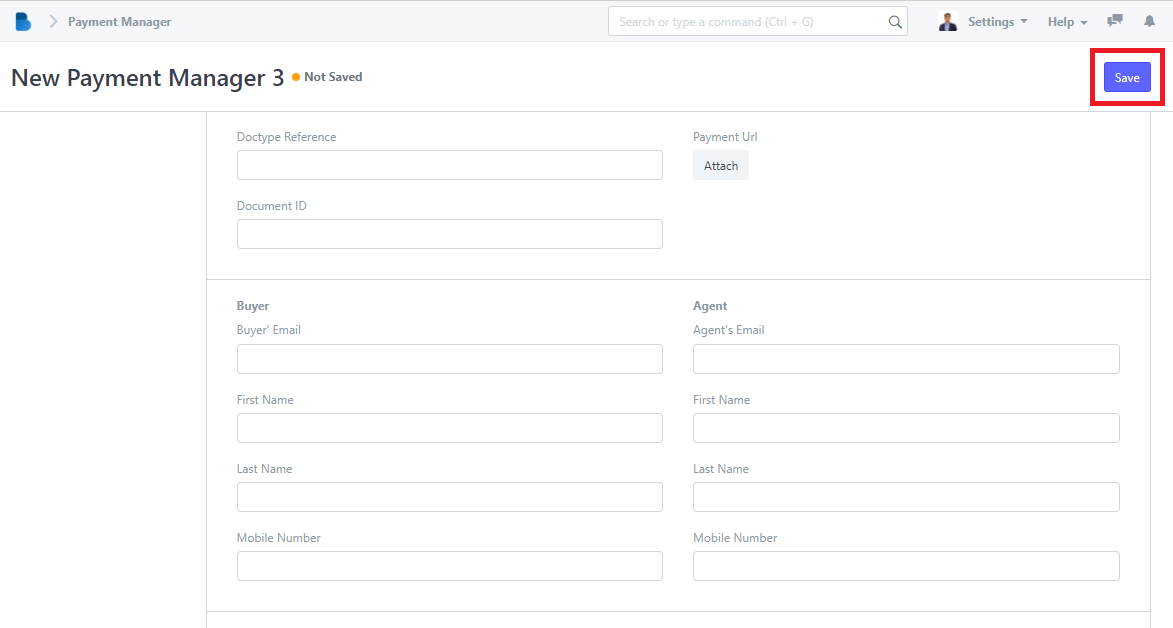
- You will see Reservation Management features, We will first focus on Reservation Payments Click 'Reservations Payments’.

2. Click the ‘New' button to create a payment manager/transaction’.
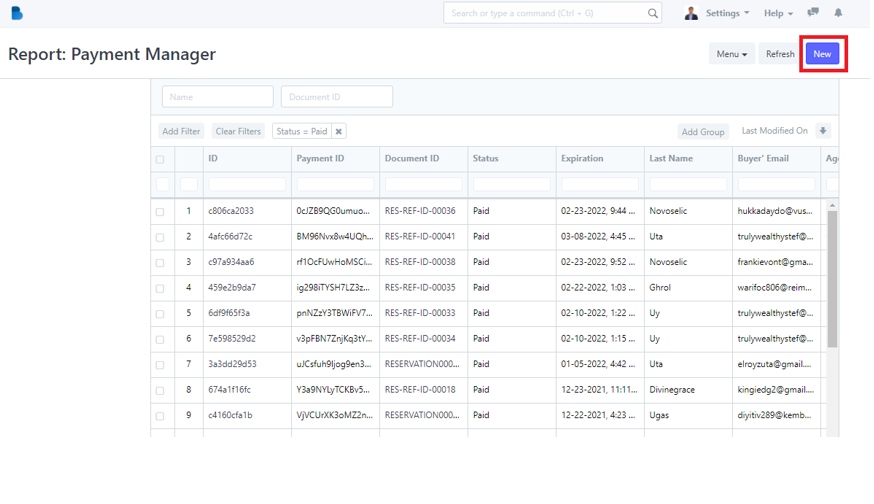
3. To create a payment manager/transaction fill up necessary information and click 'Save'.
How to Use Reservation Payments Menu
- You will see Reservation Management features, We will first focus on Reservation Payments Click 'Reservation Payments’.

2. This is the menu you can do a lot of things in here. It will be explained one by one below.
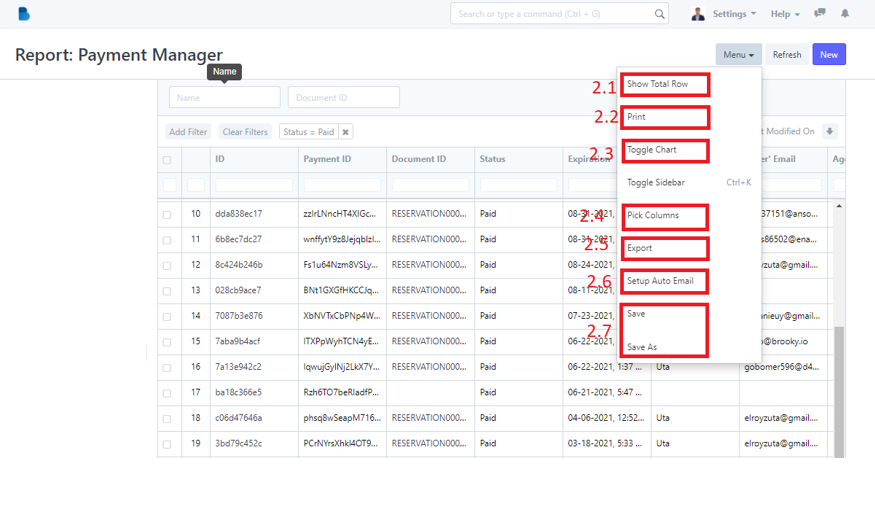
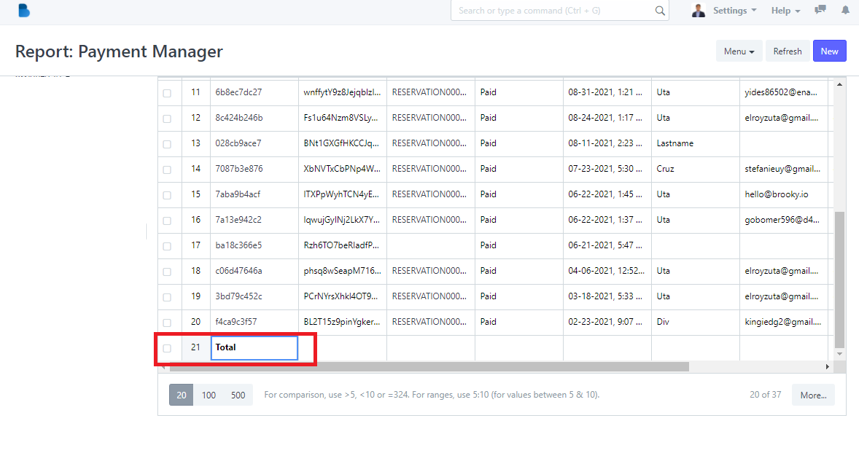
2.1 When you clicked the 2.1 highlight you will be able to see the 'total row'. In this case the total row is 21
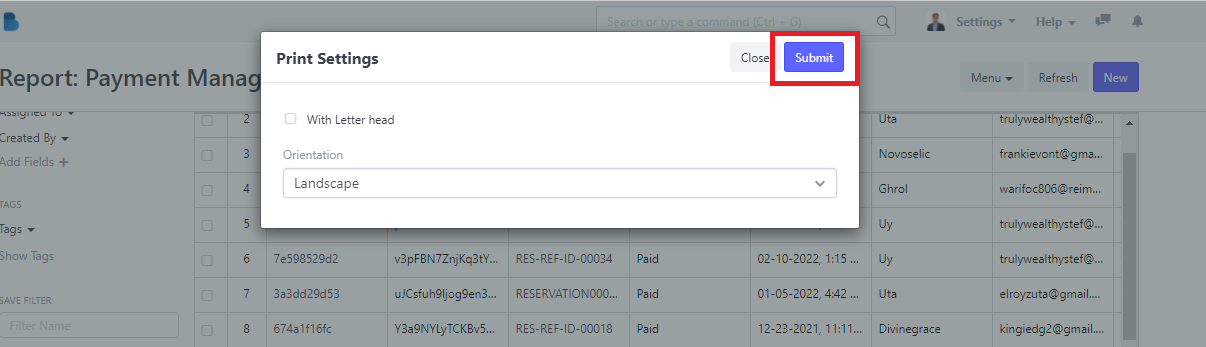
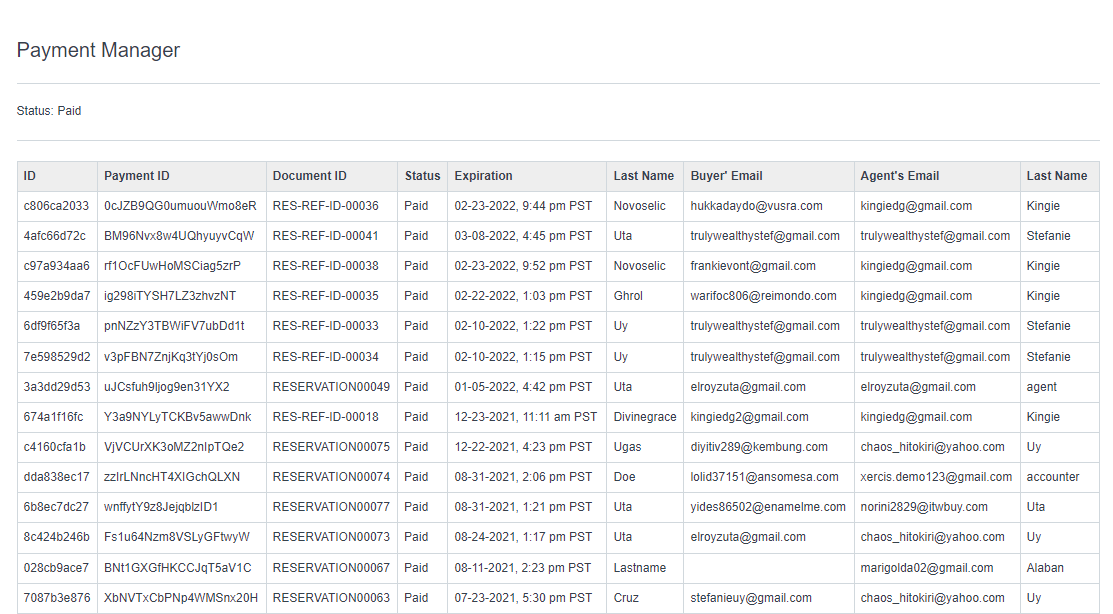
2.2 When you clicked the 2.2 highlight you will be able to able to print the data into pdf. You can also choose whether you wanna add a letter head or print it as landscape or portrait mode.
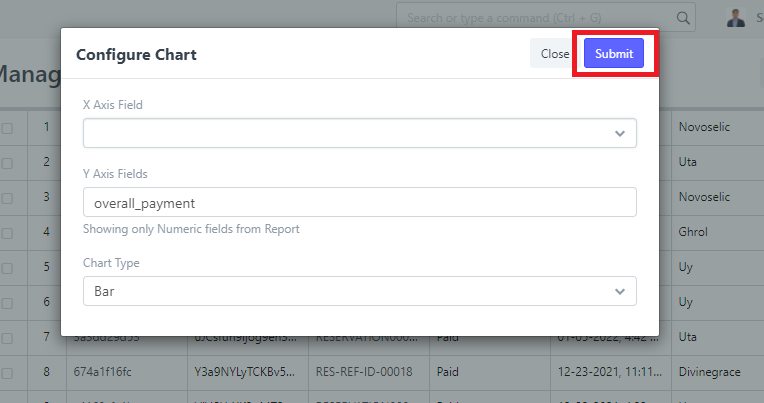
2.3 When you clicked the 2.3 highlight you will be able to turn the data into a chart. Once you fill up the x and y field and press the 'Submit' button.
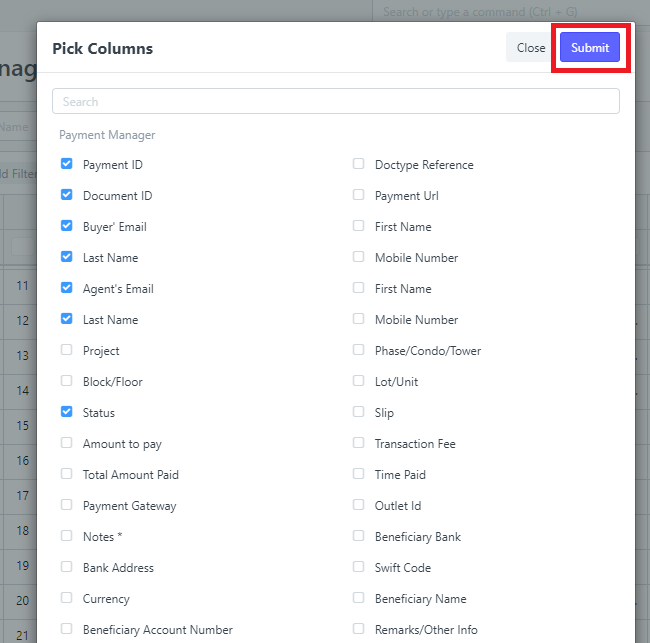
2.4 When you clicked the 2.4 highlight you will be able to choose which column you only want to appear in the data.
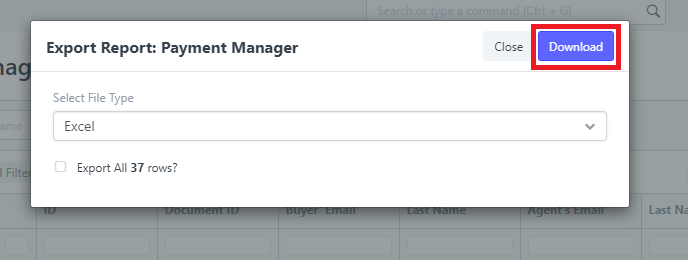
2.5 When you clicked the 2.5 highlight you will be able to export the data to either excel or csv.
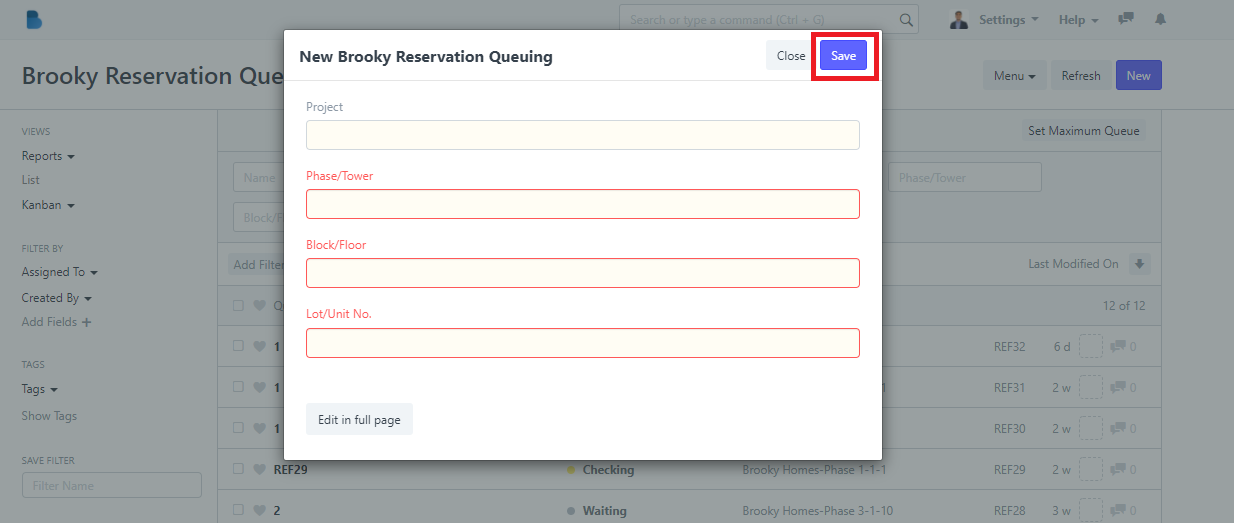
How to Create a Reservation Waiting List/Reservation Queuing
- You will see Reservation Management features, We will first focus on Waiting List Click 'Reservation Waiting List’.
2. Click the ‘New' button to create a reservation waiting list/queuing.
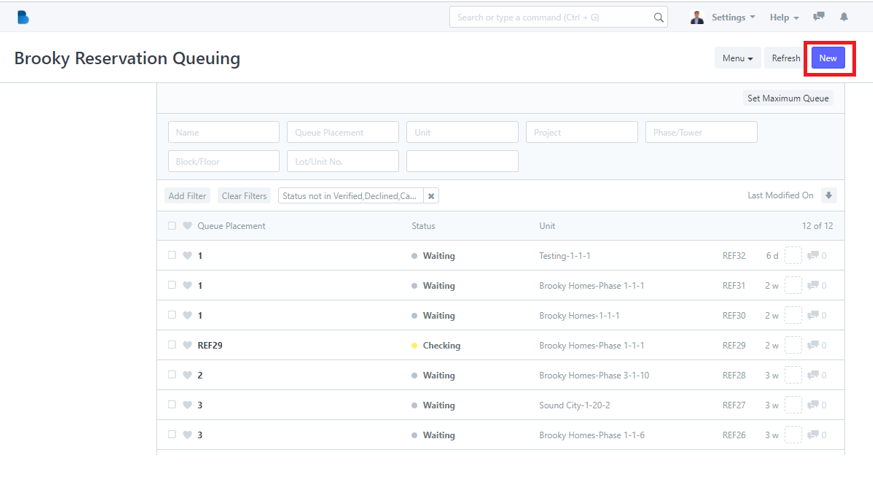
3. To create reservation waiting list/queuing fill up necessary information and click 'Save'.
How to View and Edit Reservation Waiting List/Reservation Queuing
- You will see Reservation Management features, We will first focus on Waiting List Click 'Reservation Waiting List’.

2.Click the ‘Queue Placement' that you want to view/edit and it will redirect you to view/edit page of that specific data.
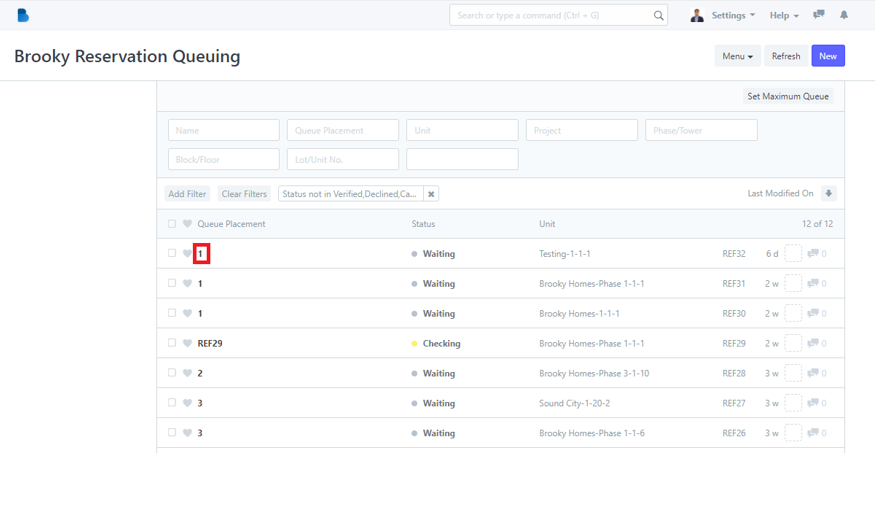
3. You can check, and edit data of the person who had a reservation waiting list/queuing. If you had any changes/updates click 'Save'.
How to Use Buyer Lock-in List
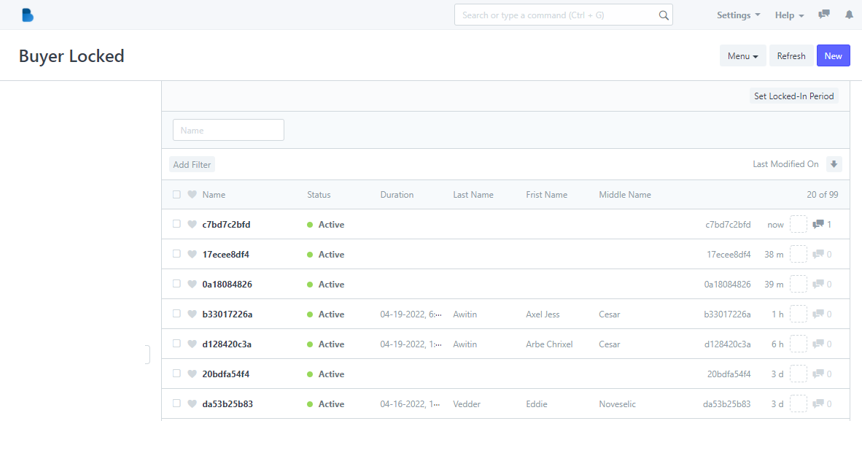
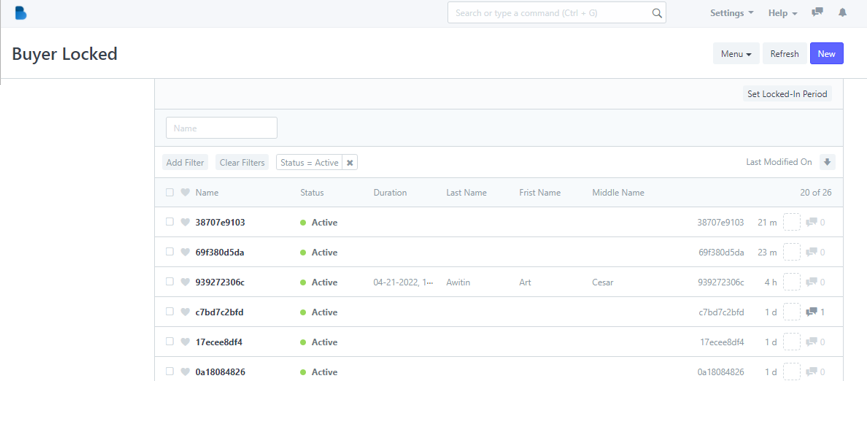
- In the Reservation Module under Waiting List Click 'Buyer Locked-in List'.
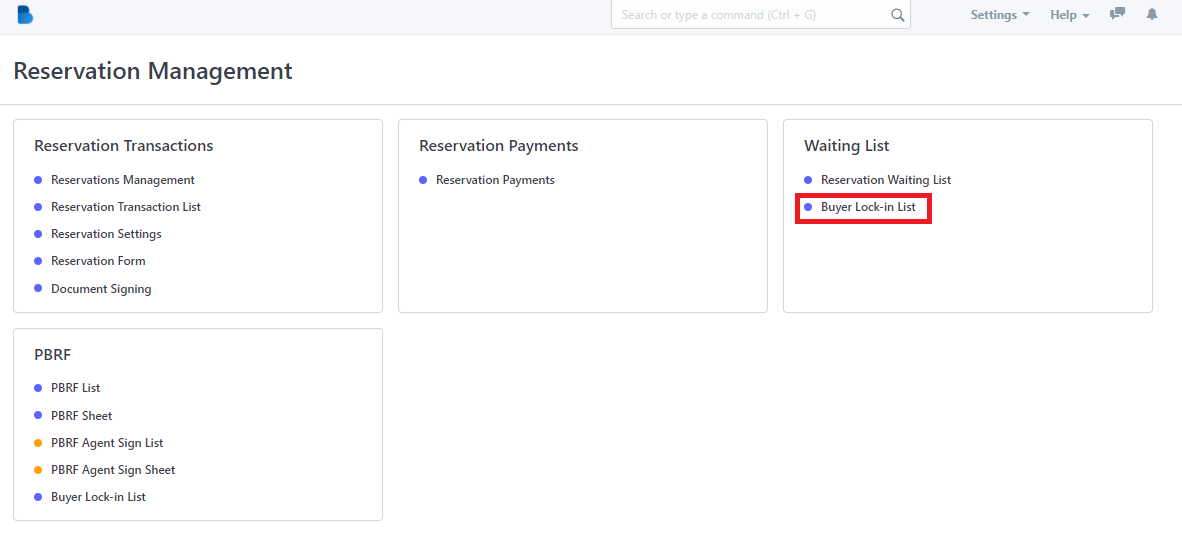
2. Admin can only check the details of the user's who made a reservation. Each user who has reservation is given 30days to complete the process if not. It will automatically cancel the reservation.
How to Create a PBRF List/Form
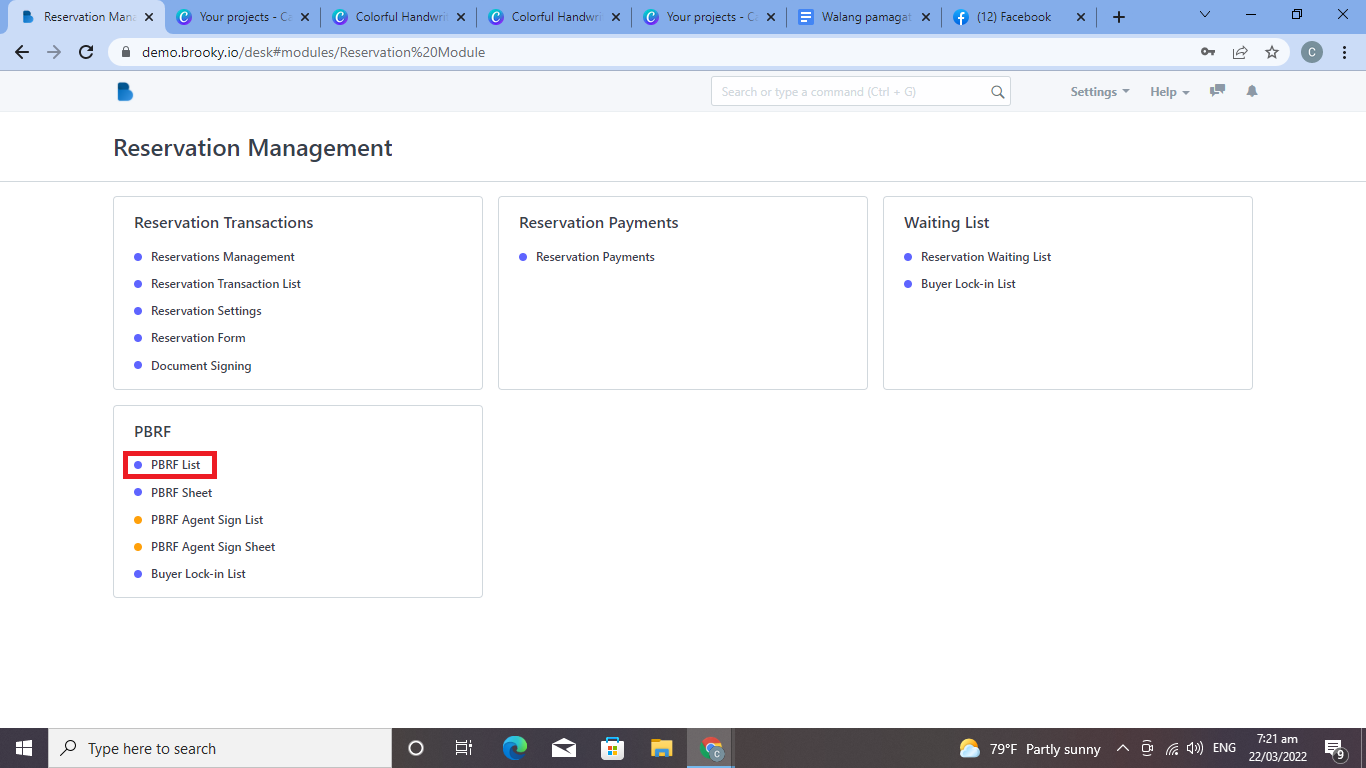
- You will see Reservation Management features, We will first focus on PBRF Click 'PBRF List’.
2. Click the ‘New' button to create a PBRF(Prospective Buyers Reservation List/Form).
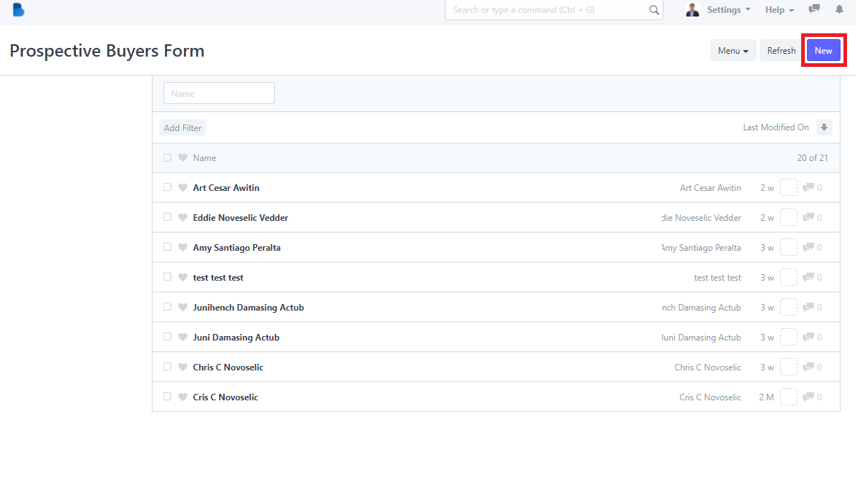
3. To create a PBRF(Prospective Buyers Reservation List/Form) fill up necessary information and click 'Save'.
How to View and Edit PBRF List/Form
- You will see Reservation Management features, We will first focus on PBRF Click 'PBRF List’.

2. You can check, attached, and edit data of the person who had a PBRF(Prospective Buyers Reservation List/Form). If you had any changes/updates click 'Save'.
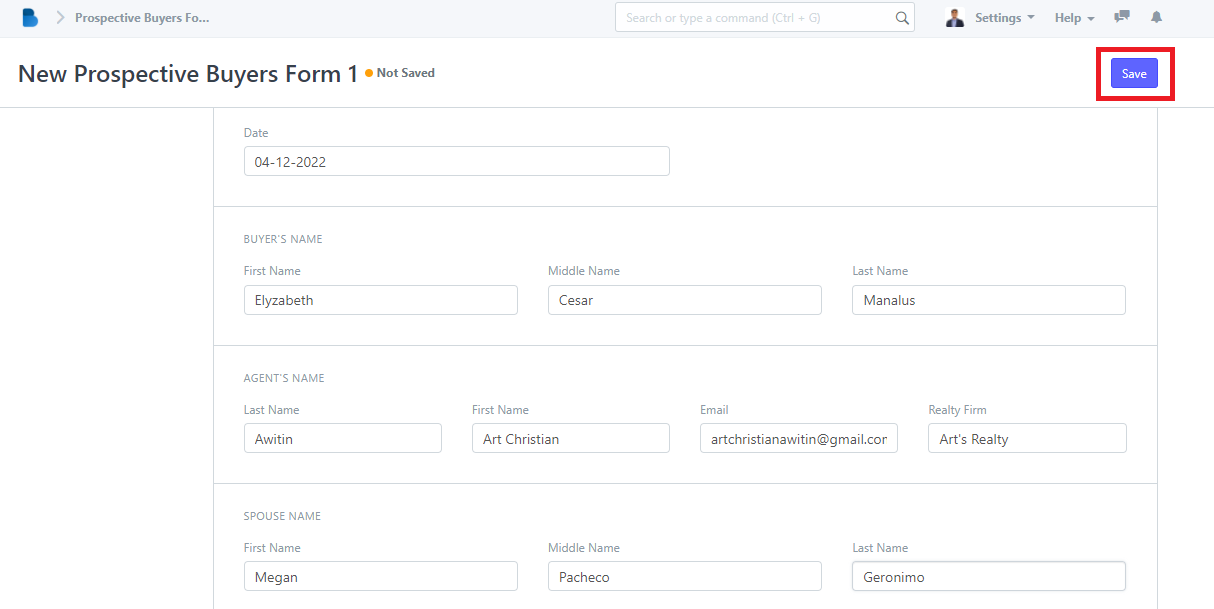
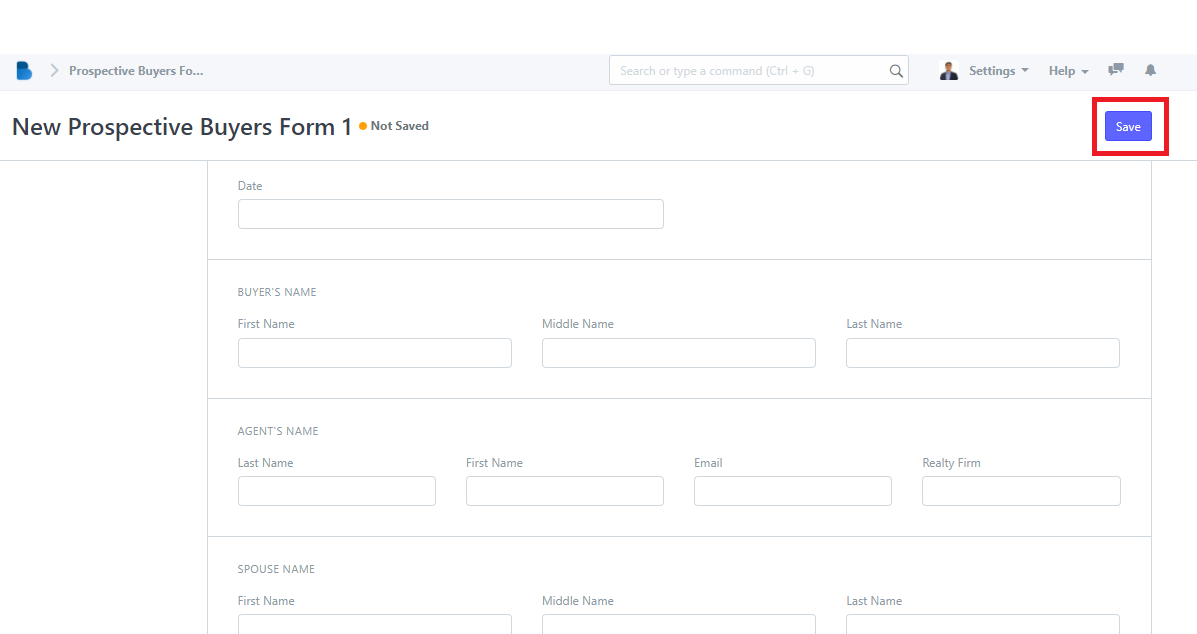
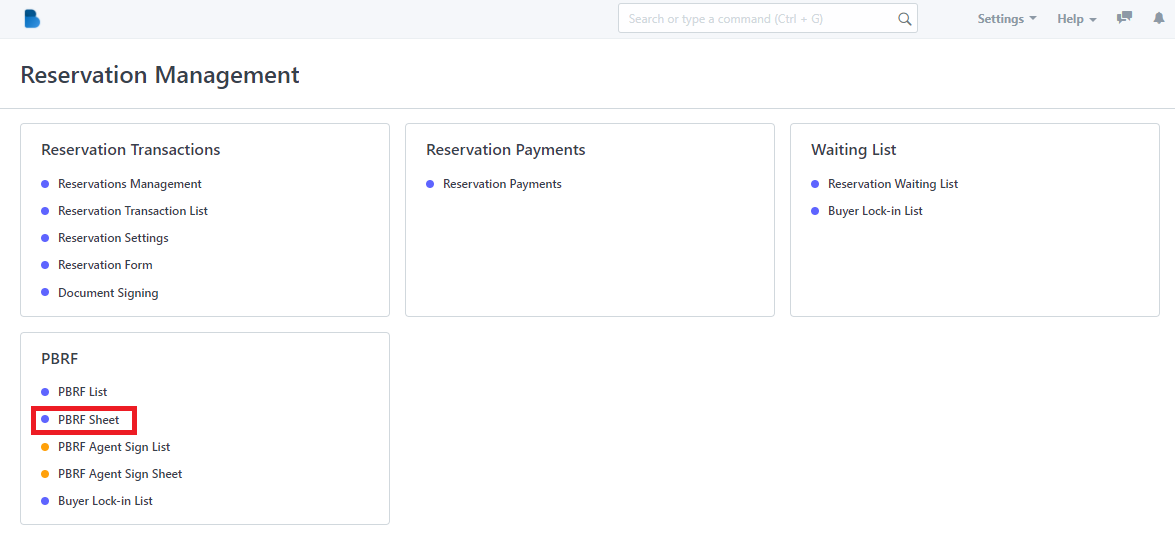
How to Create a PBRF Sheet/Form
- In Reservation Management features, We will first focus on PBRF Click 'PBRF Sheet’.

2. You can create a Reservation Form by clicking this highlight 'See on Website'.
3. Fill up the information and attached necessary data and click 'Submit' to successfully create a PBRF sheet/form.
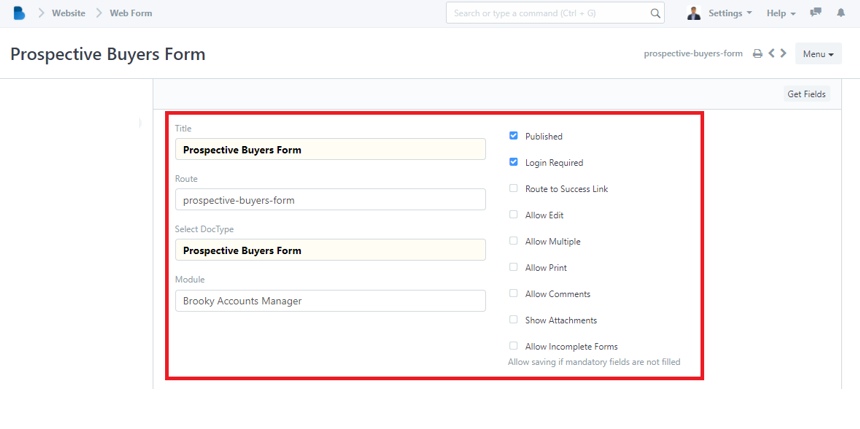
How to View, Edit, and change permission to PBRF Sheet/Form
1.
2. You can edit the Route and the Module of Prospective Buyer's Form/Sheet. Also it allows the admin to enable/disable permission to published, login required, allow print, and allow incomplete forms.
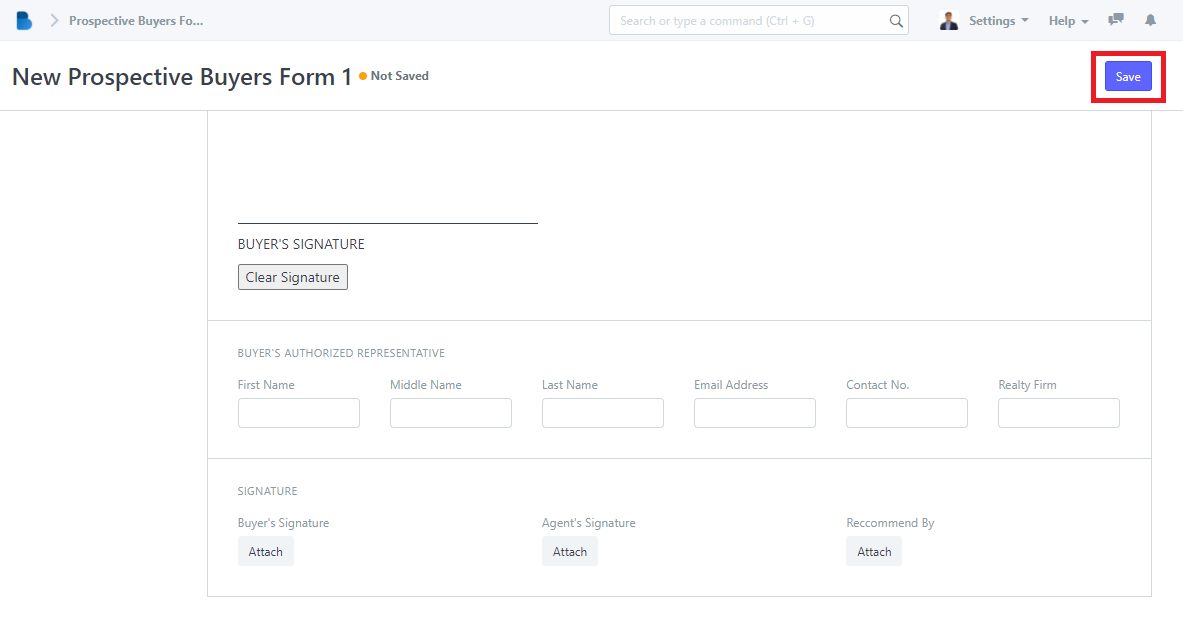
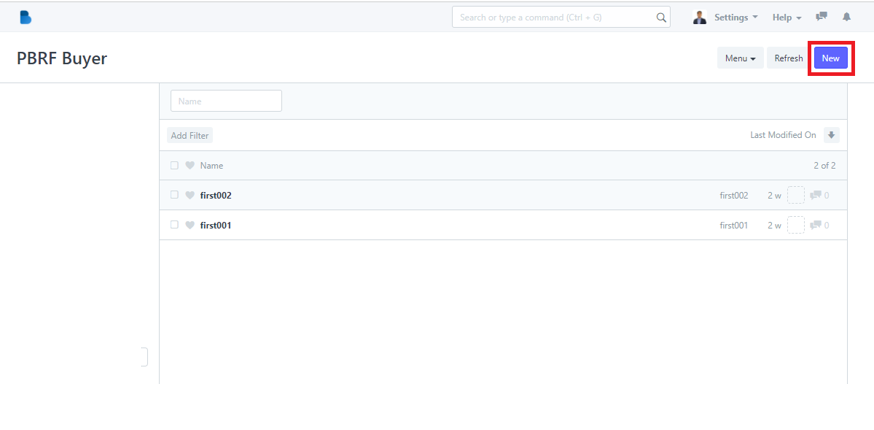
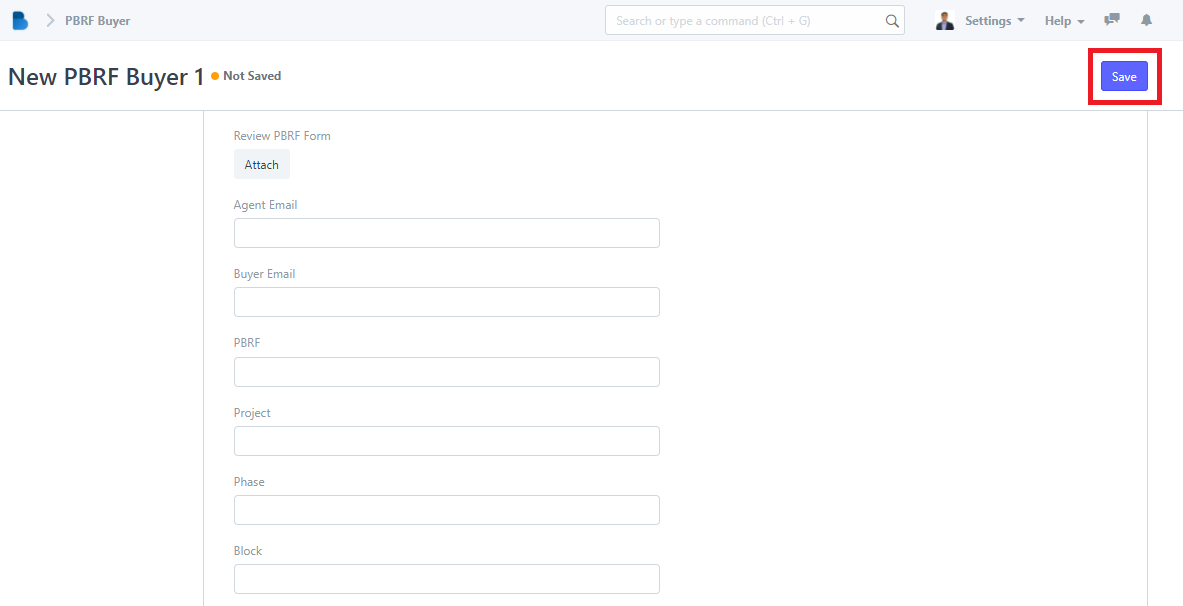
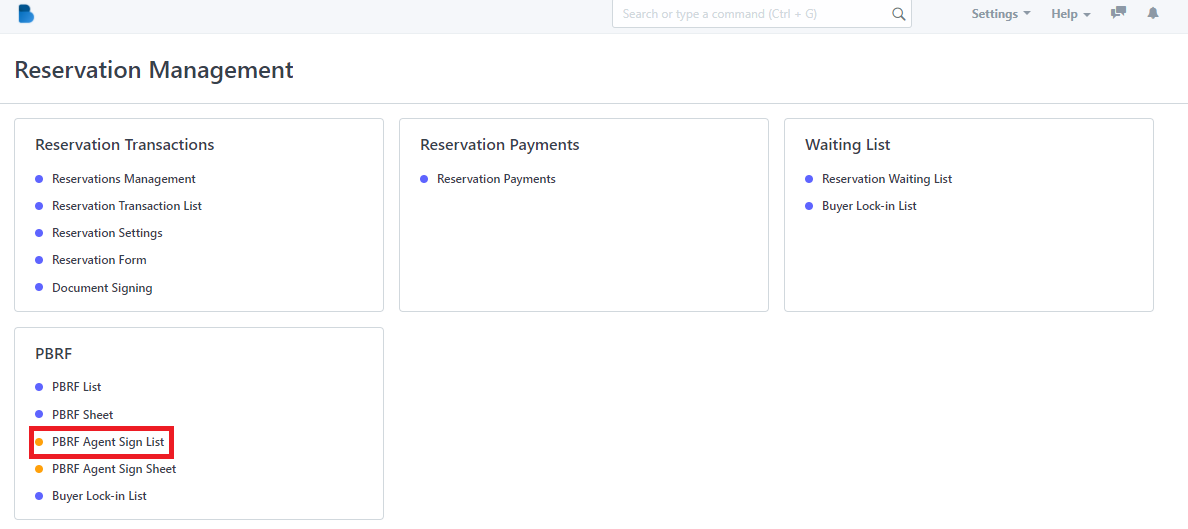
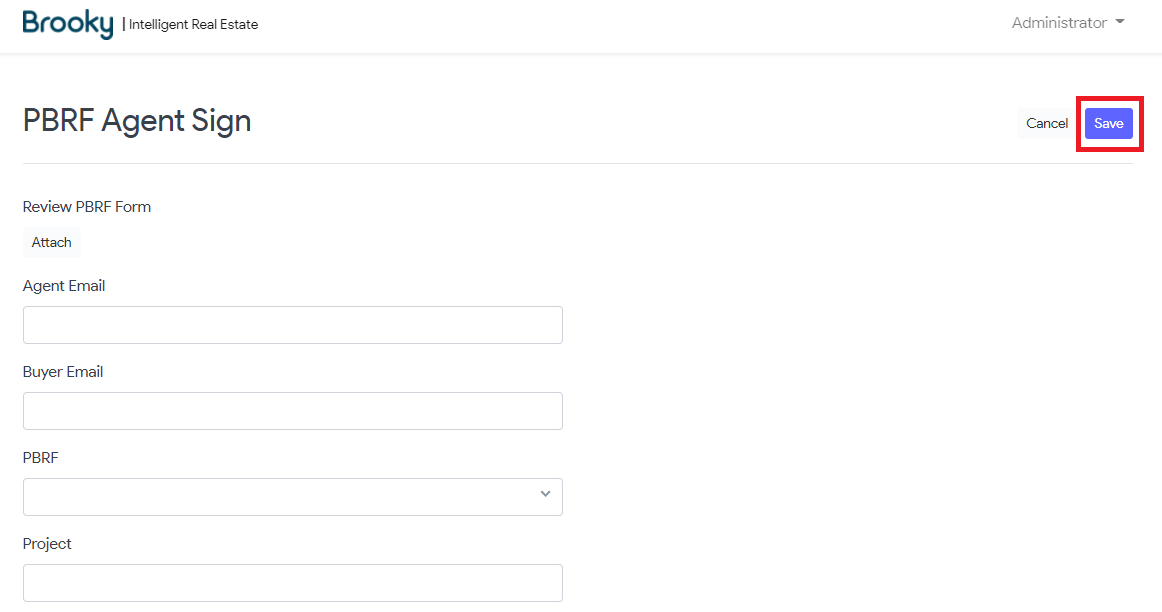
How to Create a PBRF Agent Sign List/PBRF Buyer
- In the Reservation Management Module under PBRF Click 'PBRF Agent Sign List'.

2. Click the ‘New' button to create a new PBRF buyer/agent List.
3. To create a new PBRF buyer/agent fill up, and attached necessary information and click 'Save'.
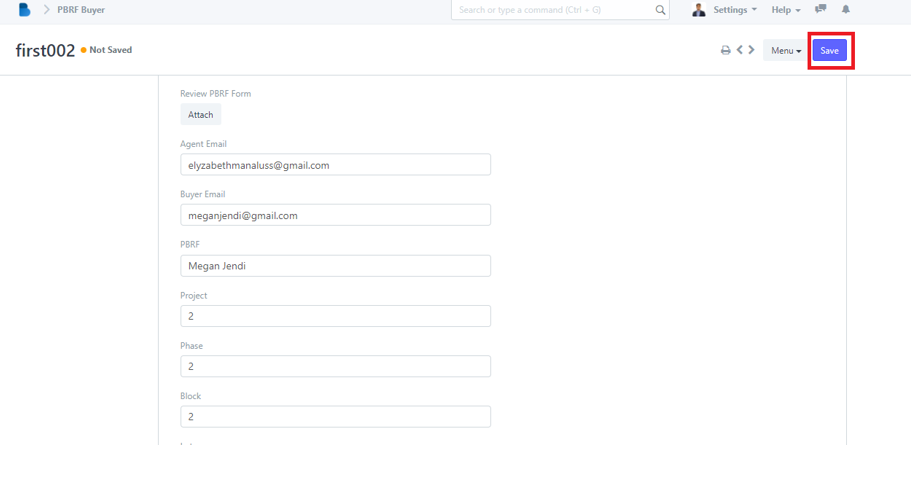
How to View and Edit PBRF Agent Sign List/PBRF Buyer
- In the Reservation Management Module under PBRF Click 'PBRF Agent Sign List'.
2. Click the ‘Name' that you want to view/edit and it will redirect you to view/edit page of that specific data.
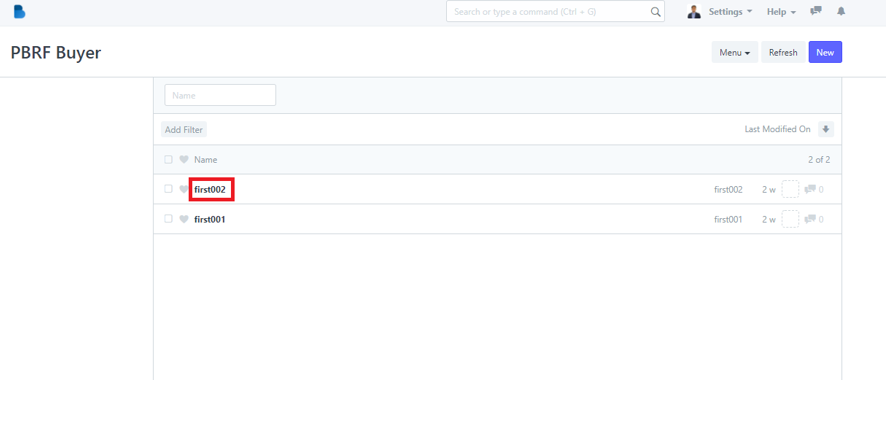
3. You can check, and edit data of the person you selected. If you had any changes/updates click 'Save'.
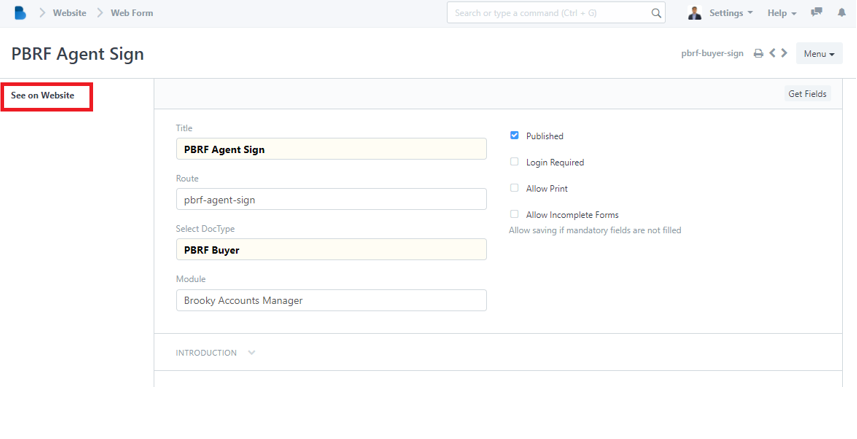
How to Create a PBRF Agent Sign Sheet
- In the Reservation Management Module under PBRF Click 'PBRF Agent Sign Sheet'.

2. You can create a PBRF Agent Sign Sheet by clicking this highlight 'See on Website'.
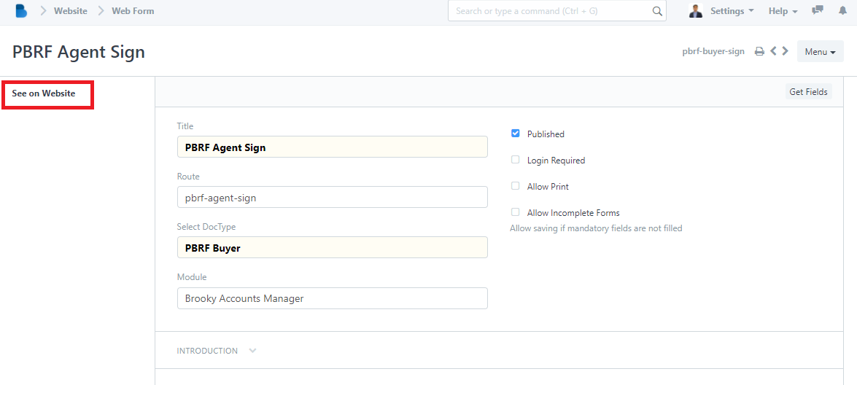
3. Fill up the information and attached necessary data and click 'Save'.
How to View, Edit, and change permission to PBRF Agent Sign Sheet
- In the Reservation Management Module under PBRF Click 'PBRF Agent Sign Sheet'.

2. You can edit the Route and the Module of PBRF Agent Sign Sheet. Also it allows the admin to enable/disable permission to published, login required, allow print, and allow incomplete forms.
How to Use Buyer Lock-in List
- In the Reservation Management Module under PBRF Click 'Buyer Lock-in List'.
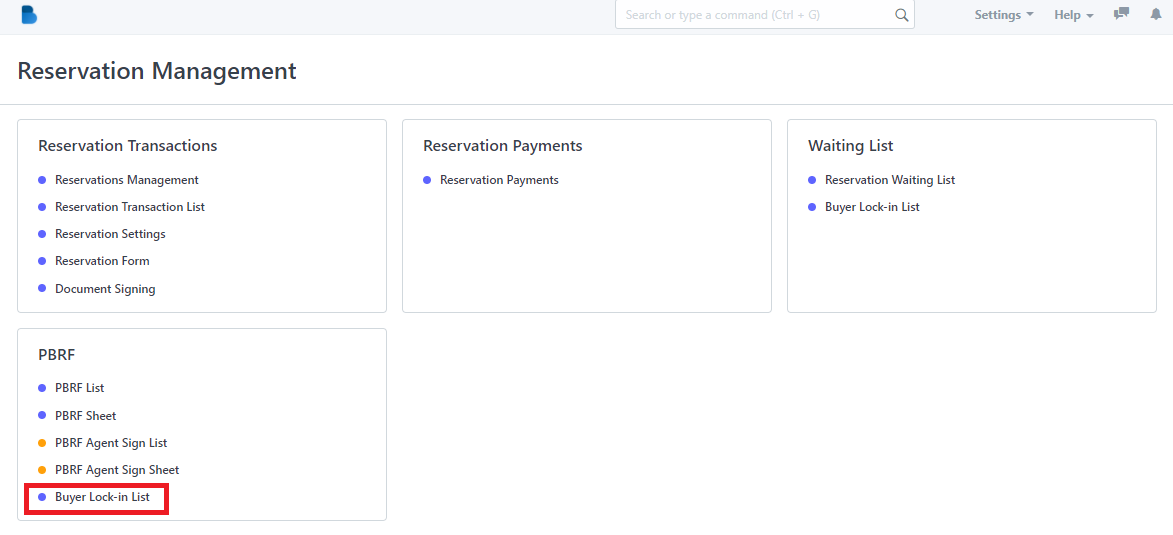
2. Admin can only check the details of the user's who made a reservation. Each user who has reservation is given 30days to complete the process if not. It will automatically cancel the reservation.
Documents
How to Create a New Document
- Click the Documents.
2. Once you click the Document, It will redirect you to the page of all the documents listed.
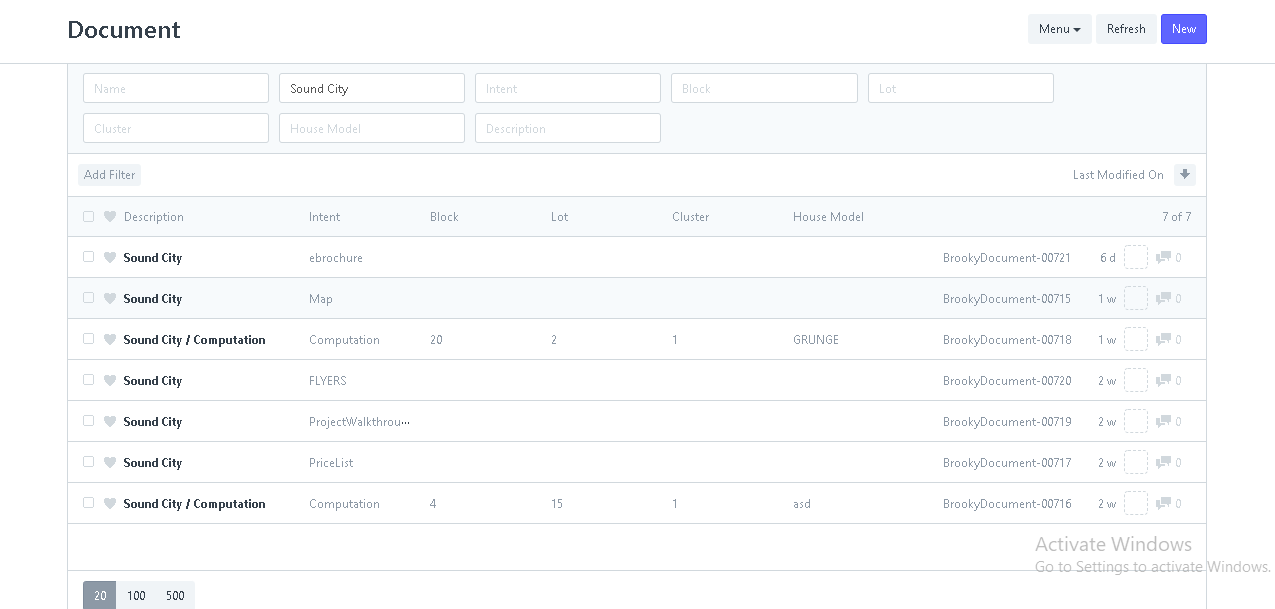
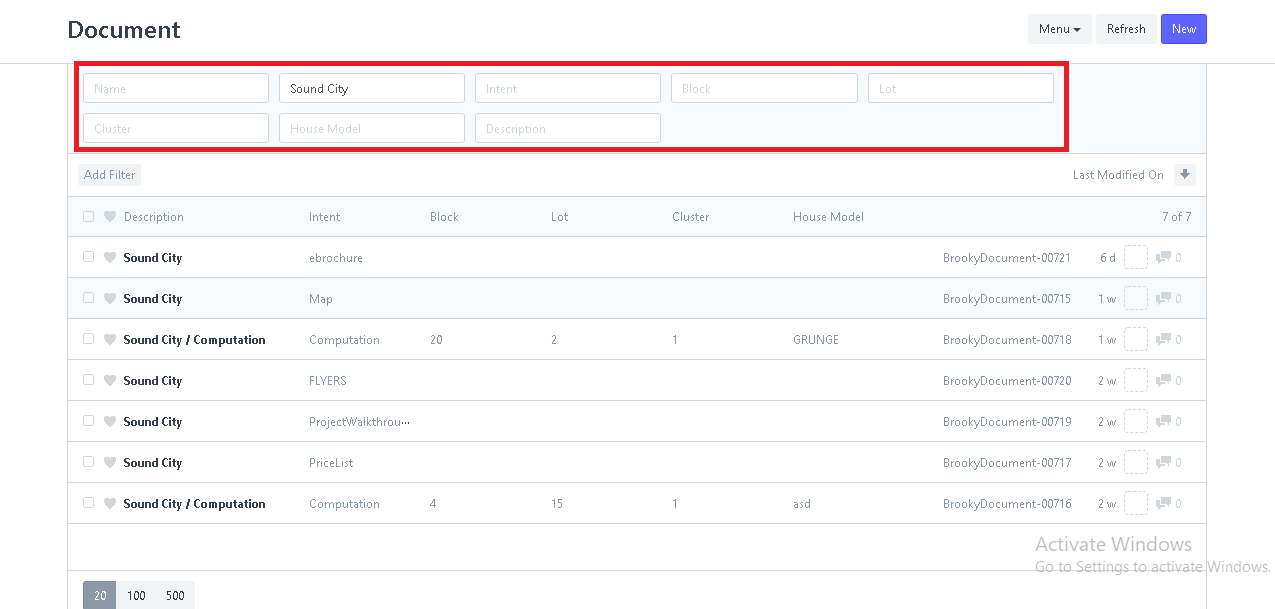
3. After you click the Document, enter the information/filter you want to see such as the (Name, Project, Cluster, The Description, House Model, Intent, Block, and the Lot).
4. Click the New button, to create a new document.

5. After clicking the New, you will navigate to this page where you can input the name of the "Project" and "Intent", and attach the file on Map template. And click Save to Create a New file.

6. After clicking Save, you will redirect on page to the document you created and you can edit the information.

7. In the "Assigned To", by clicking the Assign+, you will redirect to the Added To Do page.
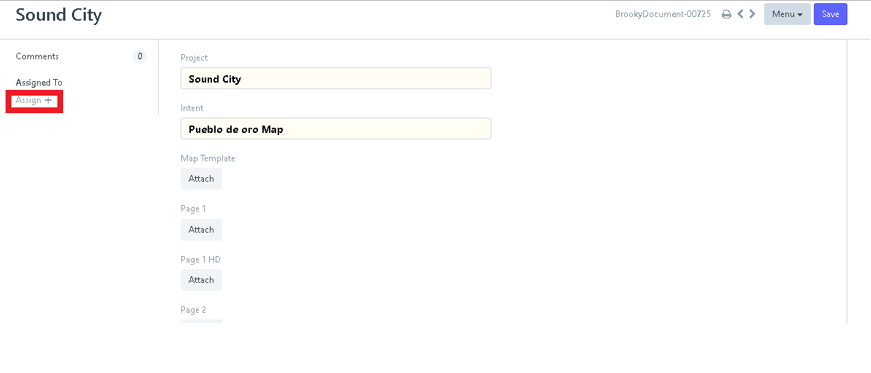
8. After clicking Assign +, you can assign anybody and or by yourself by clicking Assign to me and Click Add.

9. In the "Attachments", by clicking Attach File and you can upload files, or attach a web link.

10. Click Upload if you are done to attached the file.

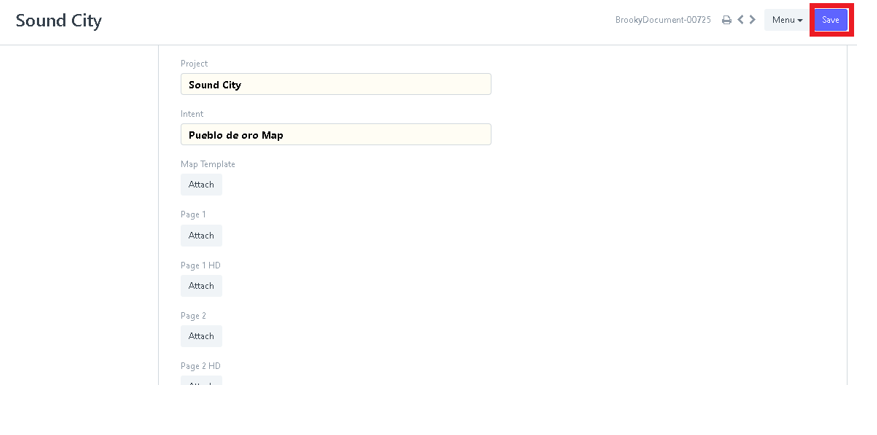
11. Once you are done to edit the information, Click Save to save the document you edit.
Interactive Map
How to Use the Interactive Map Menu
1. Open the Brooky Portal and login your credentials.
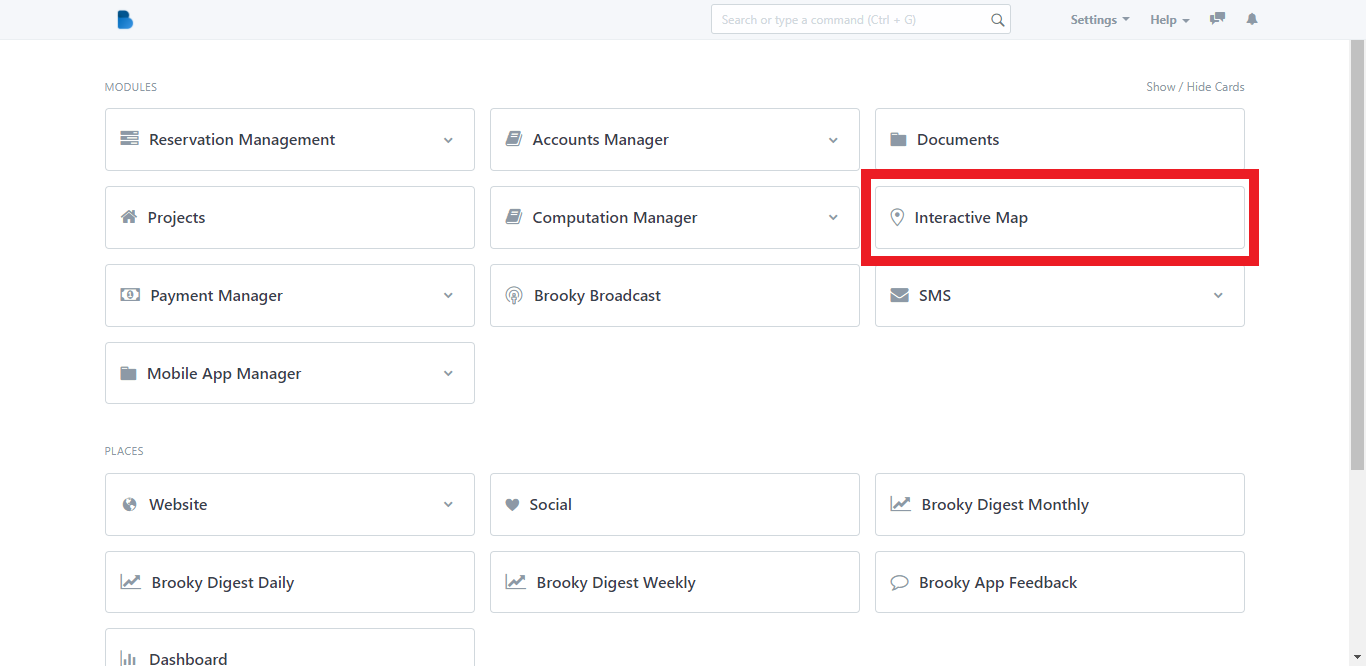
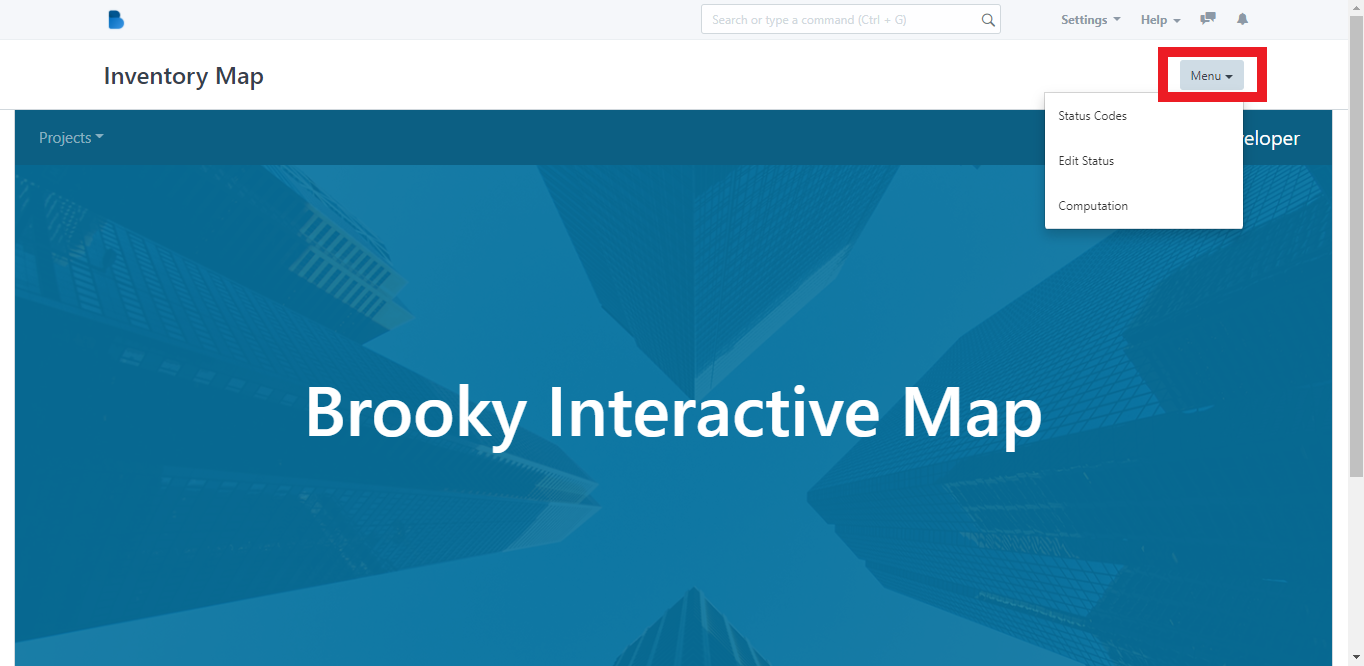
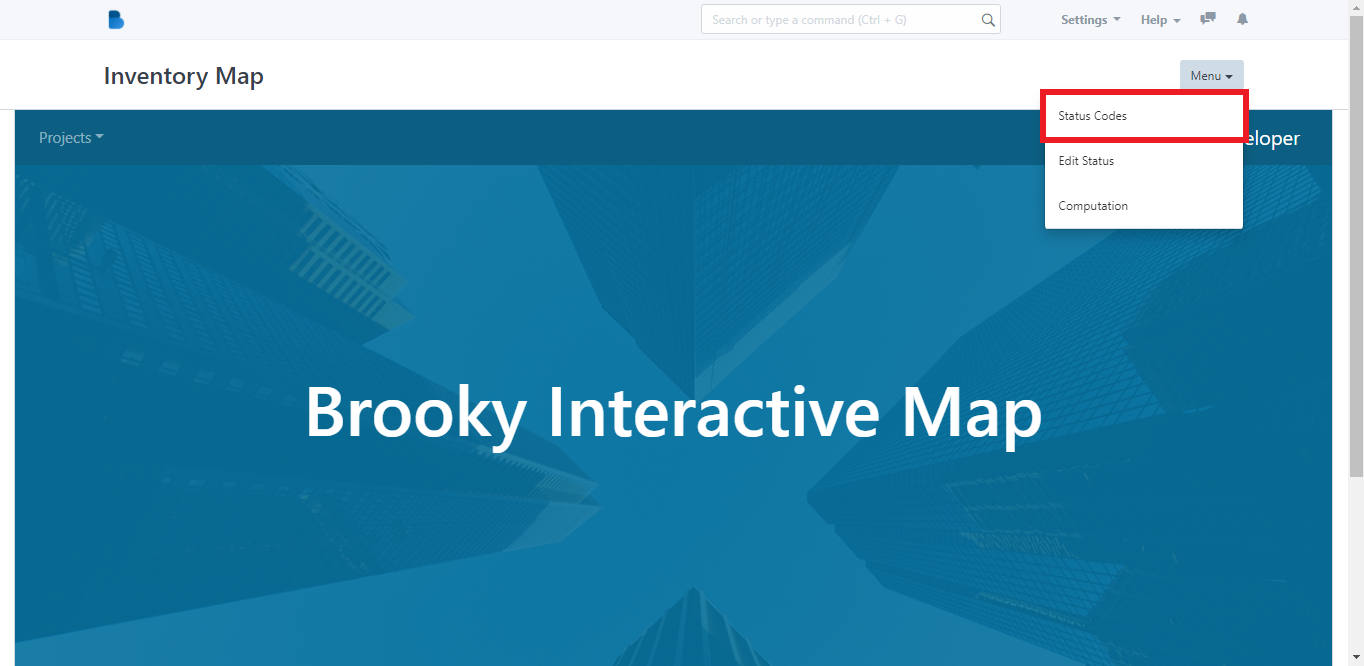
2. On the Brooky Admin Portal homepage, click on the Interactive Map and it will redirect you to its page.
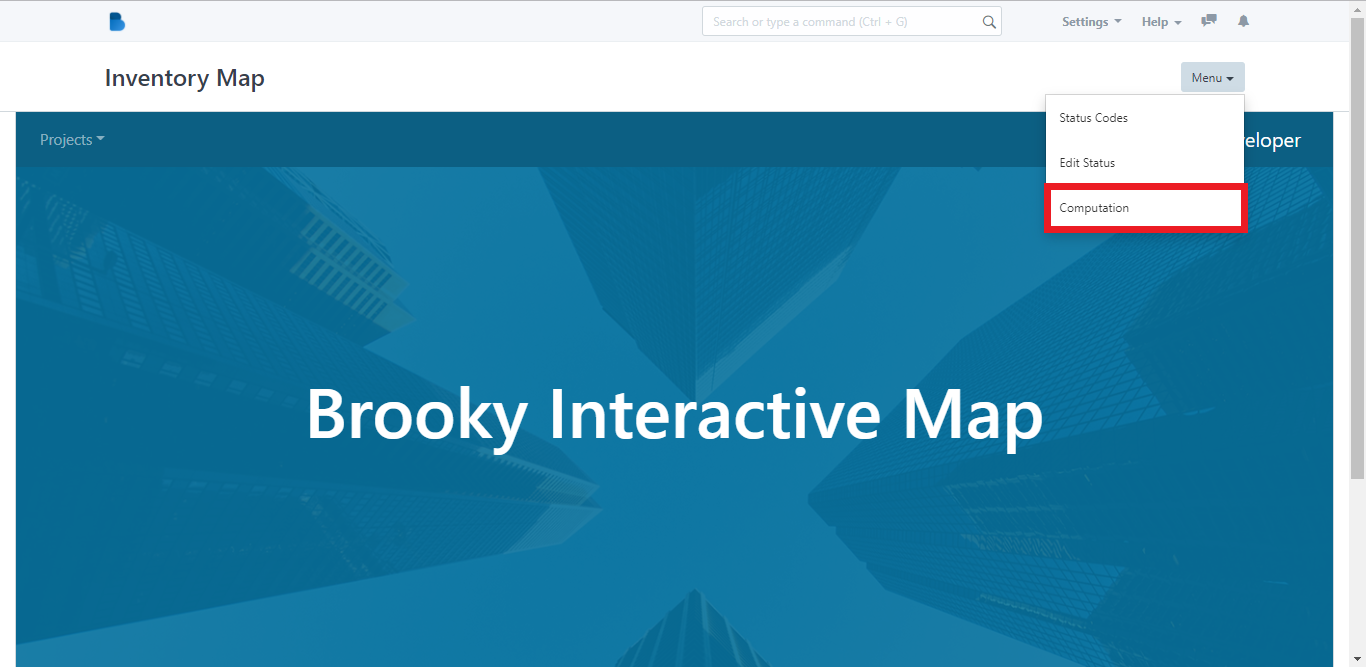
3. In its page, it has a Menu dropdown button. The Menu has three options; Status Codes, Edit Status and Computation.
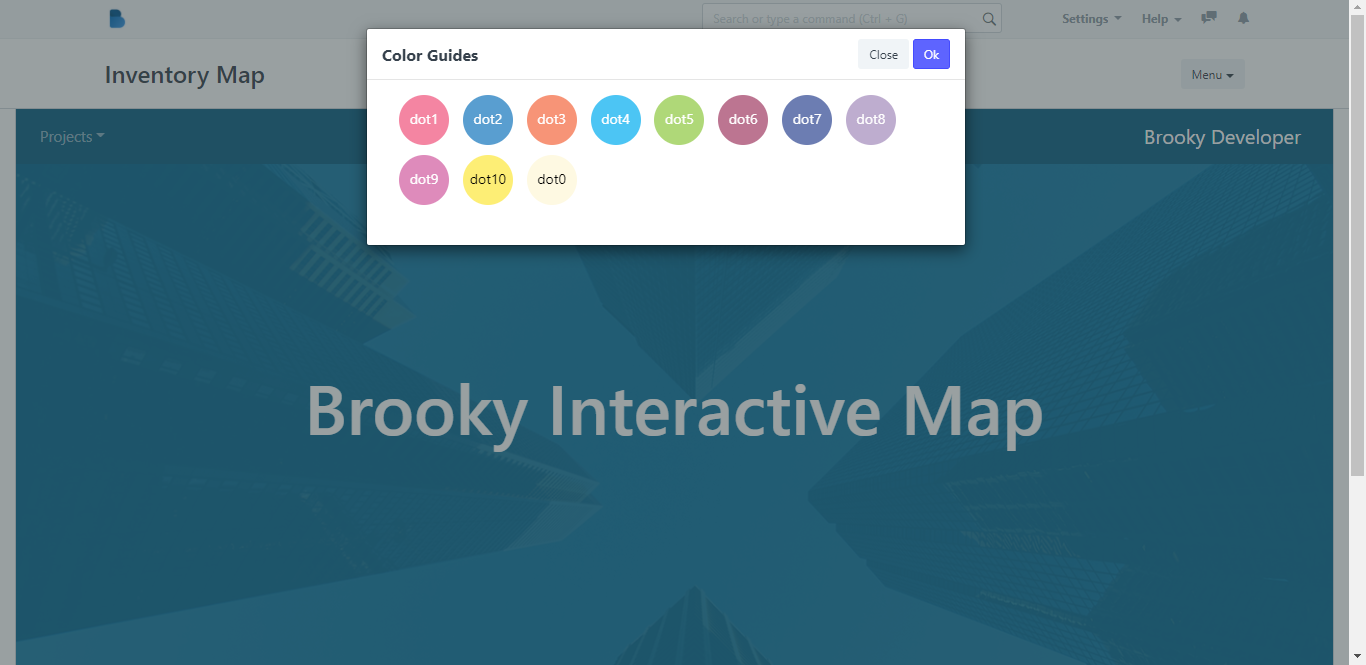
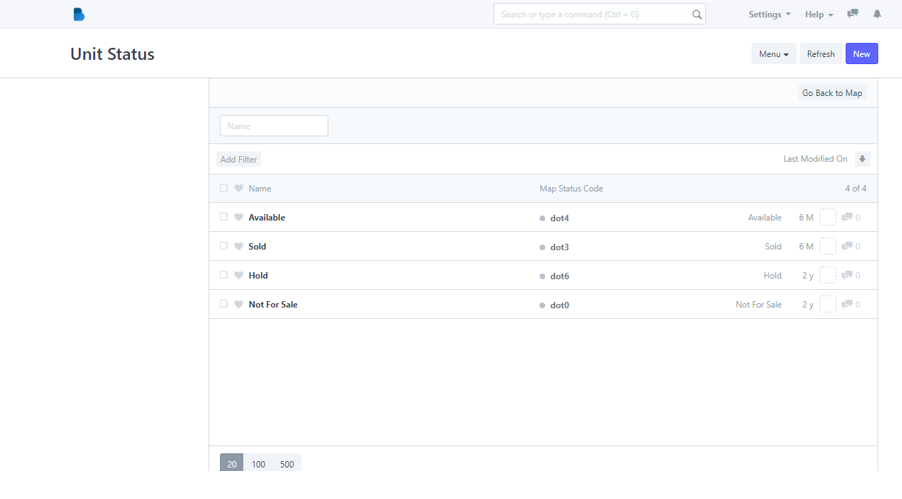
4. In the Menu option, click Status Codes and it will display the color guides in the interactive map. After that, click Close or Ok as both options work the same to exit from the color guides.
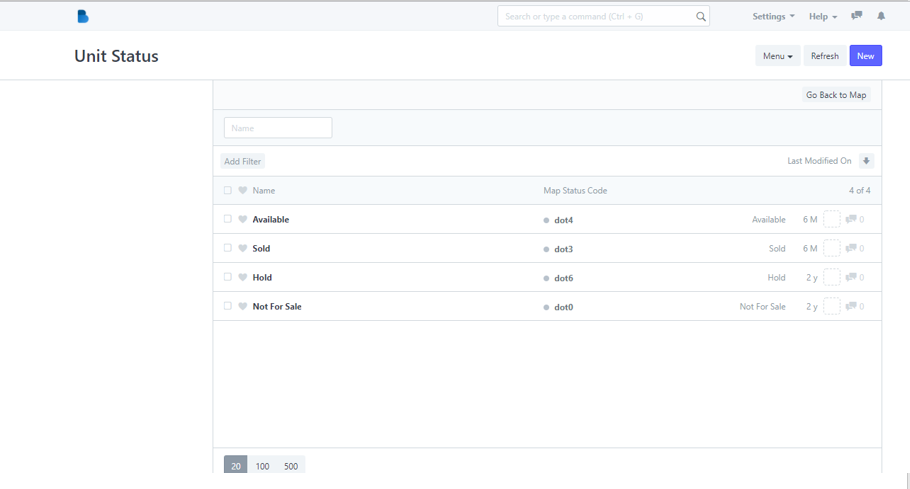
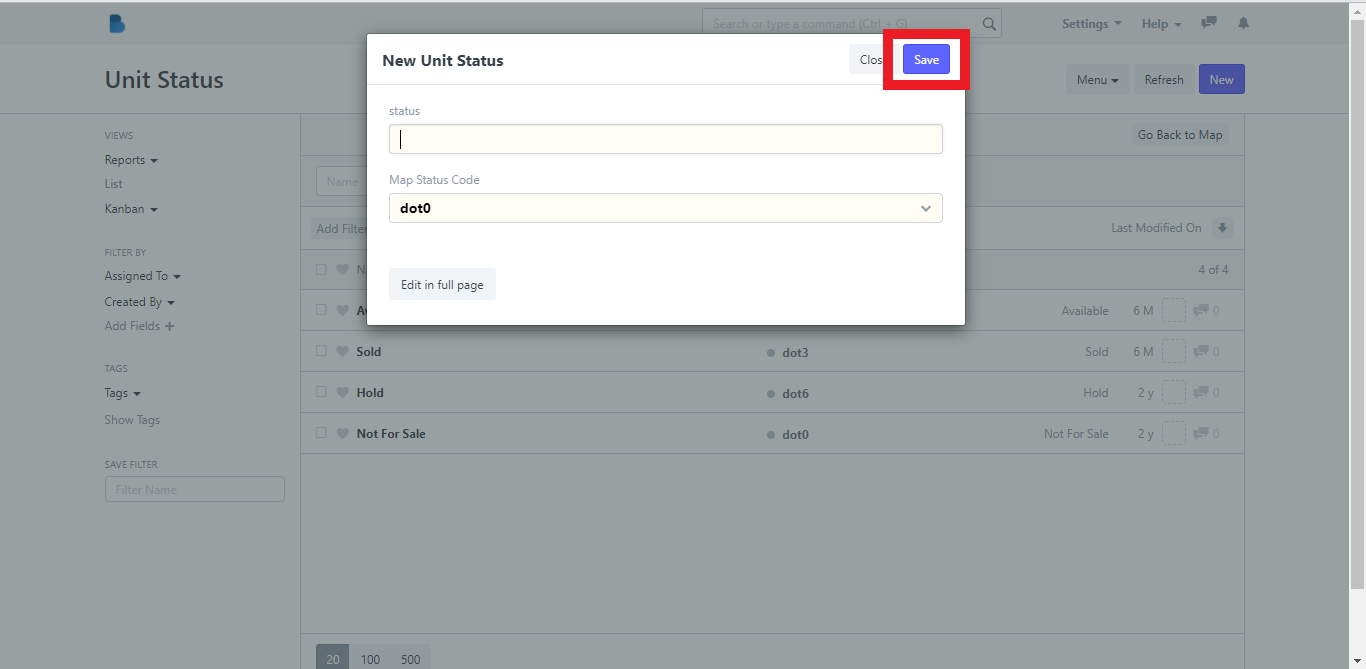
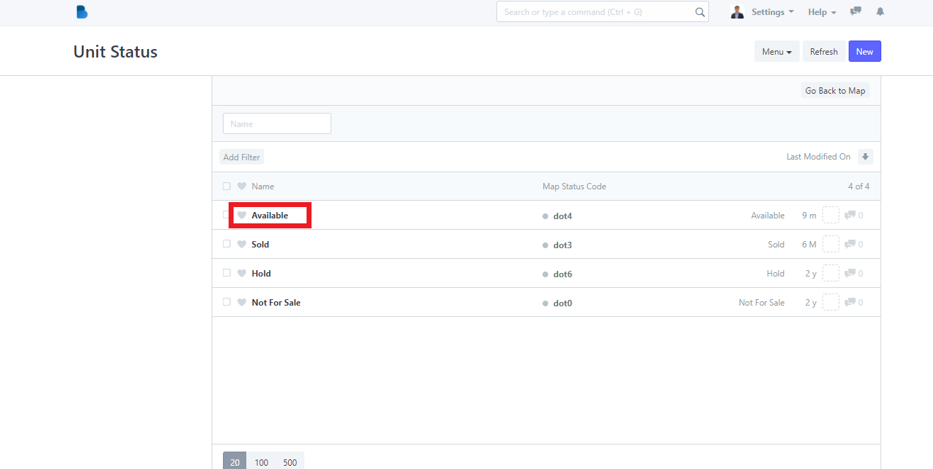
5. In the Menu option, click Edit Status to add unit/property status, ie. Available, Sold, On Hold and Not for Sale. After clicking Edit Status, it will redirect you to its page.

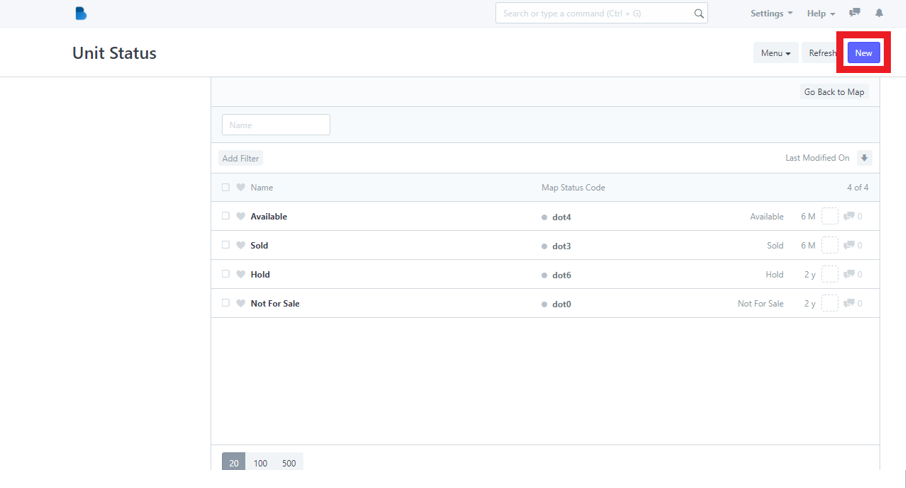
6. In the Unit Status page, click the New button to add a new unit status. After adding a new unit status, click Save.
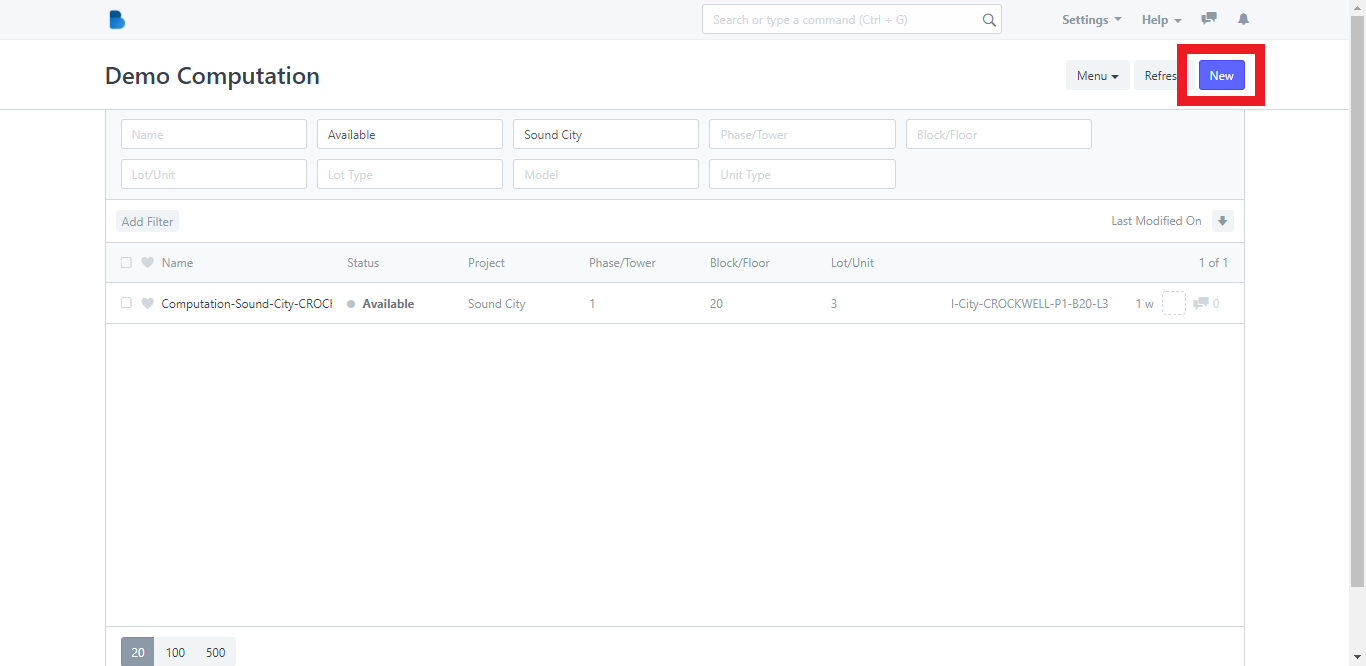
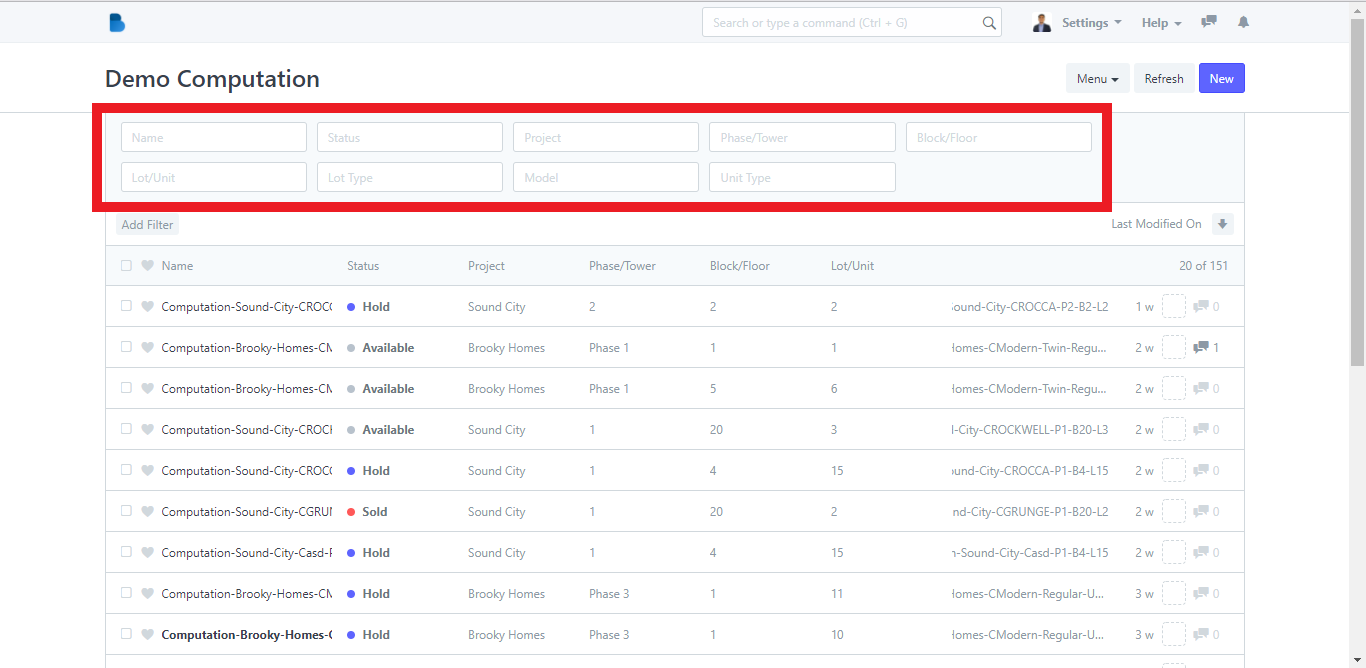
7. In the Menu option, click Computation and it will redirect you to its page. You can add filters to the property computations and you can create new computation by clicking the New button.
How to Change the Status Codes on the Interactive Map
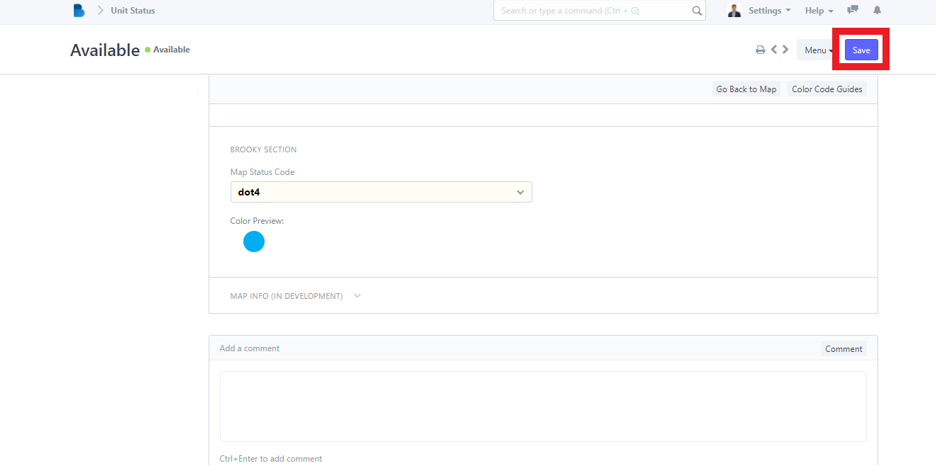
1. On the Interactive Map module, click the Edit Status button in the Menu dropdown option and it will redirect you to its page.
2. Click one status code, i.e the Available status code. After clicking, it will redirect you to its page.
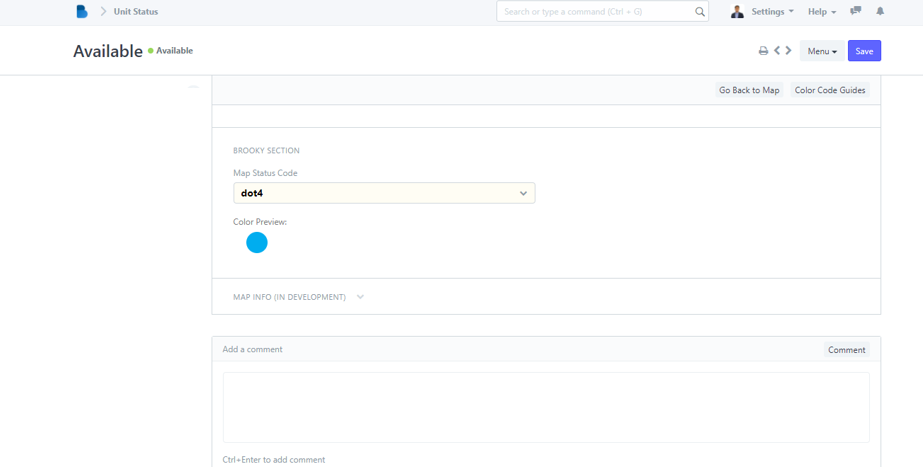
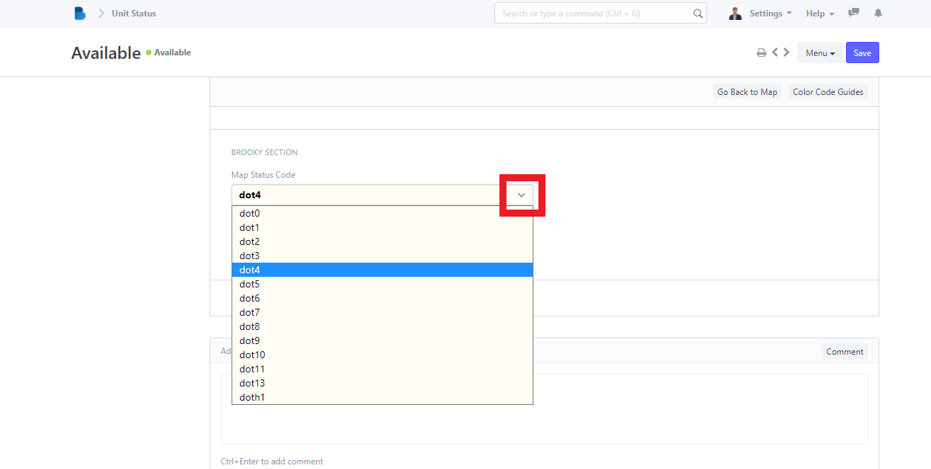
3. Click the Map Status Code dropdown option and you can now choose what dot number for the specific status code.
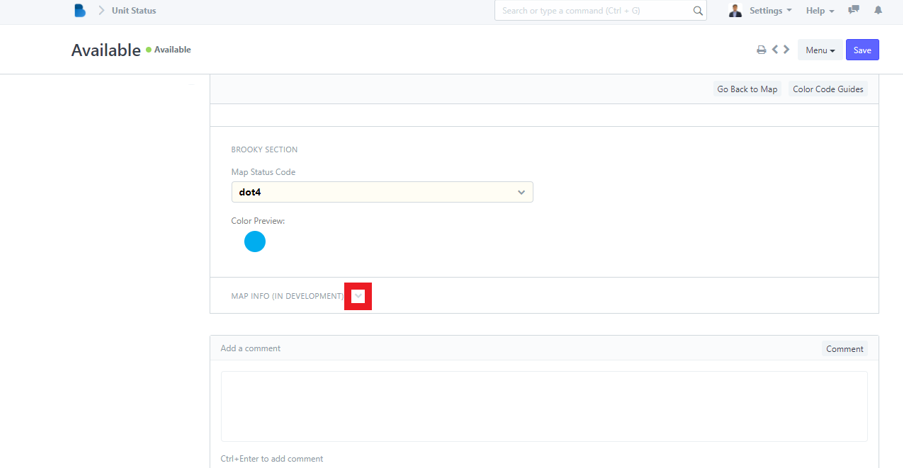
4. Click the Map Info dropdown option to change the dot color for in development properties in the interactive map.
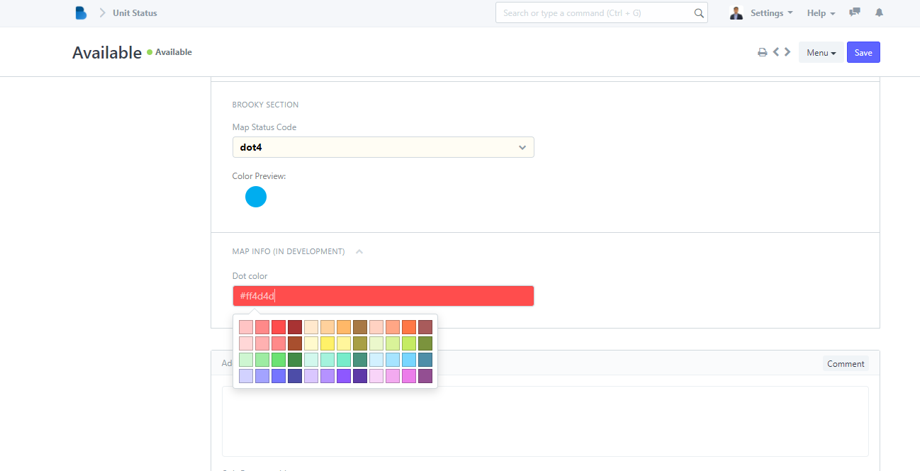
5. You can also add a comment regarding the map status code.
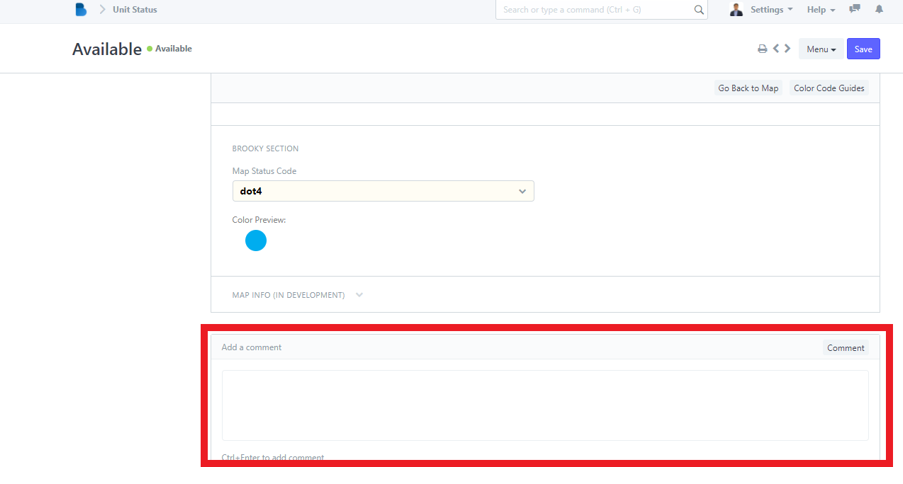
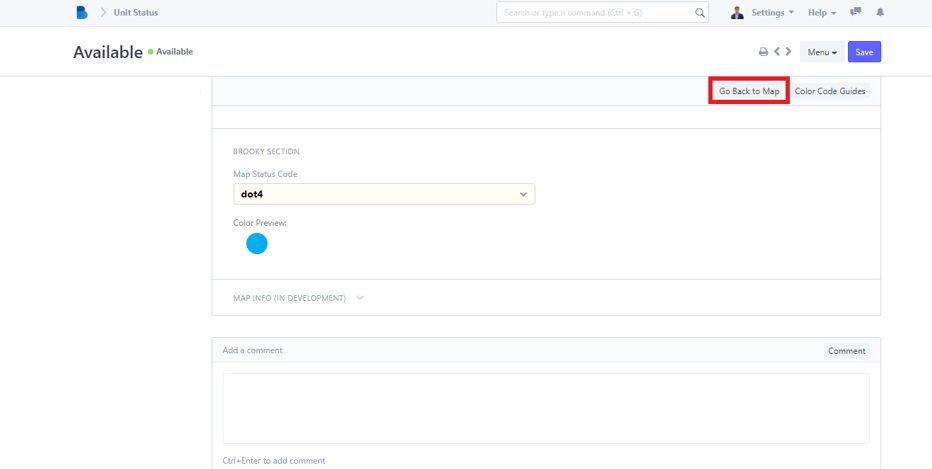
6. Click the Go Back to Map button and it will bring you back to the Inventory Map page.
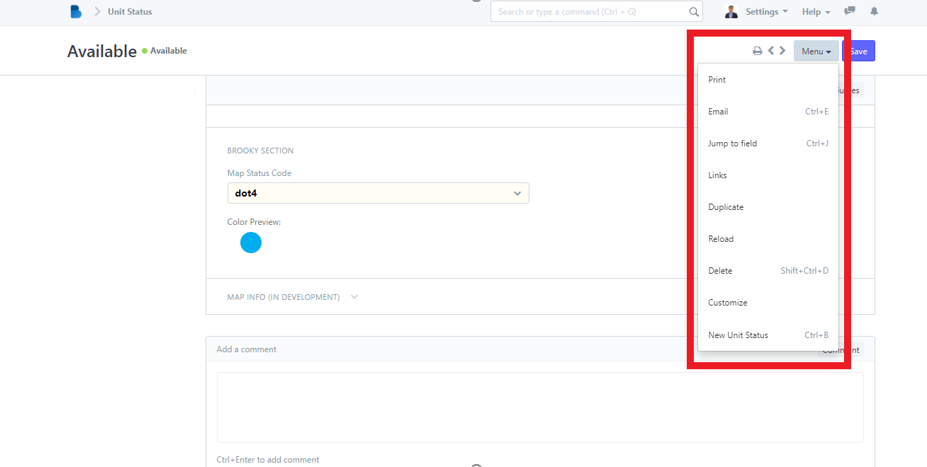
7. You can also see another Menu dropdown option in the Unit Status page. It has a Print option where you can save a pdf file of the status code, Email option where you can send the status of a property through email, Jump to field option, Links option, Duplicate option, Reload option, Delete option, Customize option and New Unit Status option where you can add a new status code.
8. After you've made your changes, click the Save button.
How to Use the Interactive Map
1. Open the Brooky Portal and login your credentials.
2. On the Brooky Admin Portal homepage, click on the Interactive Map and it will redirect you to its page.
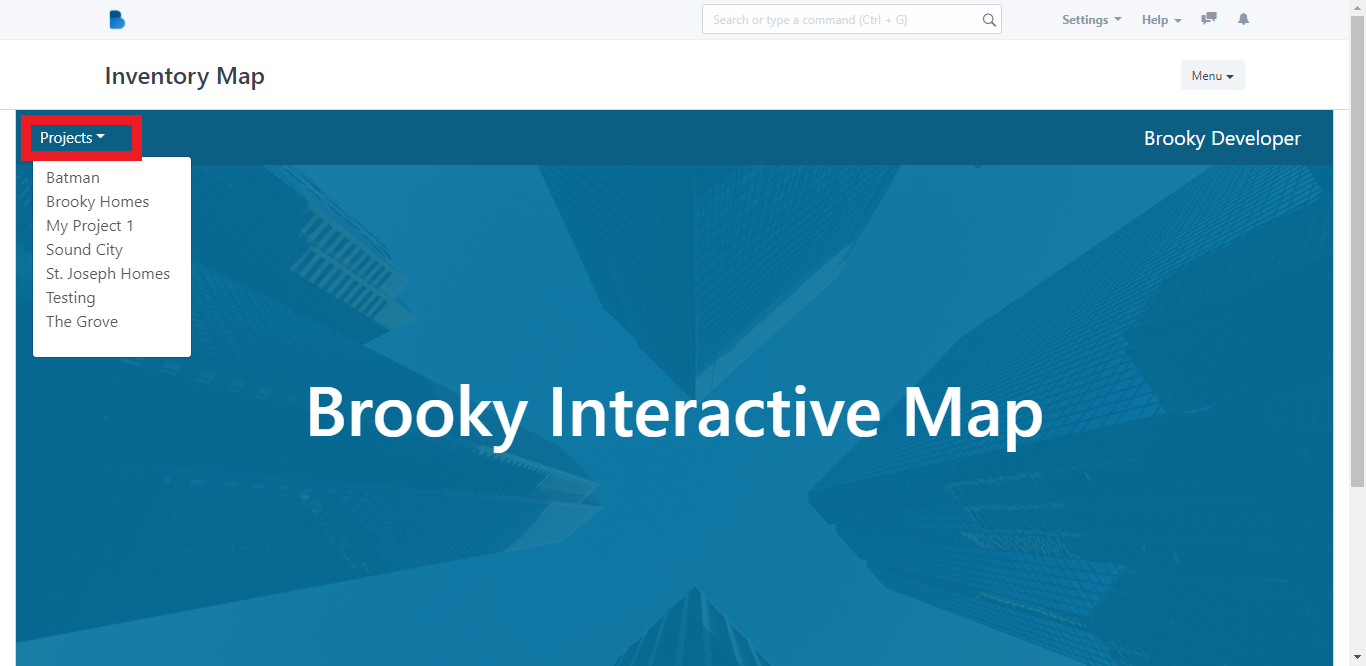
3. In its page, it has the Projects dropdown button. This will display a list of all the interactive maps created for each project.
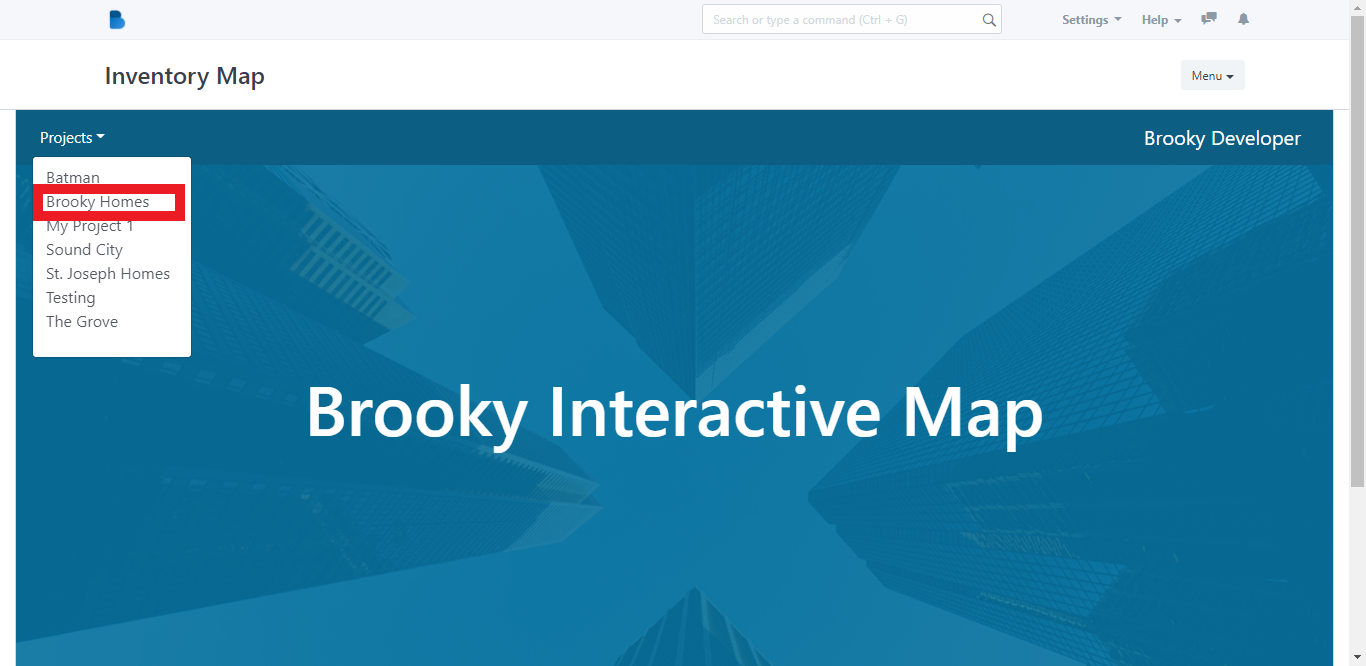
4. Click one project (Brooky Homes) to see its sample map.

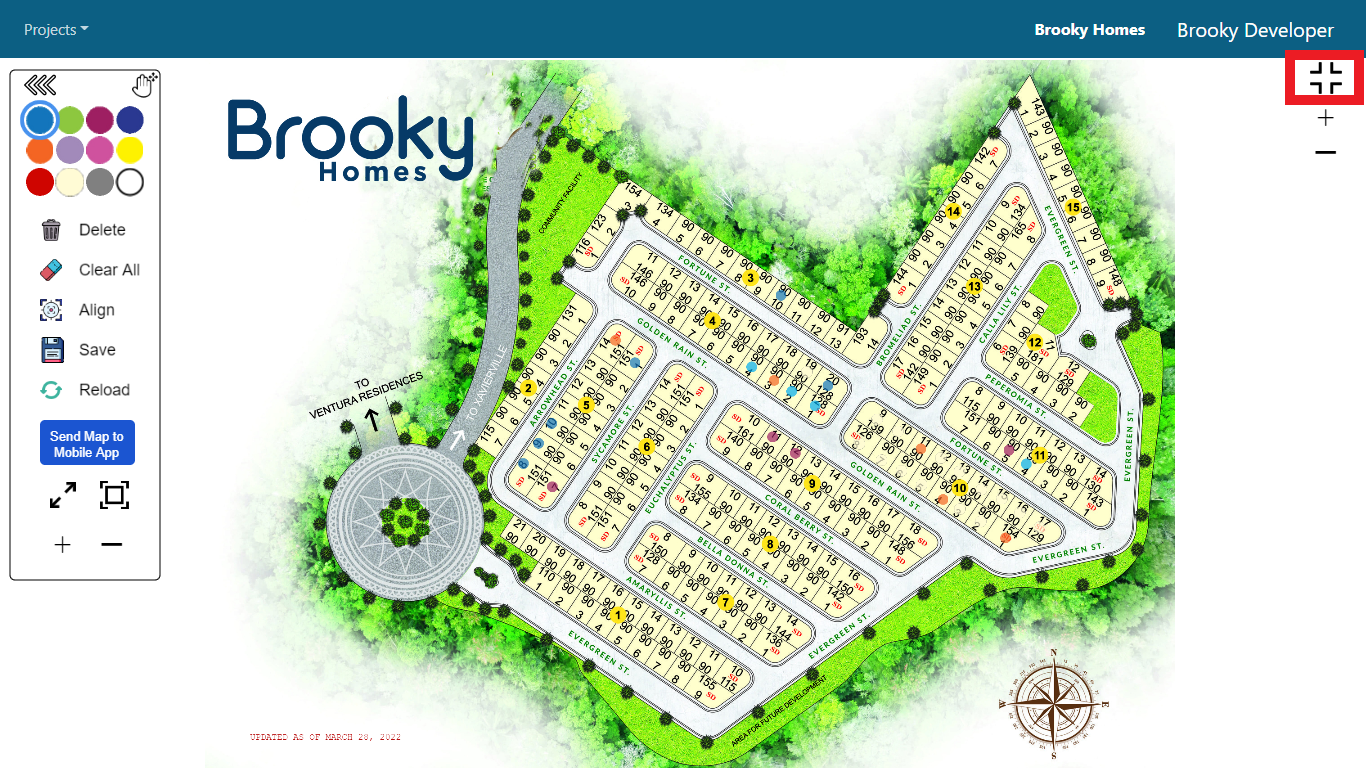
5. In the sample map, there are different buttons displayed. To have a full screen view of the map, see the photo below. To exit full screen, press Esc on your keyboard or just click the full screen icon again.
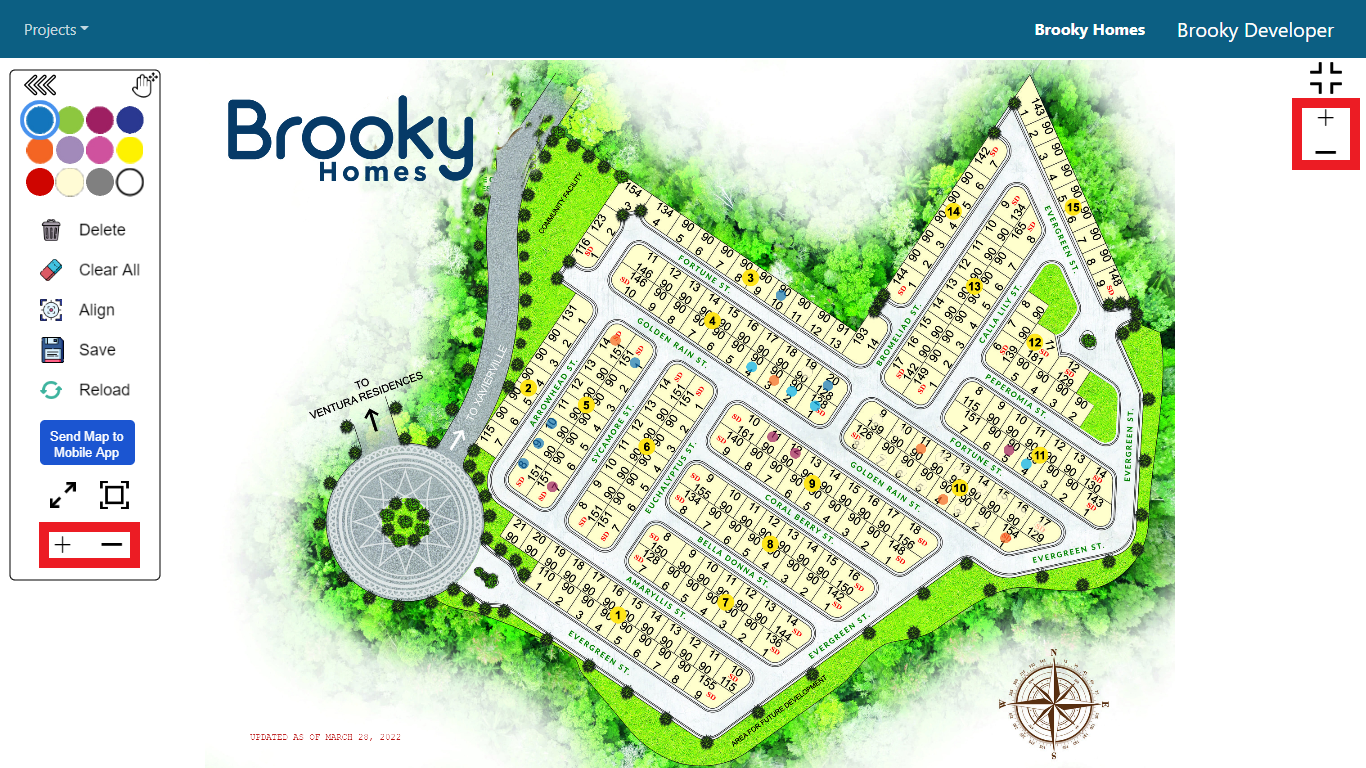
6. To zoom in and zoom out the map, see the photo below.
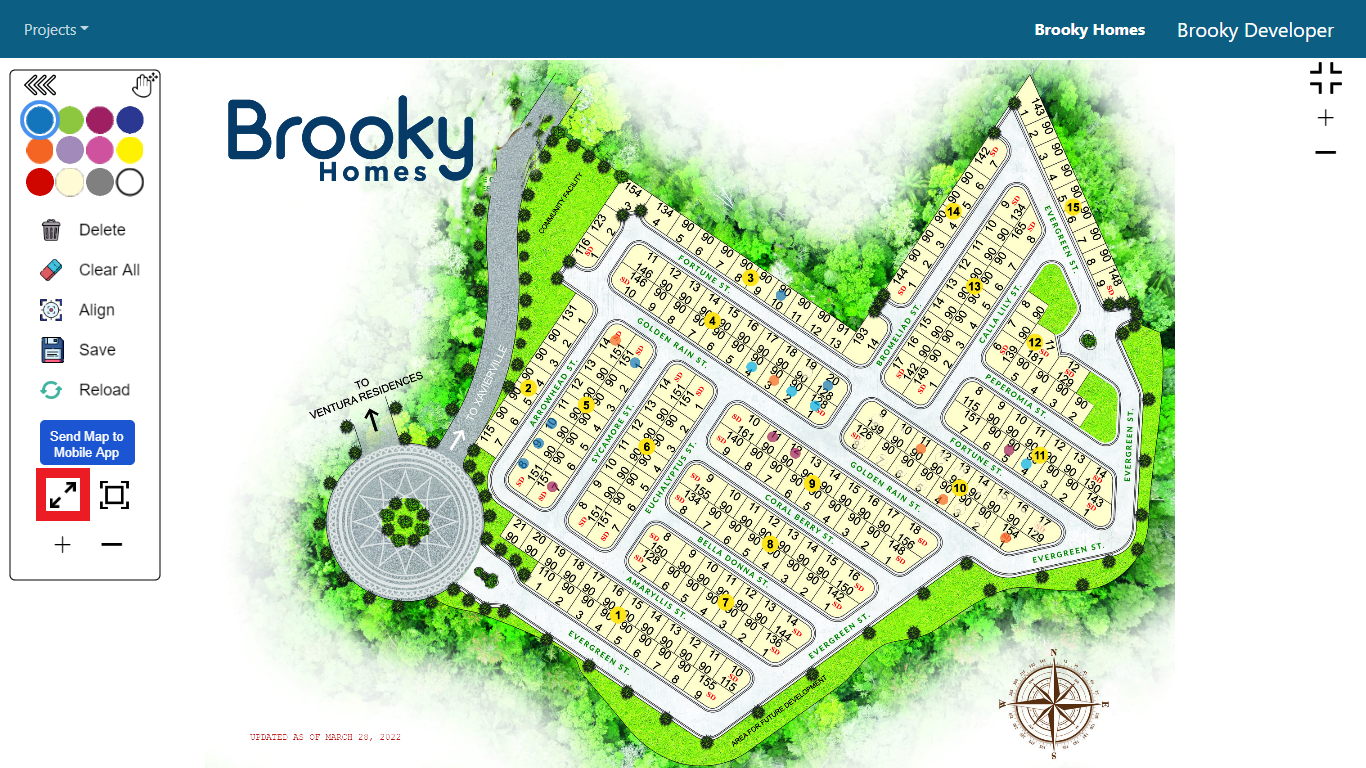
7. Another zoom in feature in this map is the photo shown below.
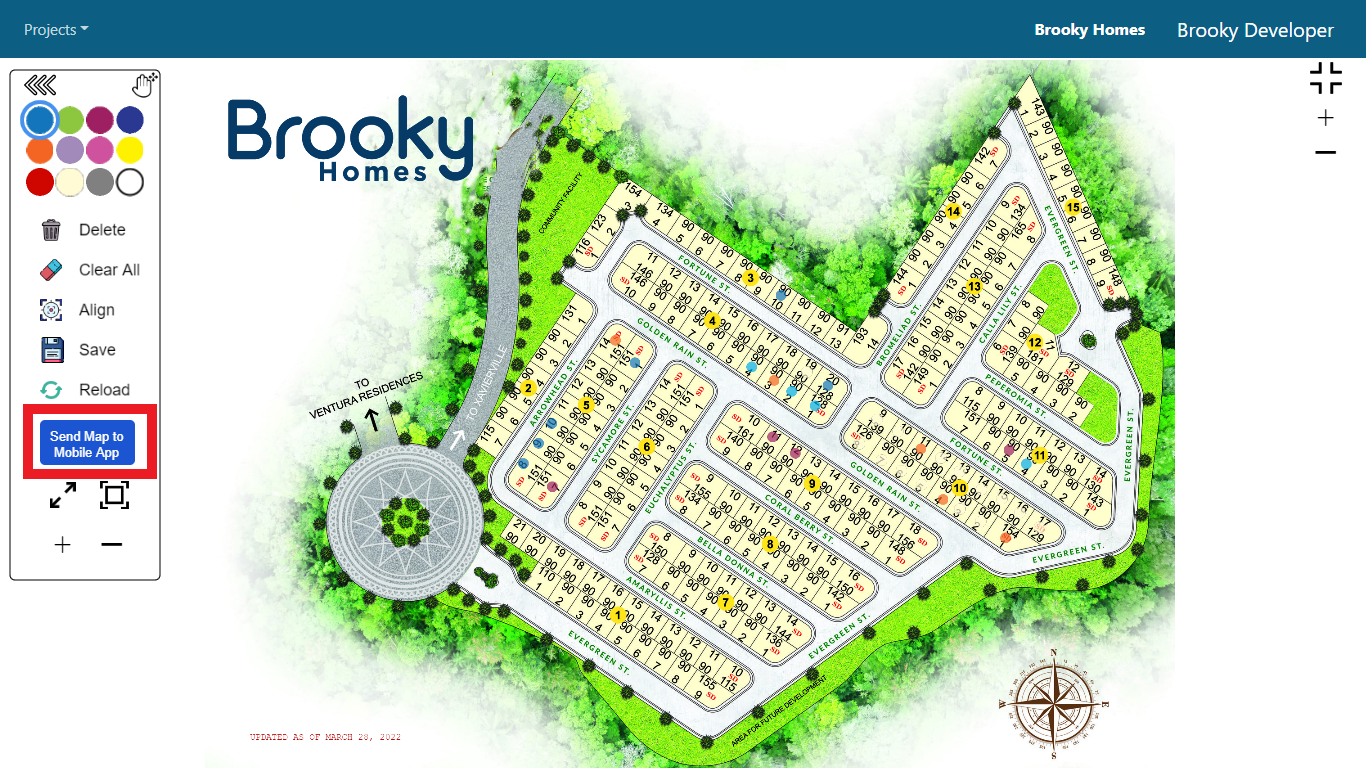
8. You can also send the map to the mobile application of Brooky by clicking the Send Map to Mobile App button.
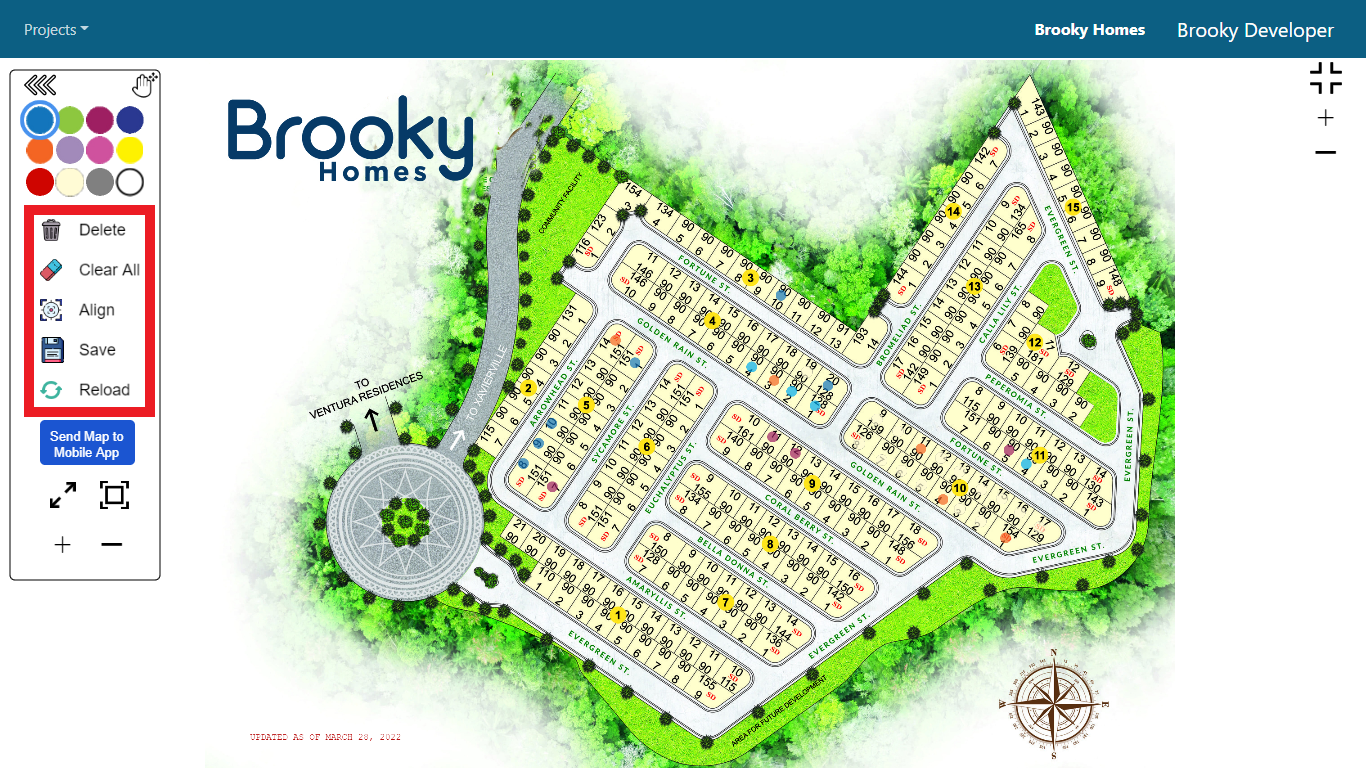
9. The Delete, Clear All, Align, Save, and Reload options are also available on the interactive map. These features can be used to change the information in each map location.
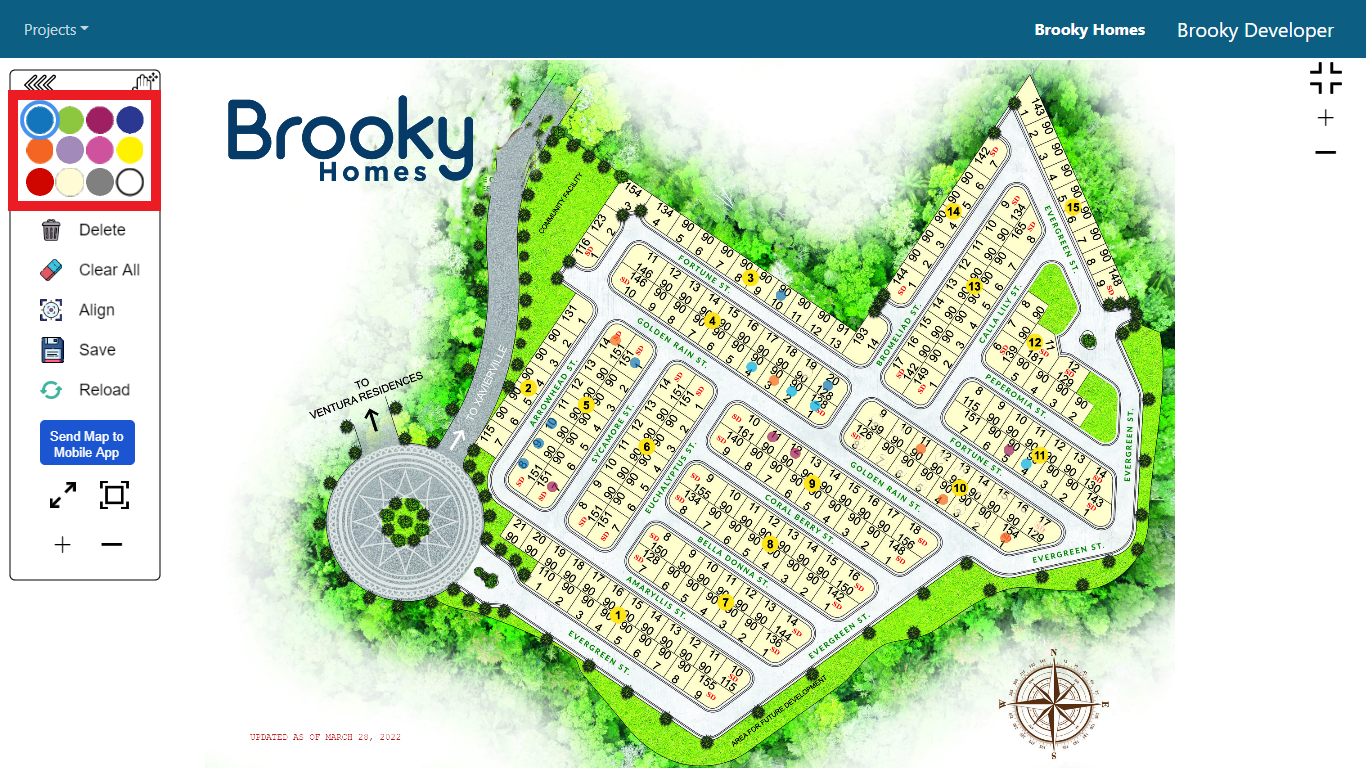
10. The Color legends will show the status of the unit/property whether it is Available, Sold, On Hold or Not for Sale.
11. To move the map to any sides of the screen, see the photo below.

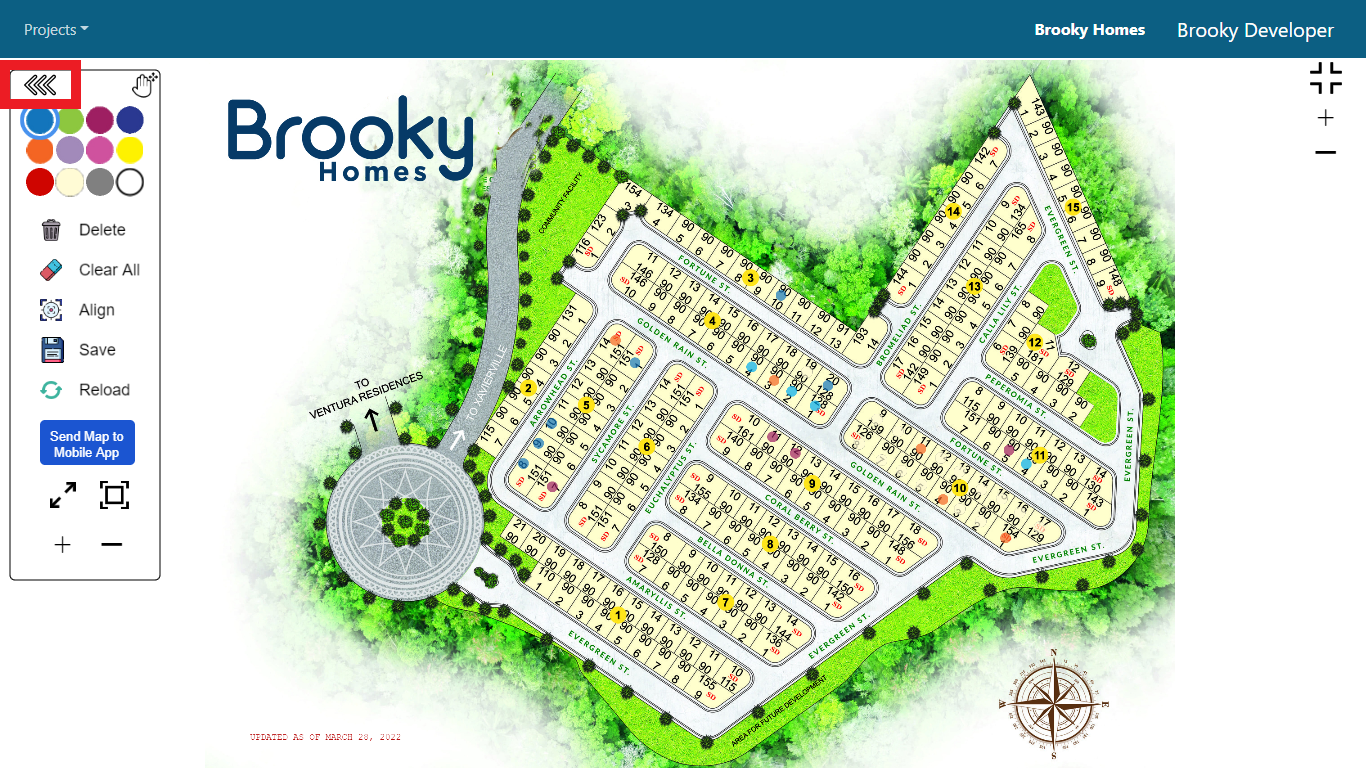
12. The Toggle Sidebar icon is shown in the photo below.
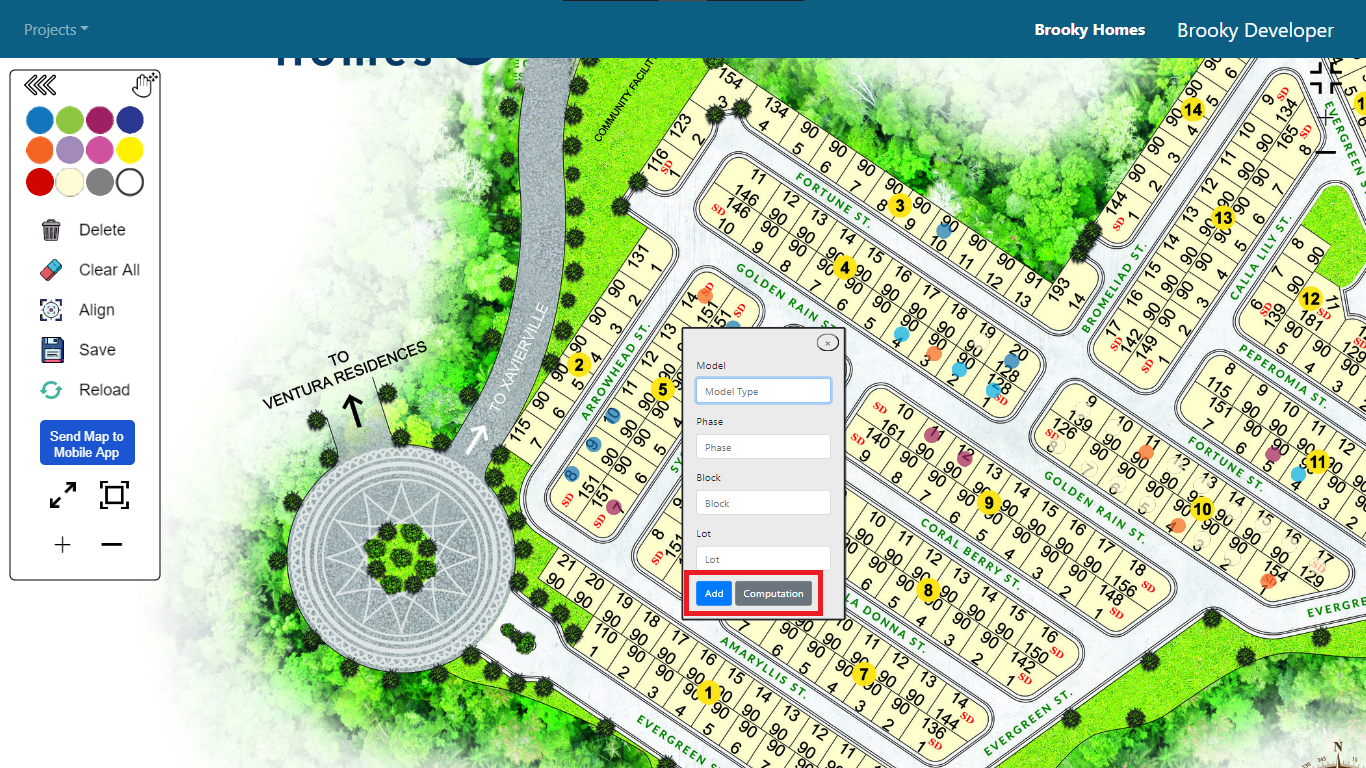
13. You can also click a specific property in the map and then edit its details.

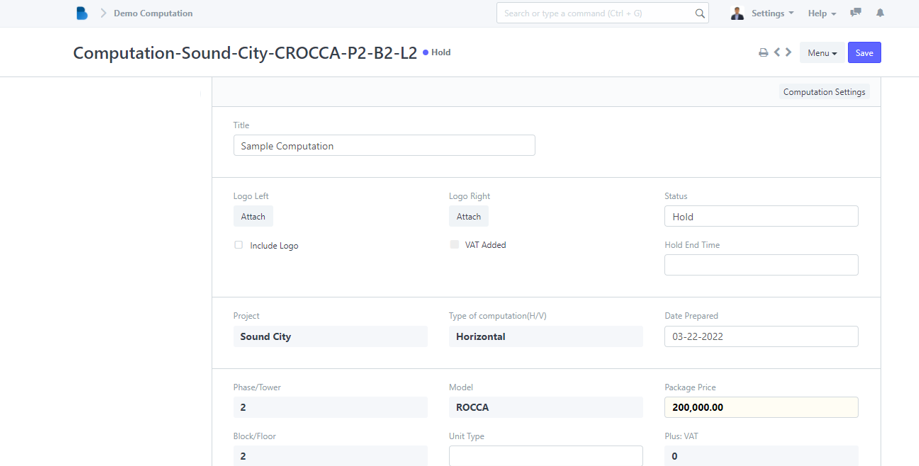
14. After entering the property's details, click the Add button, and the changes will be reflected in the property. When you click the Computation button, you'll be sent to the computation page, where you can see a detailed breakdown of the property's payments.
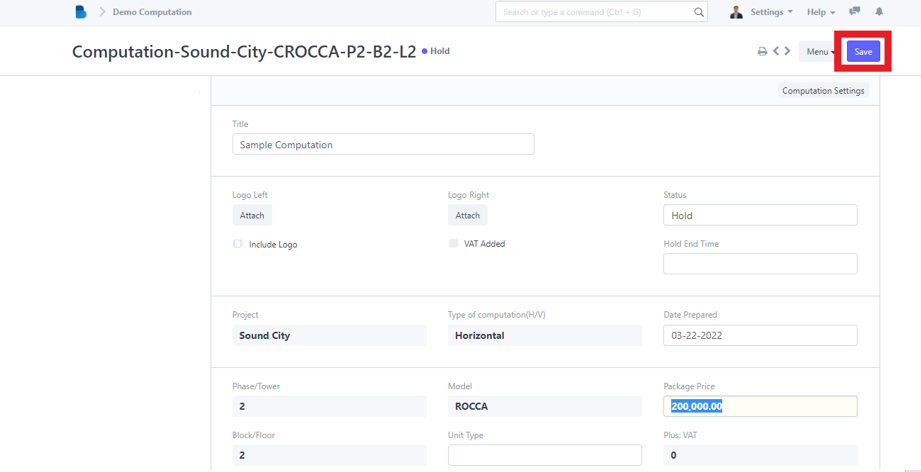
How to use Computation in the Interactive Map
1. On the Interactive Map module, click the Computation button in the Menu dropdown option and it will redirect you to its page.
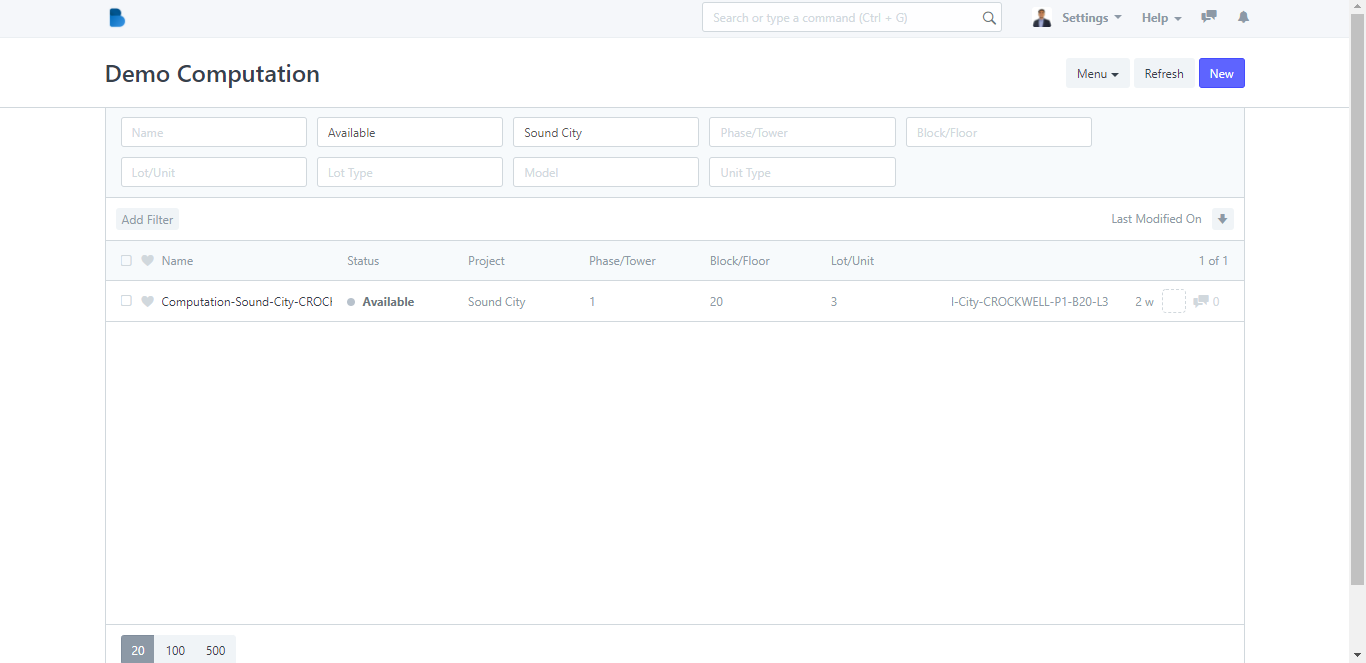
2. You can fill in these fields with the necessary information to quickly locate a certain computation.
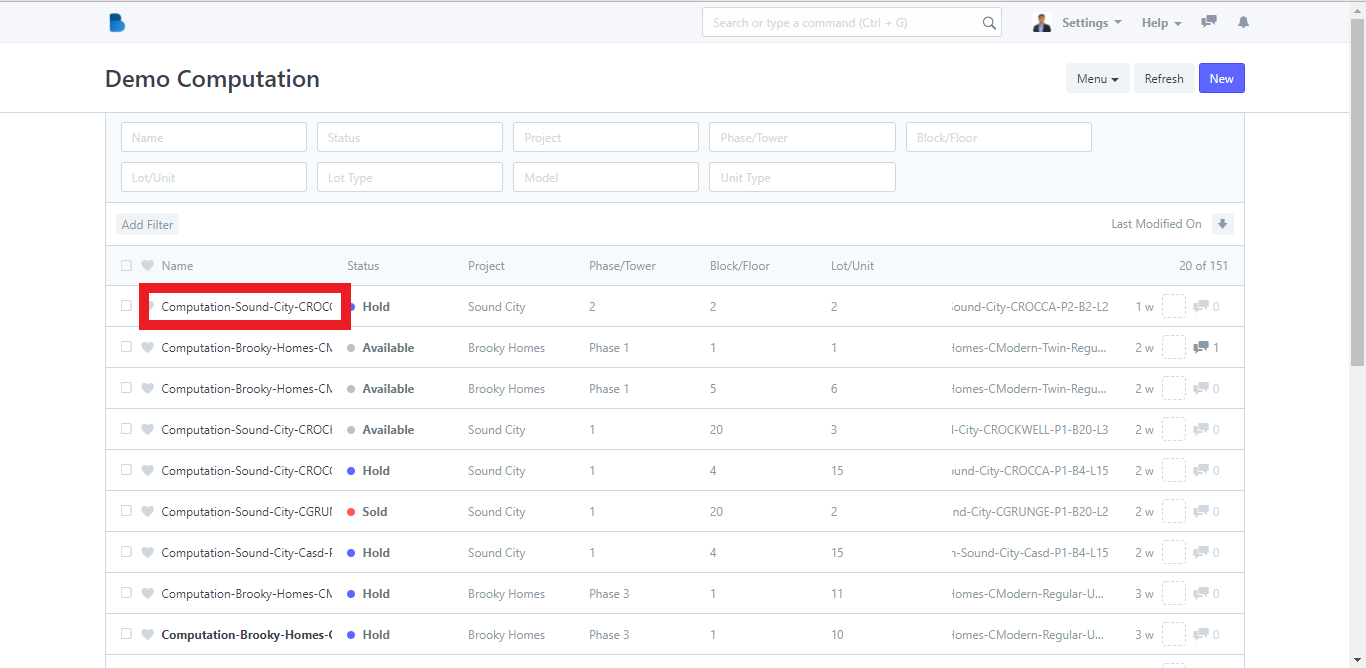
3. When you click a computation, you will be taken to the entire computation details for that property.
4. After you've filled in all of the necessary information, click the Save button.