How to Add a New Announcement in Brooky Broadcast
- Click Brooky Broadcast.

2. Once you click Brooky Broadcast it will navigate you to the Brooky Broadcast list page and you can see here all the announcements, meetings, seminars list and etc. that were created, and click New.

3. After clicking New, it will navigate you to the Creating Brooky Broadcast page to create a new announcement, meetings, seminars list and etc.


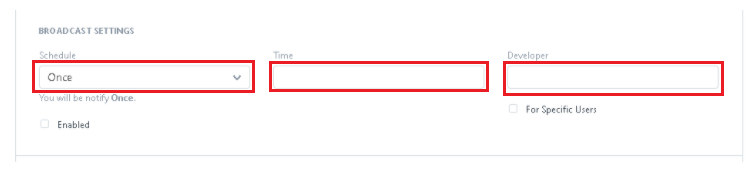
4. Once you are on the Creating a Brooky Broadcast page, Broadcast Settings are required to fill out; such as the schedule, time, and developer.
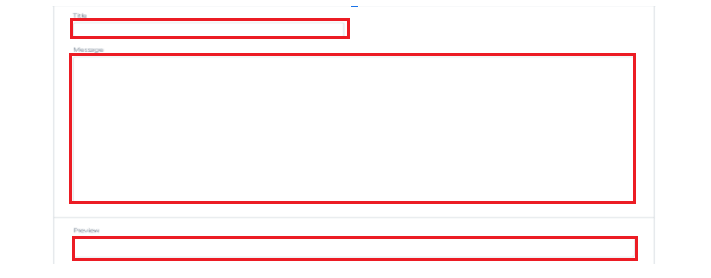
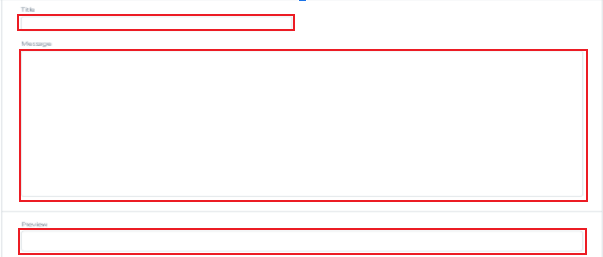
5. Enter the empty text field such as; Title, Message, and Preview.
6. Click Add Row to add Data and Insert the file.

7. After clicking the Add row, now click the drop-down arrow.

8. Click Attach to attach a file. Once you’re done, drop a file or attach a web link, upload it by clicking the Upload button.


9. After Uploading a file click the arrow up beside the “Move” button, to close.

10. And for deleting the row, just click the “trash” icon with red bg.

11. Once you are done filling up the new Brooky Broadcast or new Announcement, click Save.

12. After you save the Brooky Broadcast that you created, click Brooky Broadcast upper left to go to the Brooky Broadcast list page.

13. In the Brooky Broadcast list page, click Add filter or enter a Name or Title so you can find it easily.

14. Just click the Clear filter or Remove button to remove the filter you’ve added.
