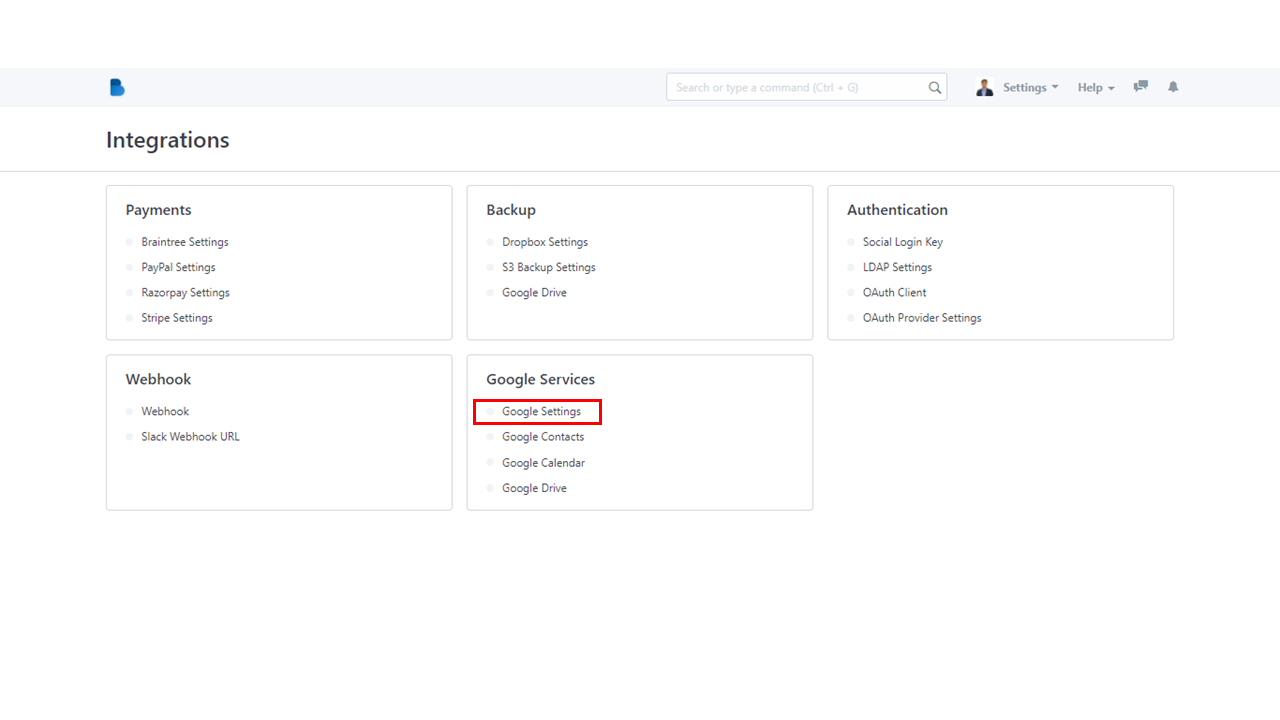
(Integrations) Google Services
- Click the Integrations module under ADMINISTRATION section.

2. In the Google Services, select the first subcategory which is Google Settings.
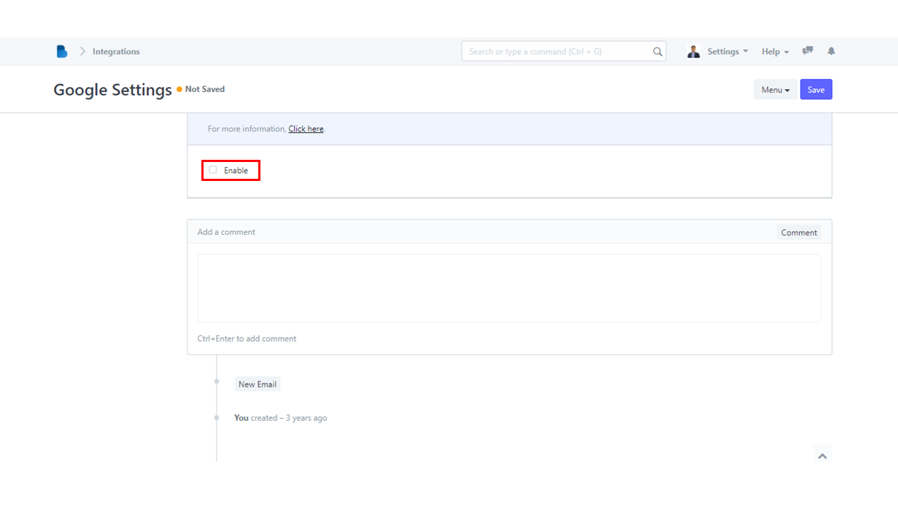
3. You'll be taken to the Google Settings page where you'll find an enable checkbox. Enable Google Settings by checking that box.
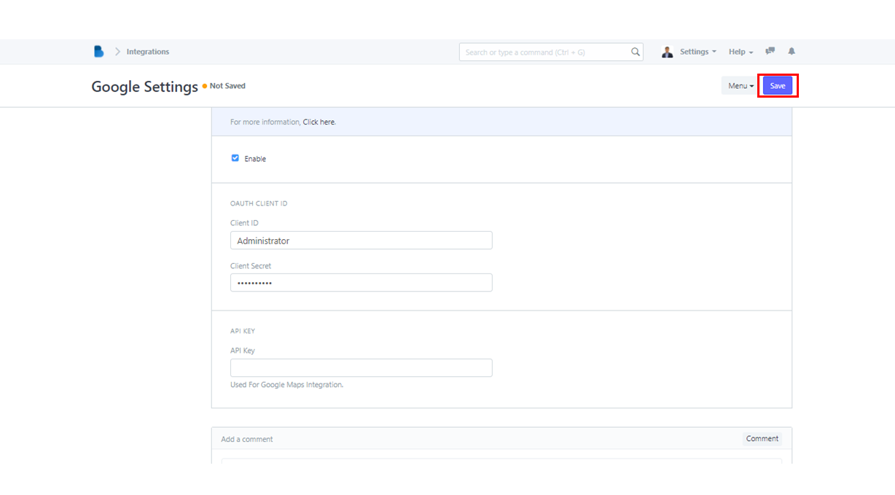
4. There are fields that will hovered down once you click enable. You can edit the Client ID, Client Secret, and API Key. Once done, your last step is to click Save.
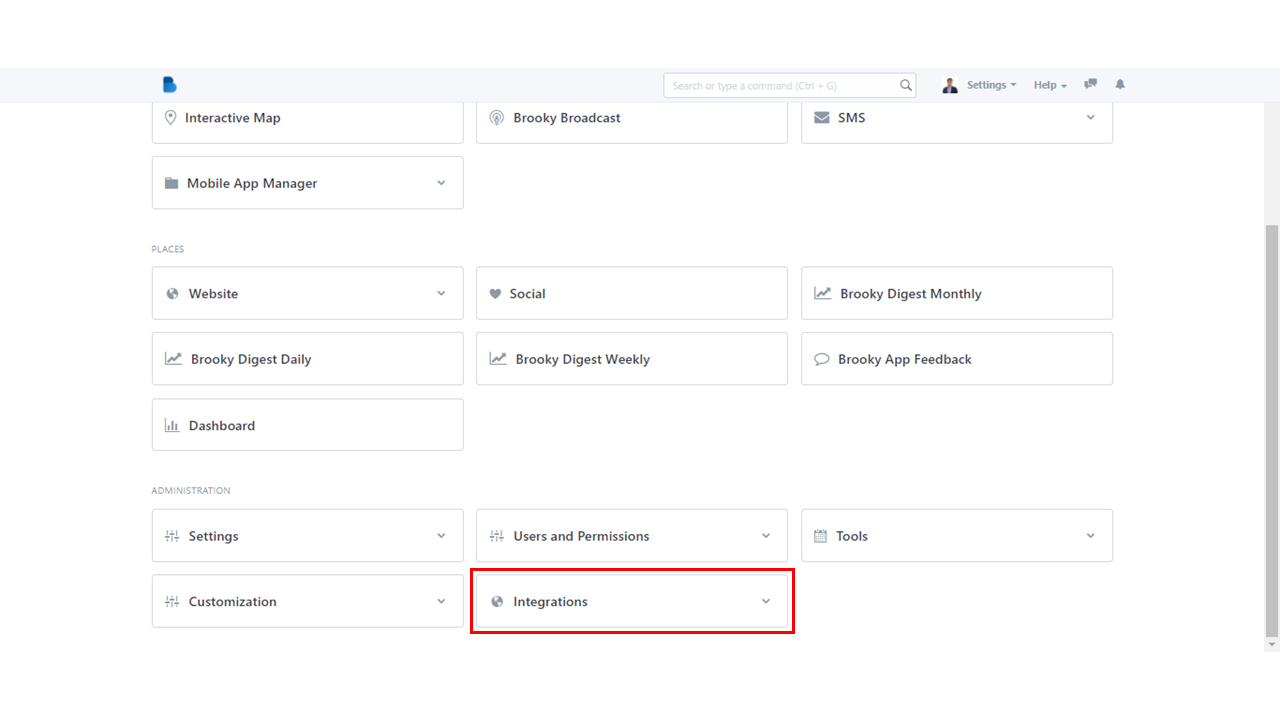
- Look for Integration module under ADMINISTRATION section in the lower portion of Admin homepage.
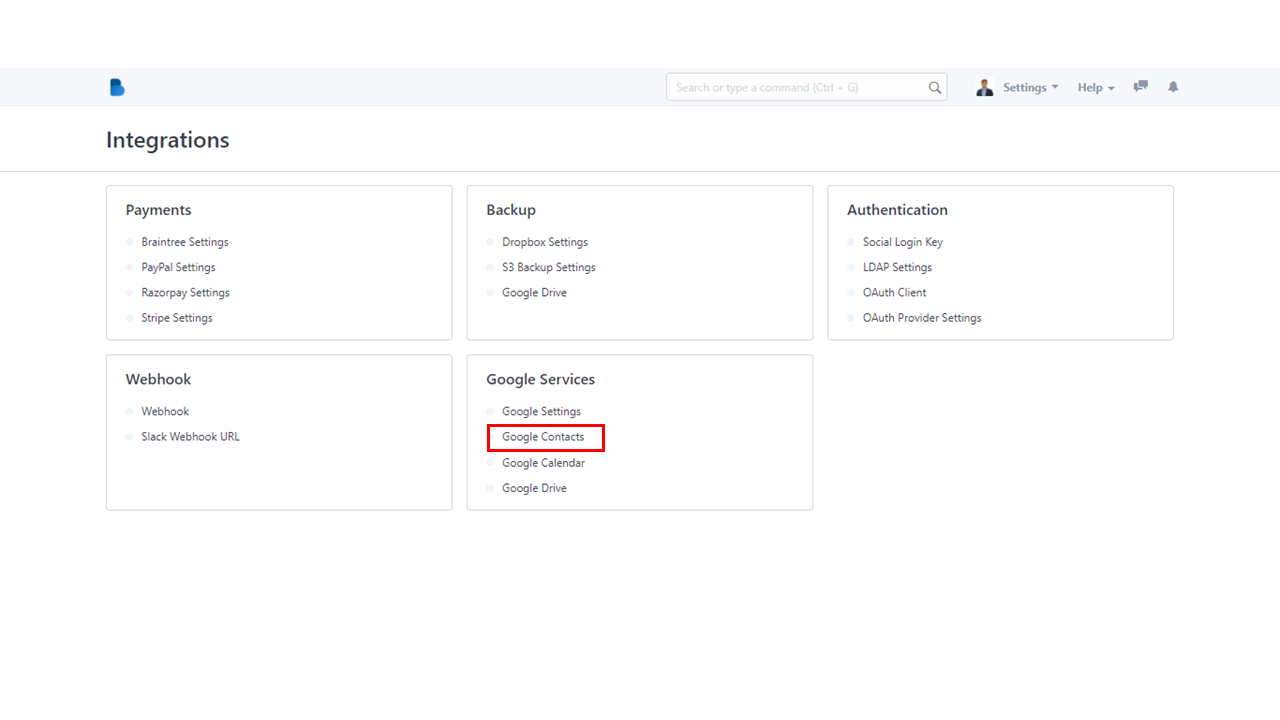
2. Next, in the Google Services category, click Google Contacts.
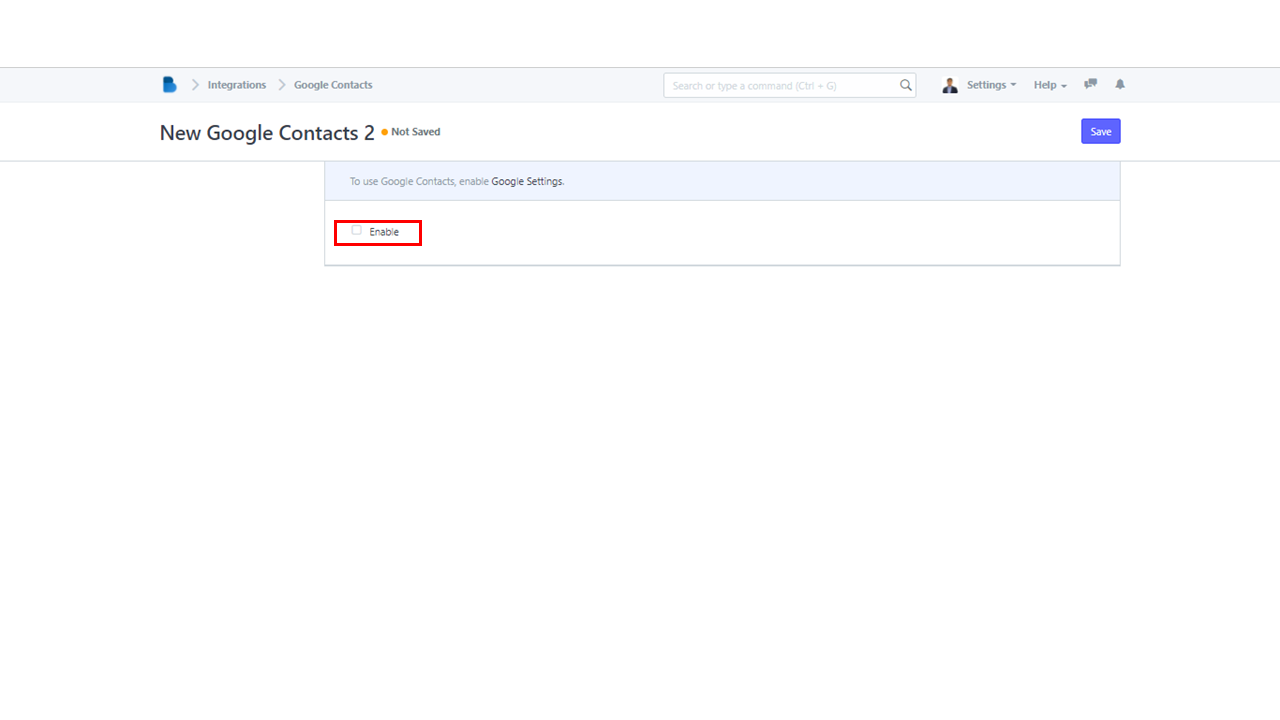
3. To create a new google contact, click New or Create a new Google Contact.

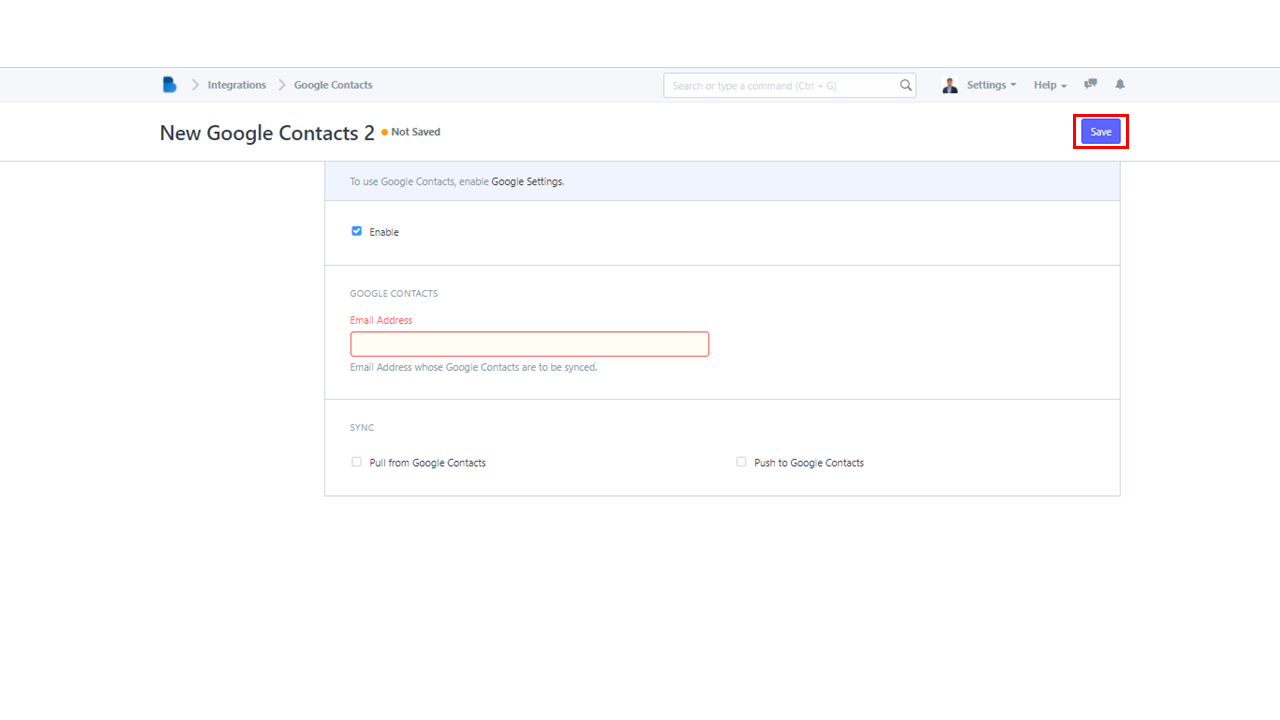
4. It will automatically navigate to the page where you can enable the google contacts. Once you check the checkbox, the system will let you provide an email address whose google contact is about to be sync. Once done, click Save.
If your Google API isn't enabled yet, then you are required to enable it first in Google Settings.
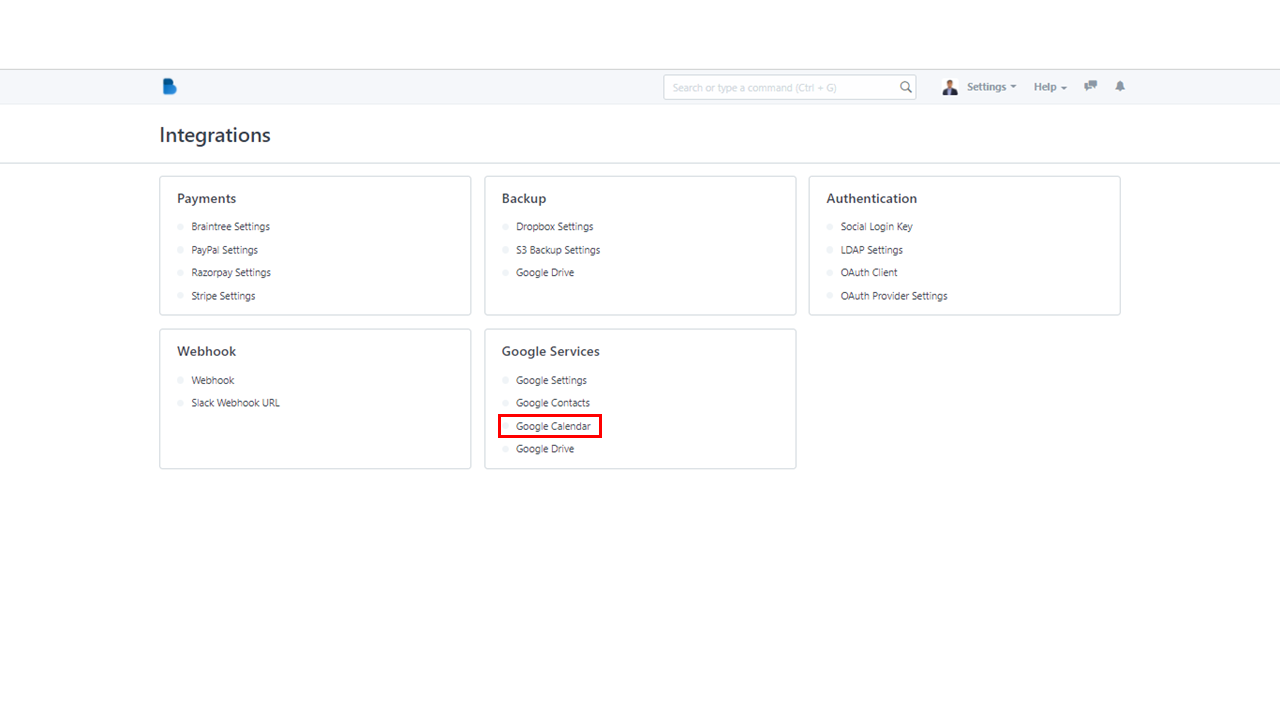
- In the Admin Homepage, scroll down to ADMINISTRATION section and click Integrations.

2. In Google Services, select Google Calendar to navigate into google calendar page.
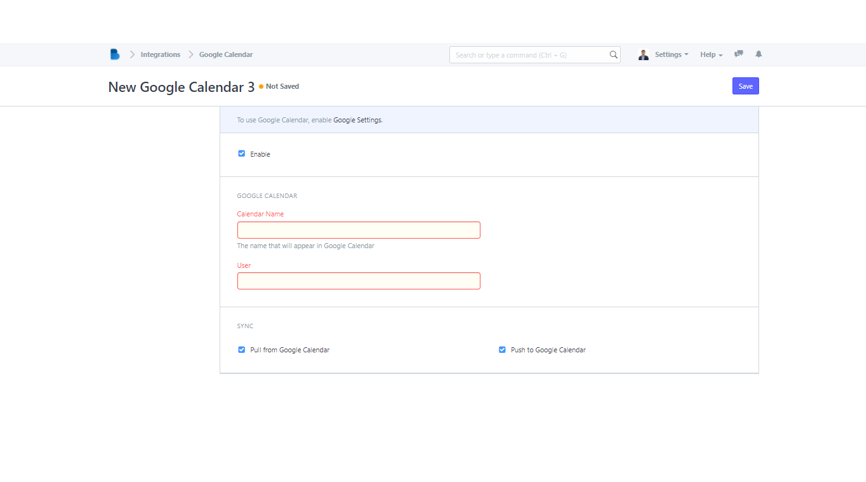
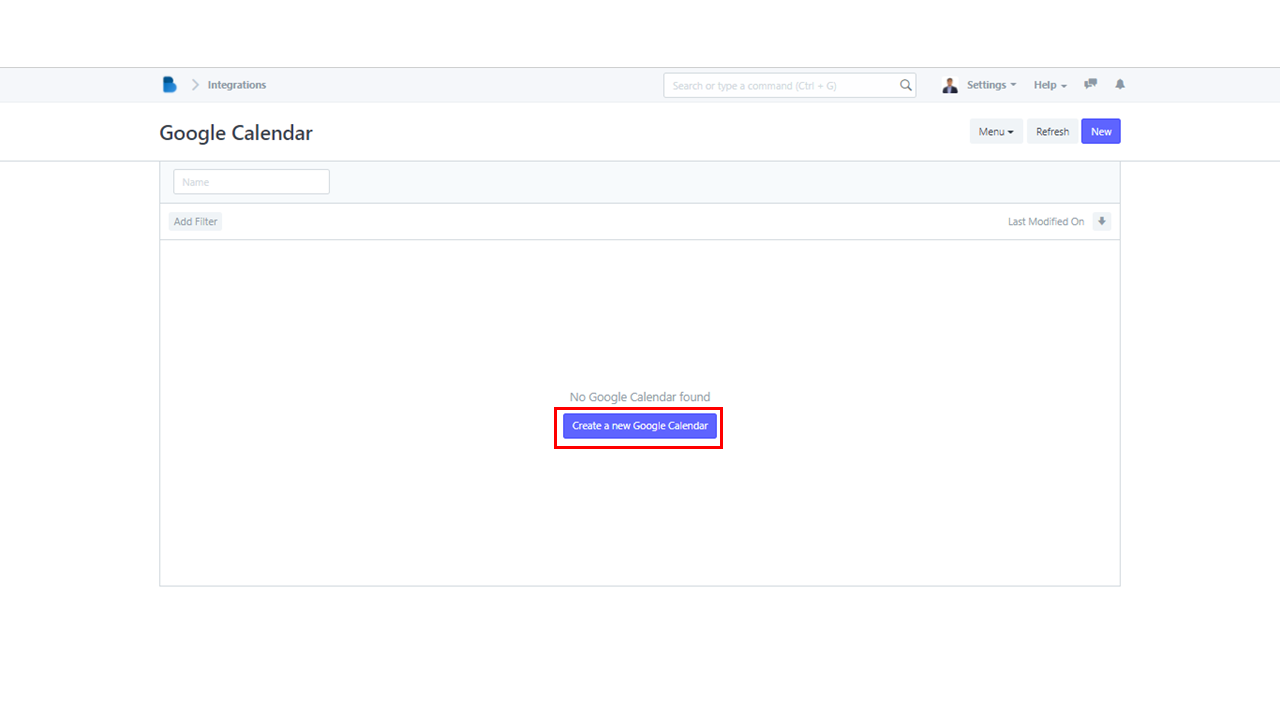
3. By clicking Create a new Google Calendar or New, you'll be able to create a new Google Calendar.
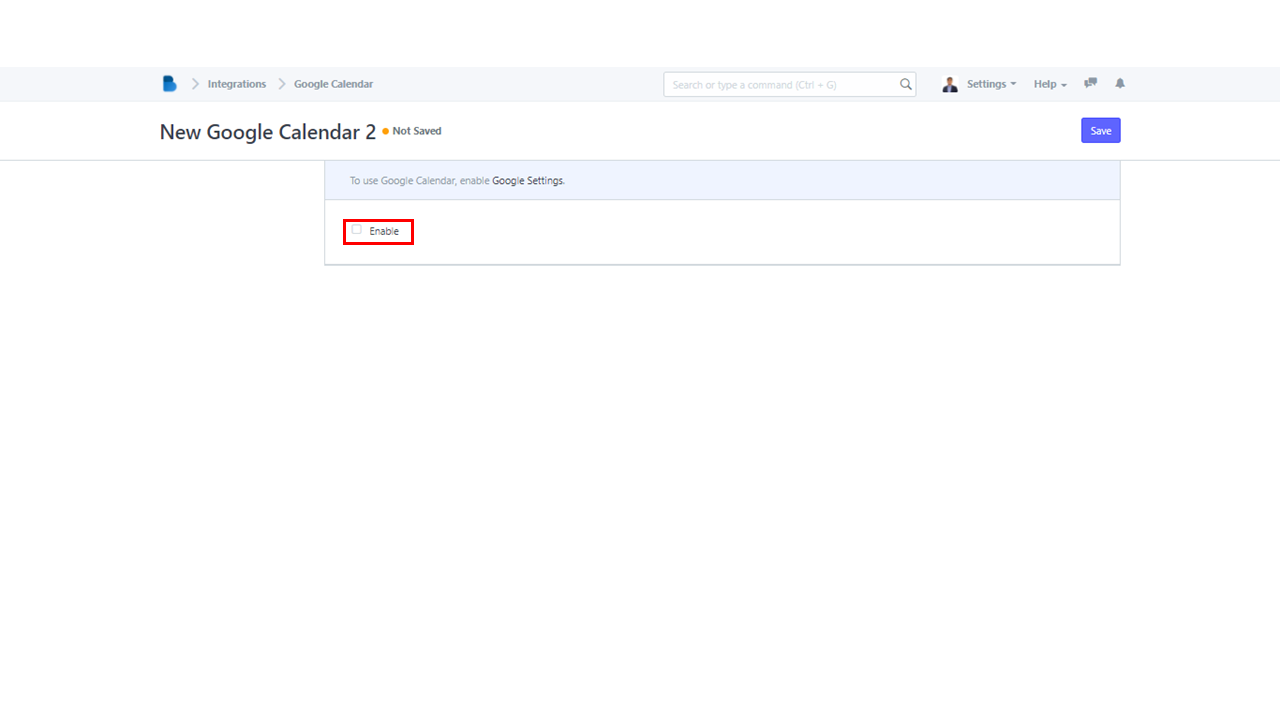
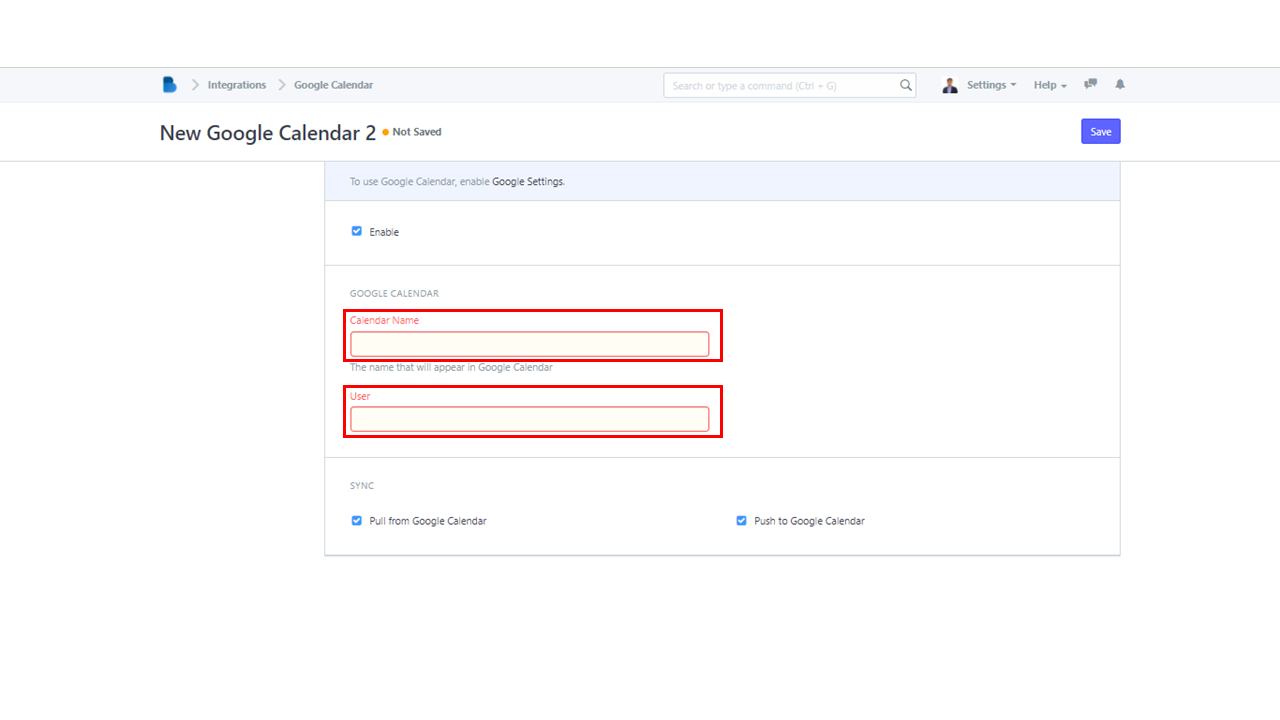
4. Check the enable checkbox. Once checked, the system will ask you to provide the Calendar Name and User. Fill out the necessary fields to proceed.
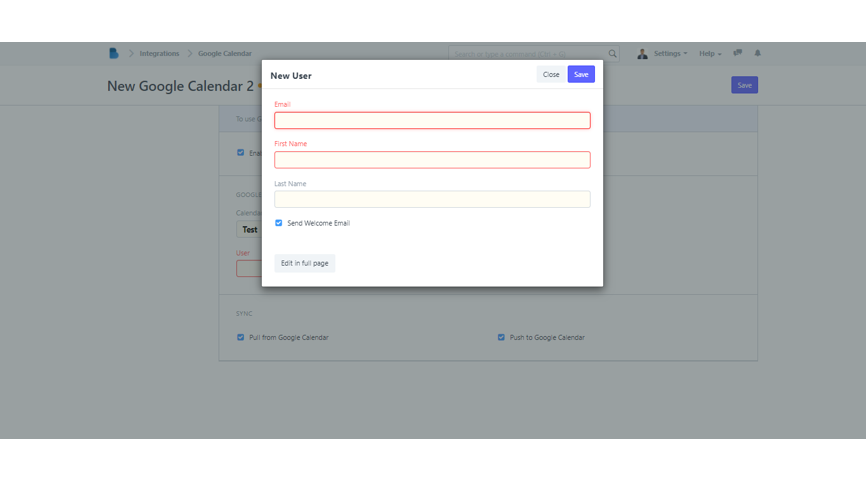
5. If you haven't created a user yet, you can add a new user by clicking the User field and type the user's email address. A "Create a new user" will hovered down after. Click it to continue.

6. A box will appear and this is where you will type the new user's email, first name, and last name. The user will be added to your lists after you click Save.
7. After filling out the essential fields (Calendar Name and User), you can now proceed and click Save.