Interactive Map Module

1. Open the Brooky Portal and login your credentials.
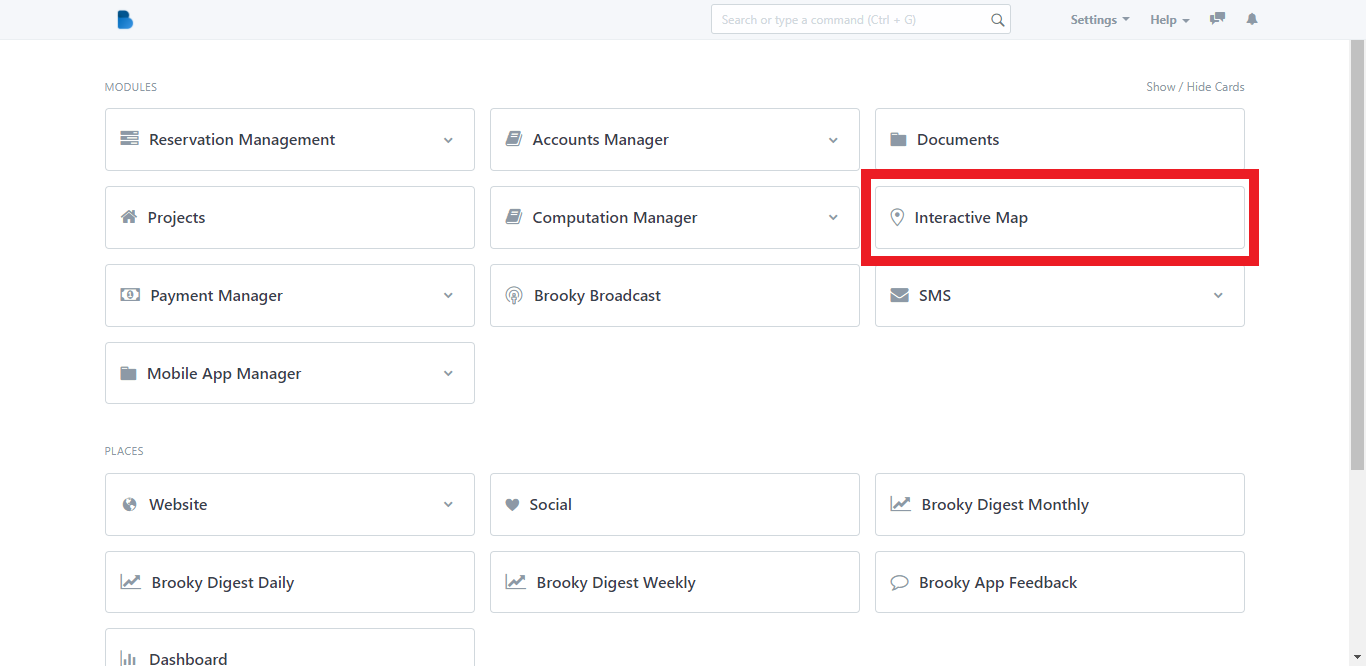
2. On the Brooky Admin Portal homepage, click on the Interactive Map and it will redirect you to its page.
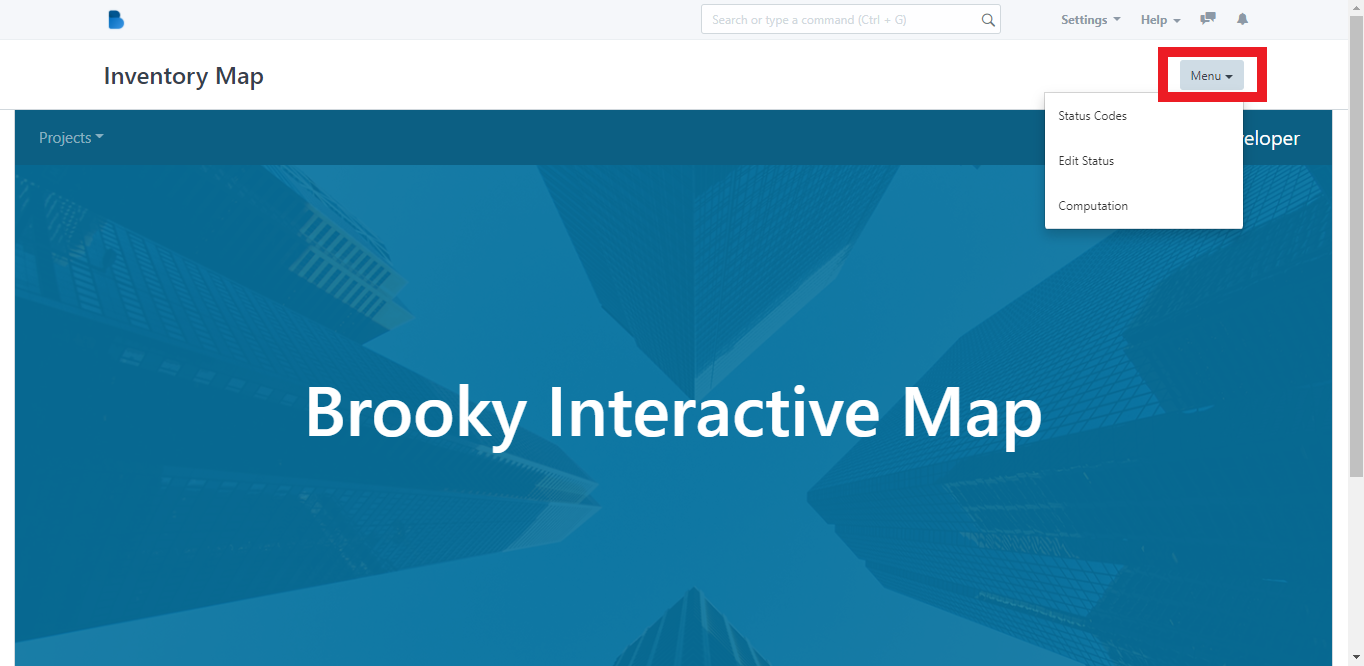
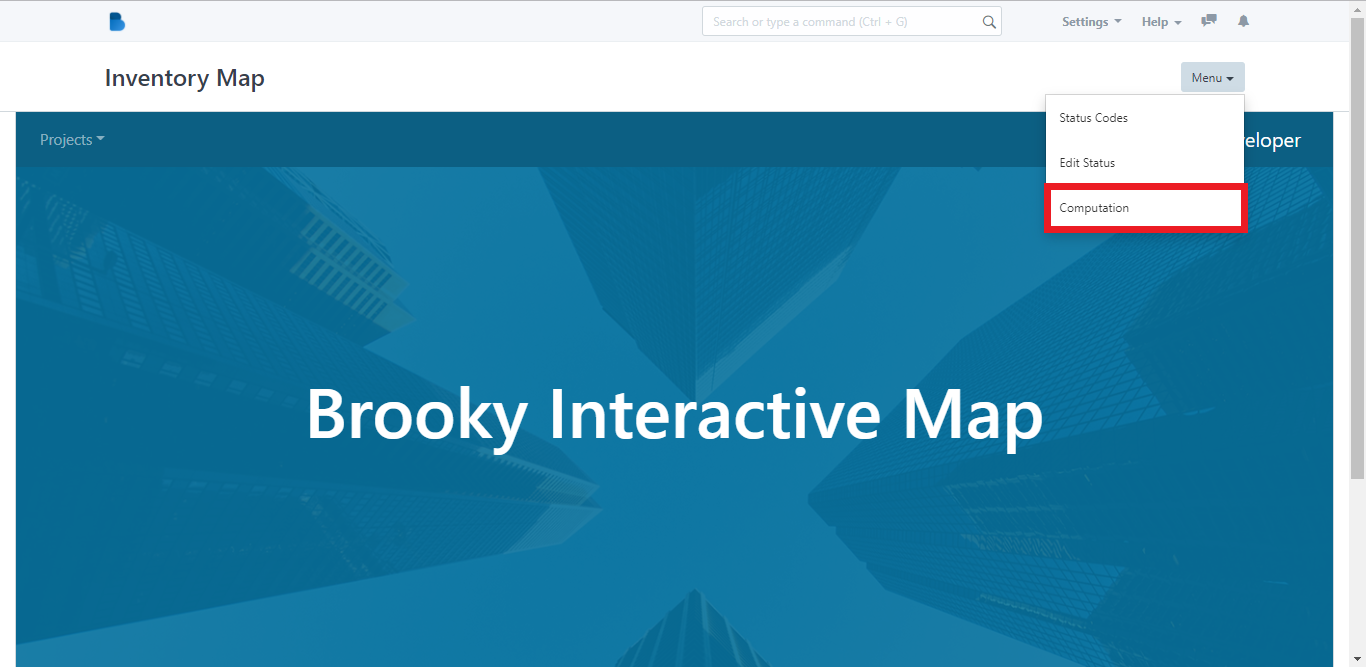
3. In its page, it has a Menu dropdown button. The Menu has three options; Status Codes, Edit Status and Computation.
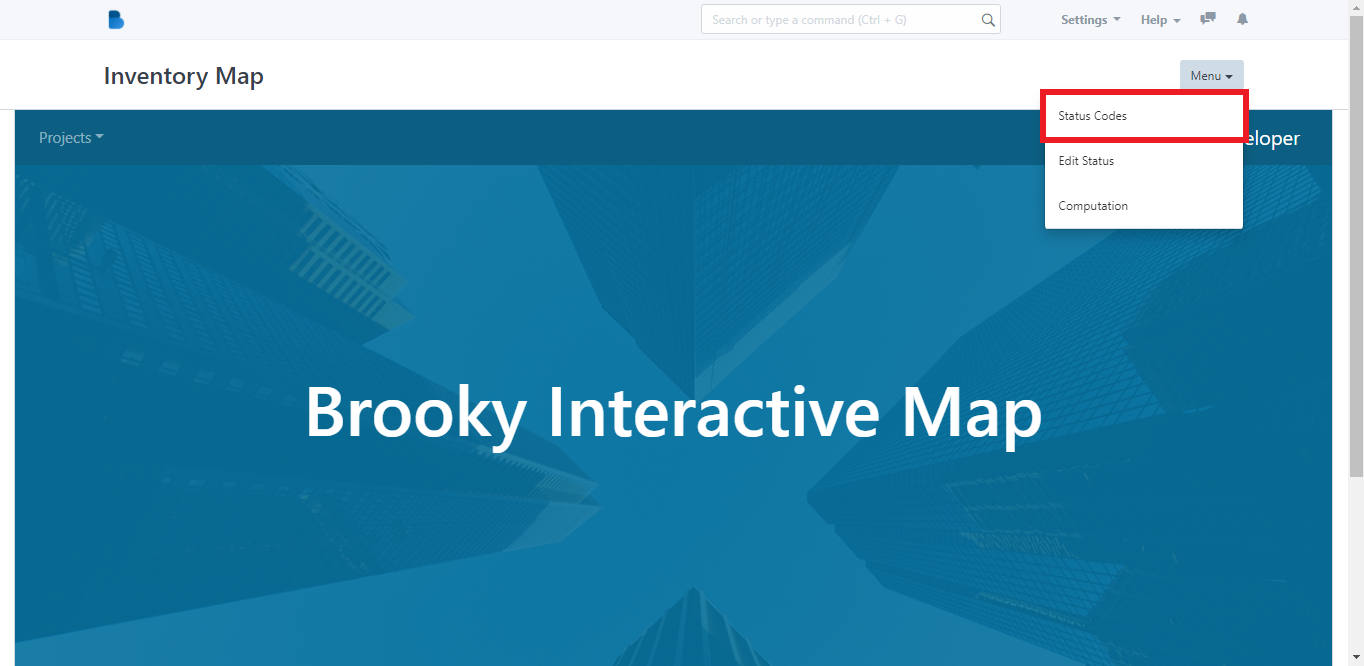
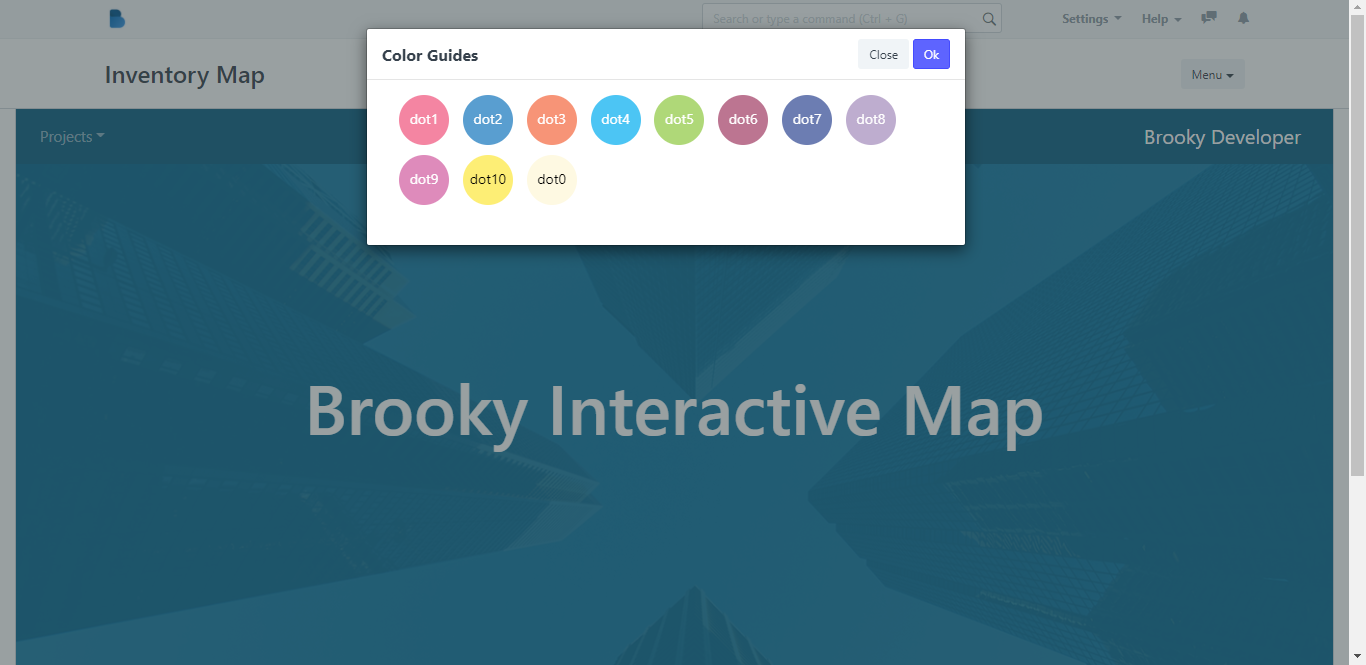
4. In the Menu option, click Status Codes and it will display the color guides in the interactive map. After that, click Close or Ok as both options work the same to exit from the color guides.
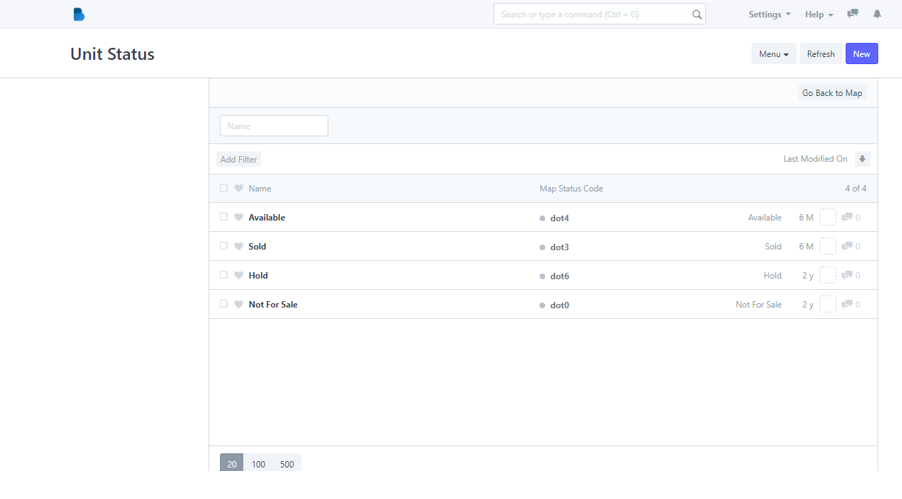
5. In the Menu option, click Edit Status to add unit/property status, ie. Available, Sold, On Hold and Not for Sale. After clicking Edit Status, it will redirect you to its page.

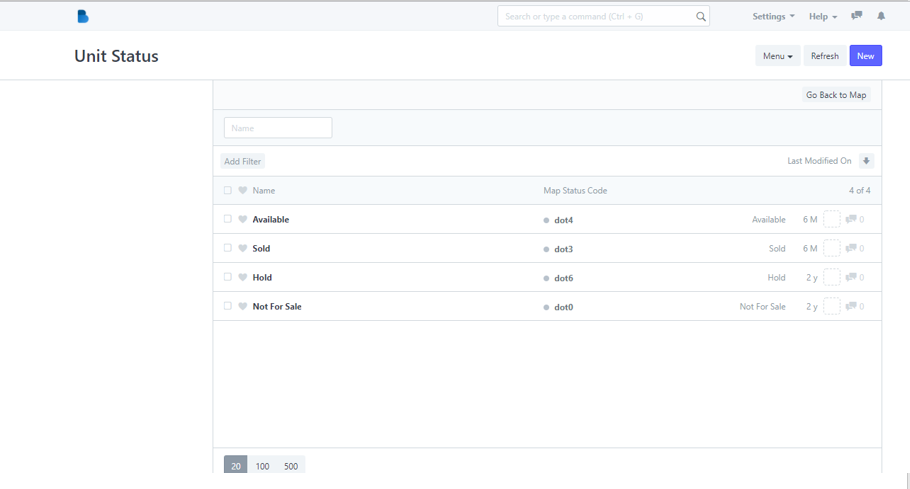
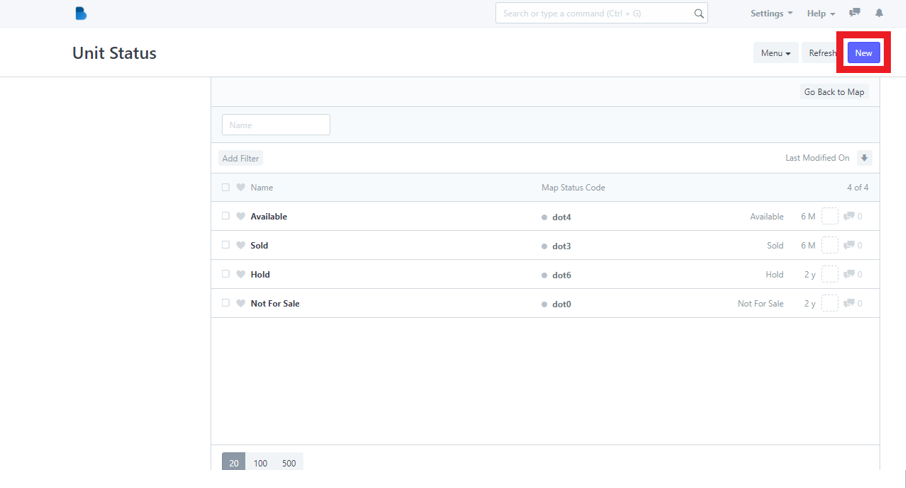
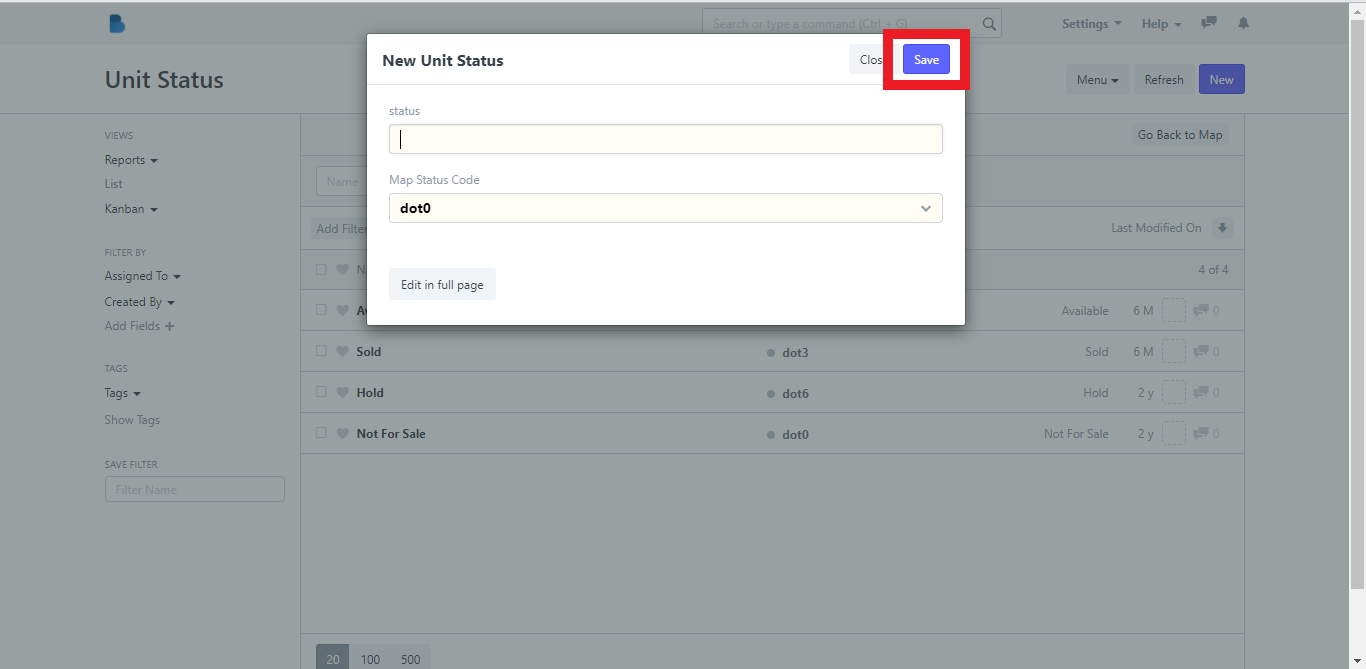
6. In the Unit Status page, click the New button to add a new unit status. After adding a new unit status, click Save.
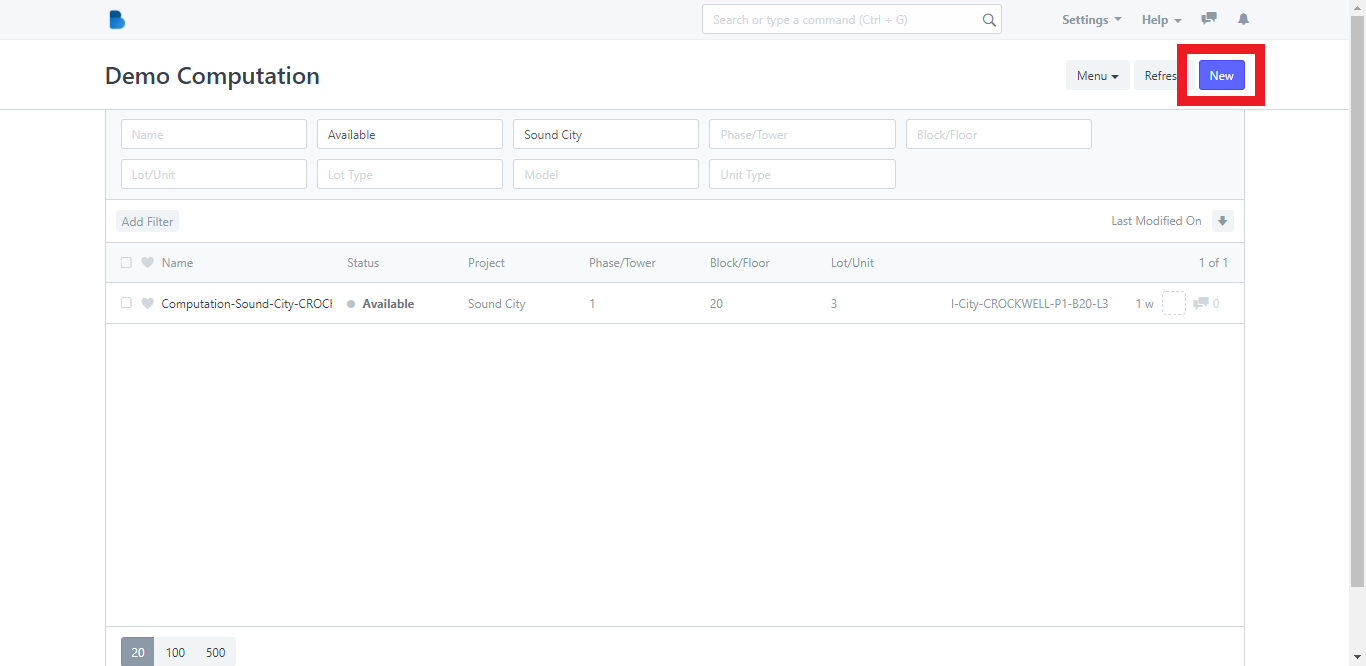
7. In the Menu option, click Computation and it will redirect you to its page. You can add filters to the property computations and you can create new computation by clicking the New button.
1. On the Interactive Map module, click the Edit Status button in the Menu dropdown option and it will redirect you to its page.
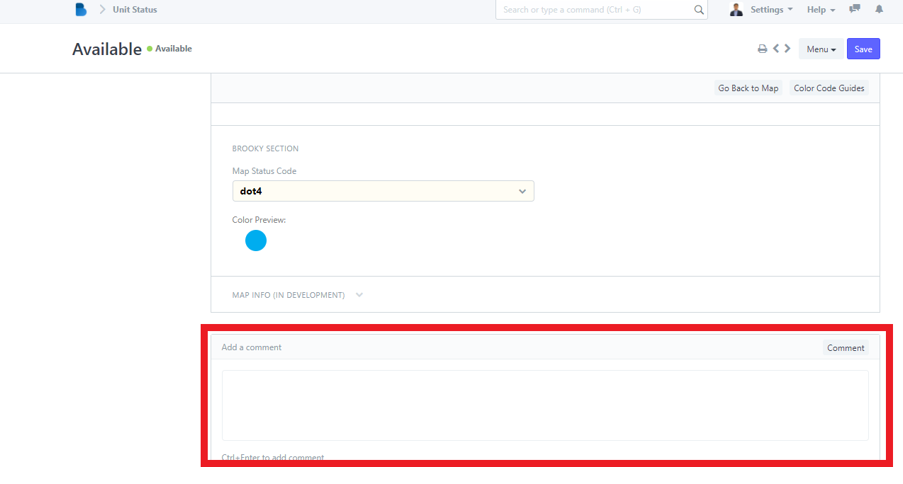
2. Click one status code, i.e the Available status code. After clicking, it will redirect you to its page.
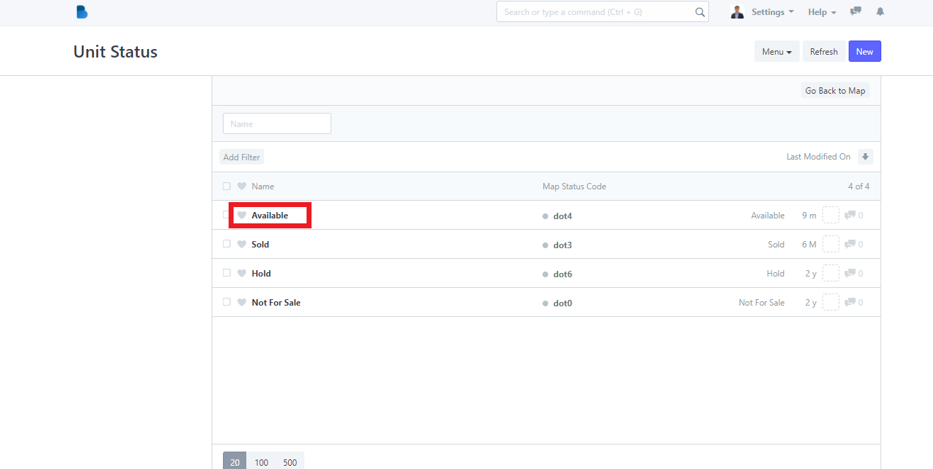
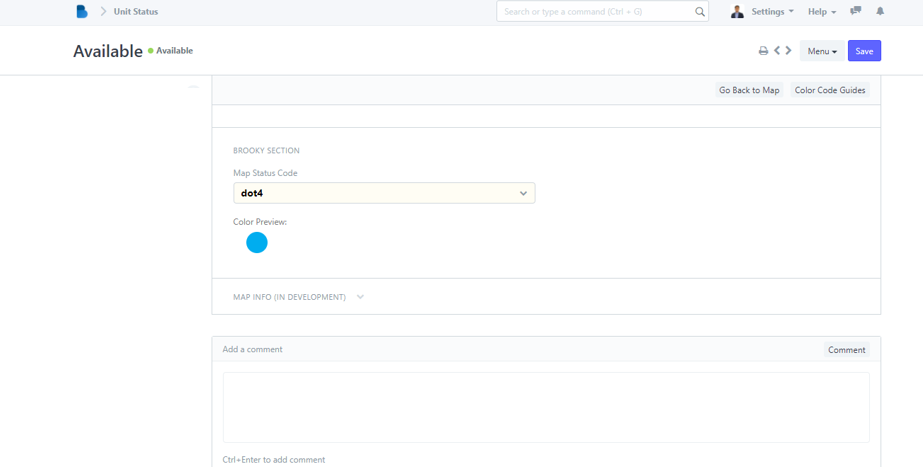
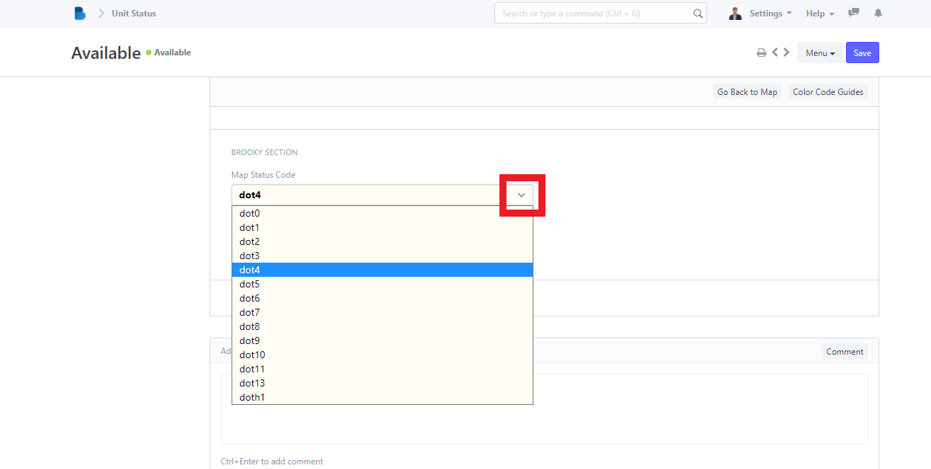
3. Click the Map Status Code dropdown option and you can now choose what dot number for the specific status code.
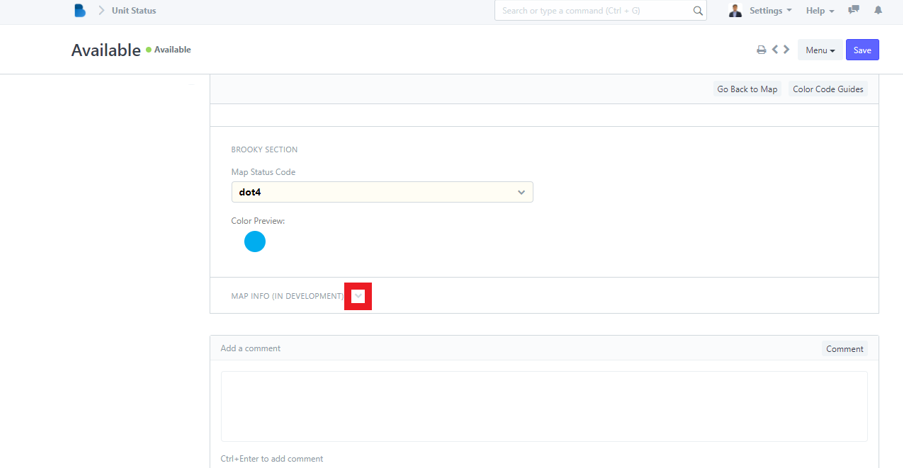
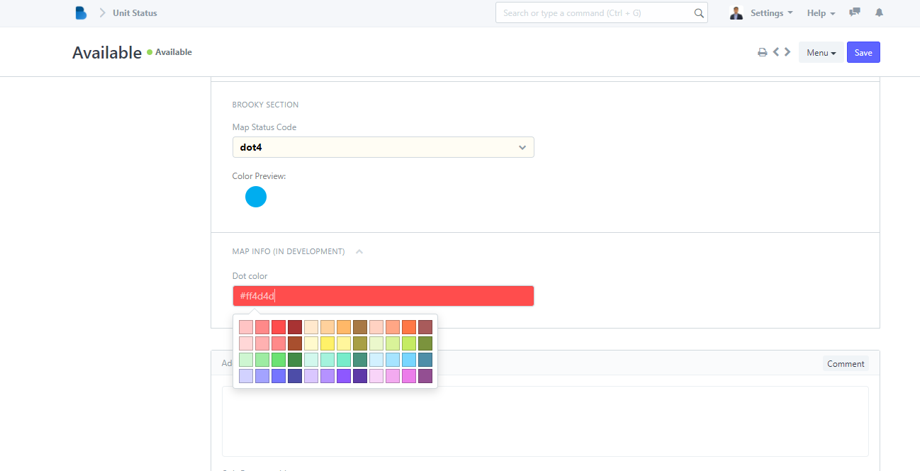
4. Click the Map Info dropdown option to change the dot color for in development properties in the interactive map.
5. You can also add a comment regarding the map status code.
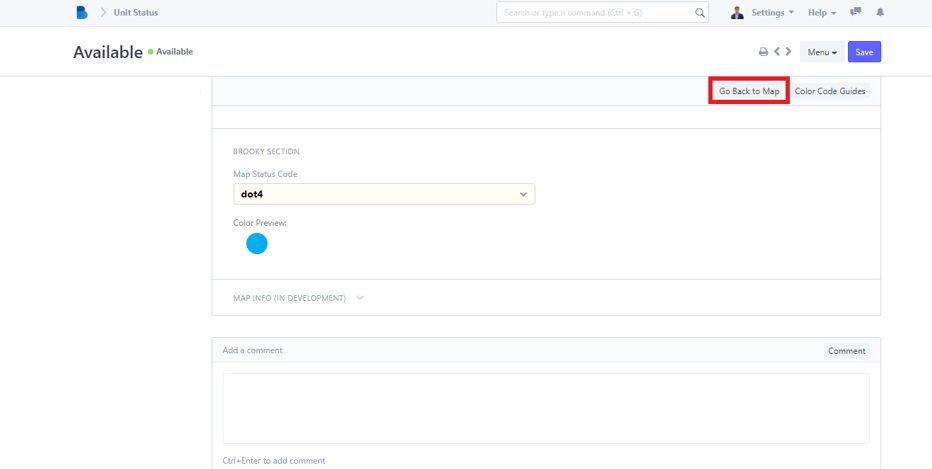
6. Click the Go Back to Map button and it will bring you back to the Inventory Map page.
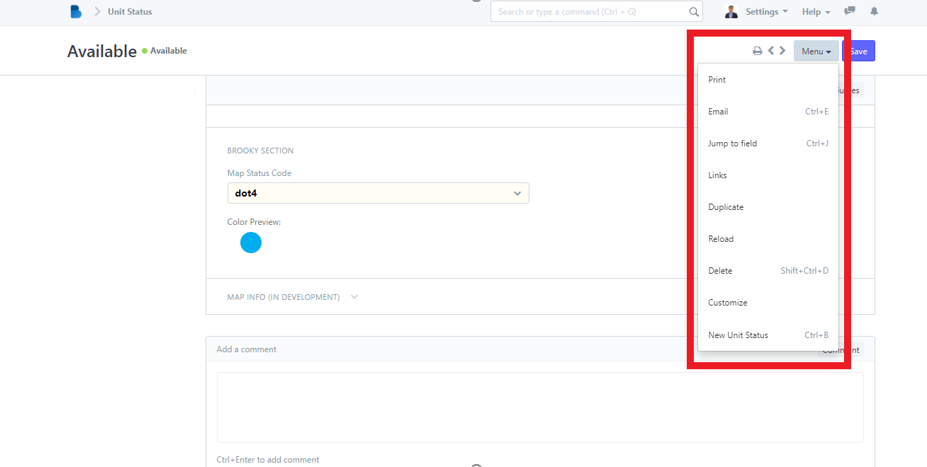
7. You can also see another Menu dropdown option in the Unit Status page. It has a Print option where you can save a pdf file of the status code, Email option where you can send the status of a property through email, Jump to field option, Links option, Duplicate option, Reload option, Delete option, Customize option and New Unit Status option where you can add a new status code.
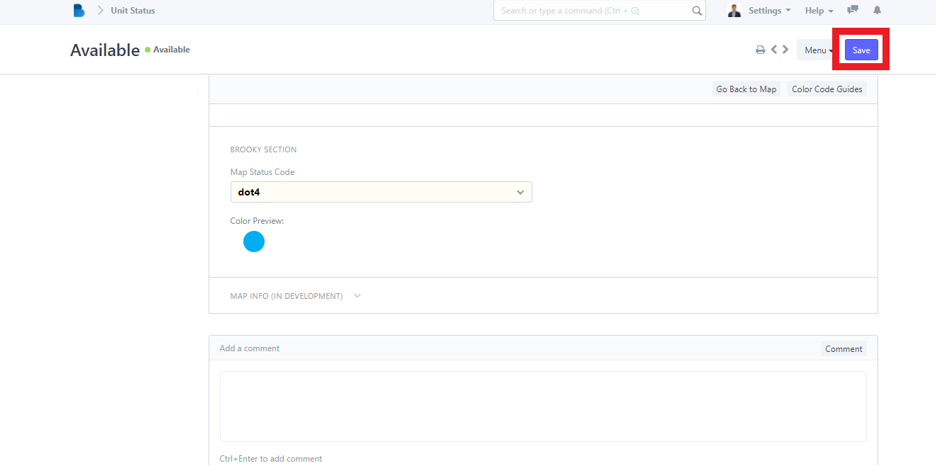
8. After you've made your changes, click the Save button.
1. Open the Brooky Portal and login your credentials.
2. On the Brooky Admin Portal homepage, click on the Interactive Map and it will redirect you to its page.
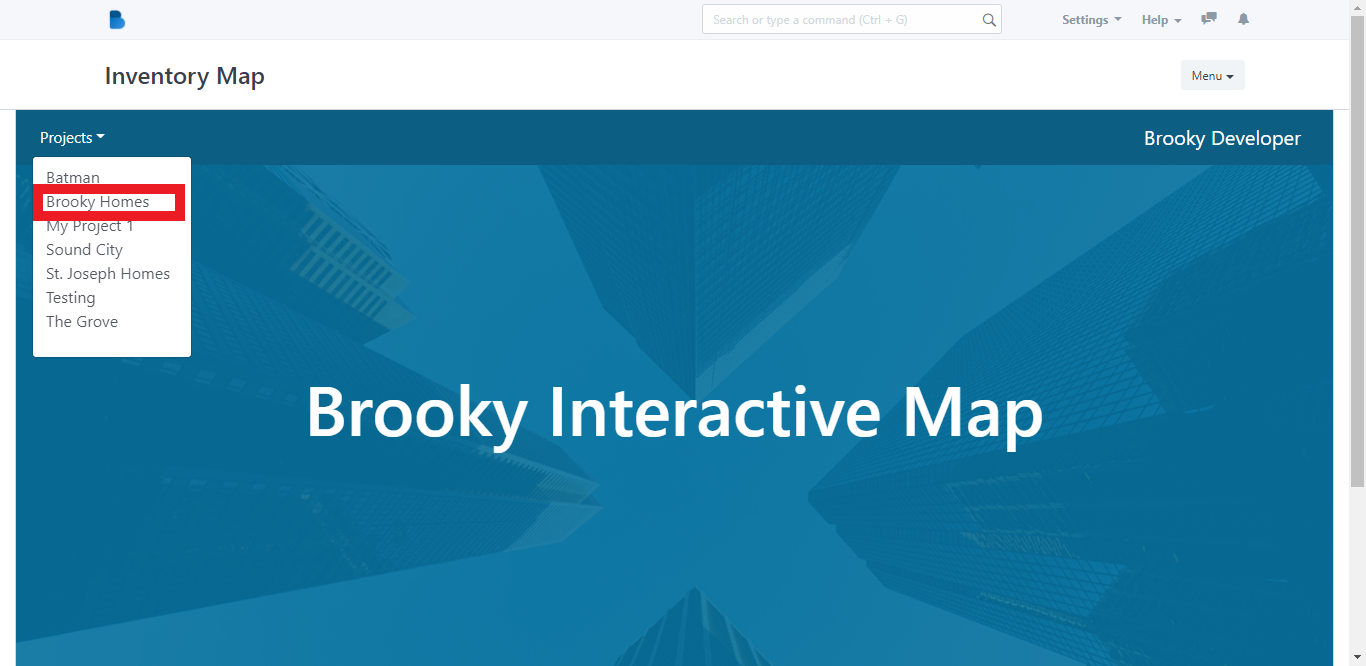
3. In its page, it has the Projects dropdown button. This will display a list of all the interactive maps created for each project.
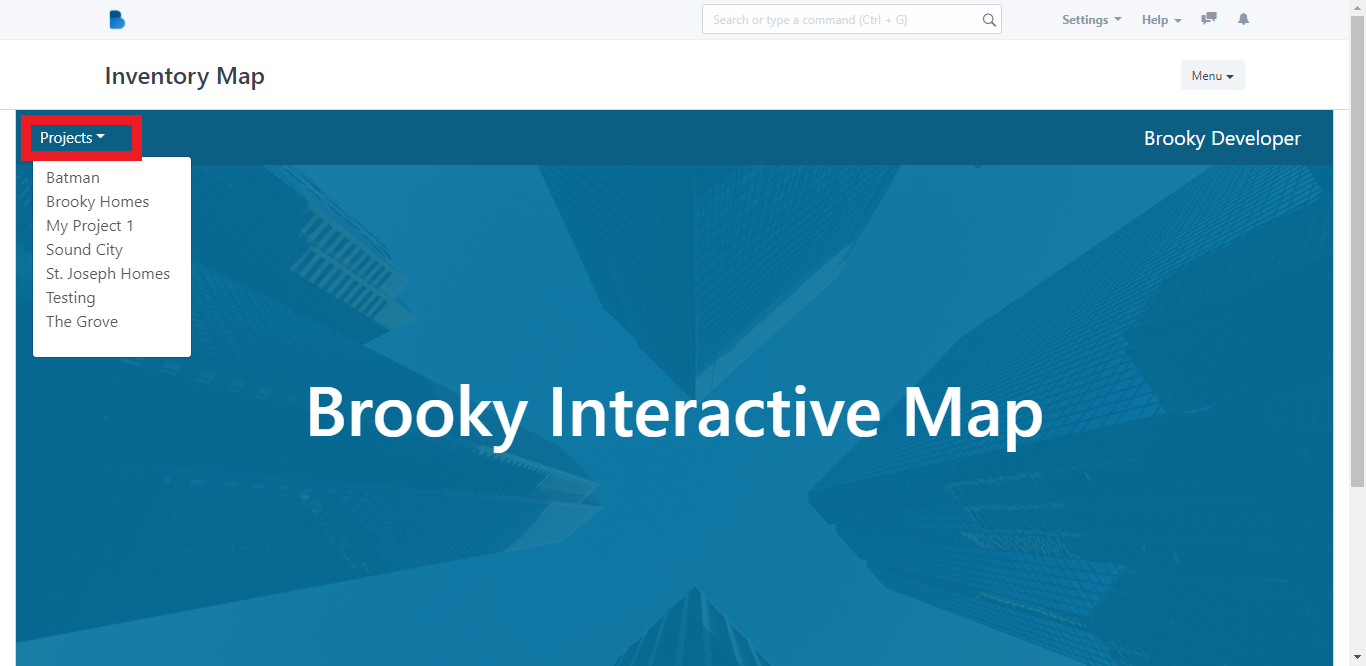
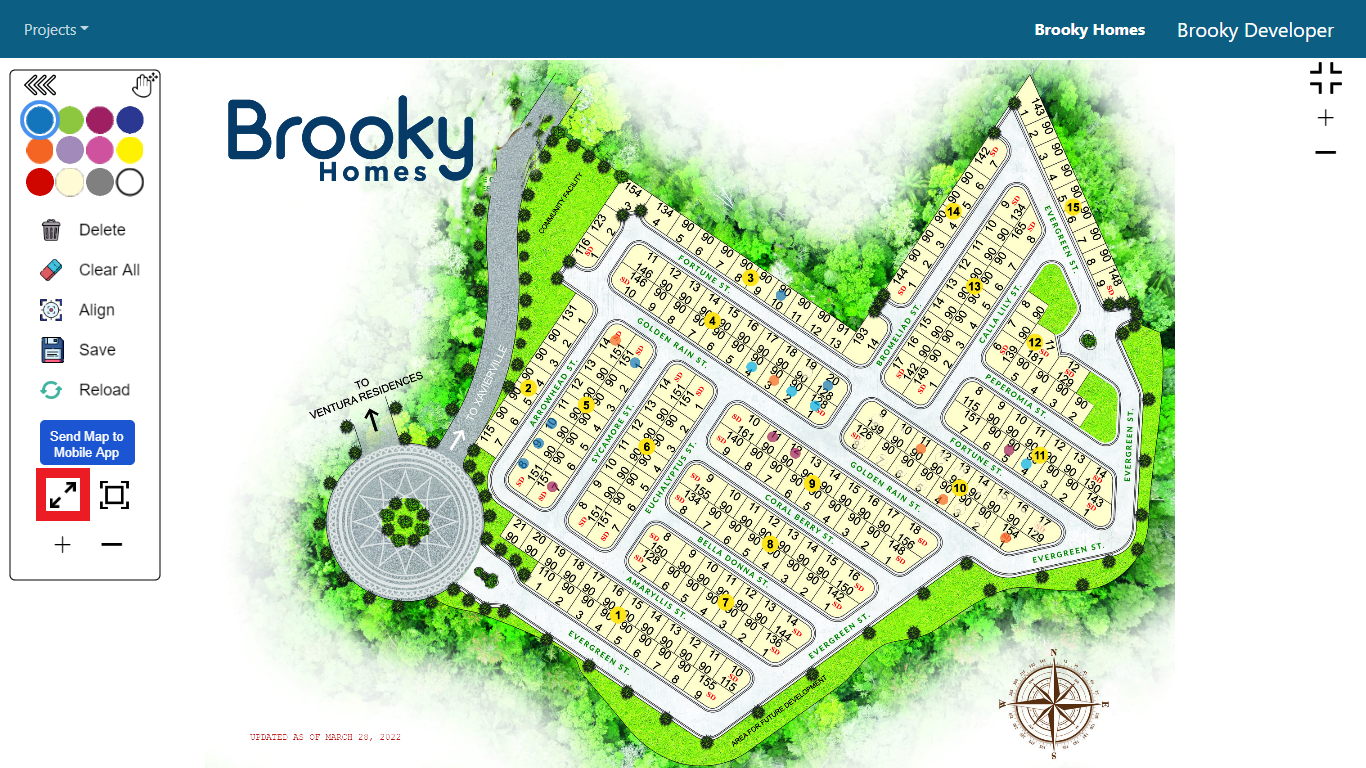
4. Click one project (Brooky Homes) to see its sample map.

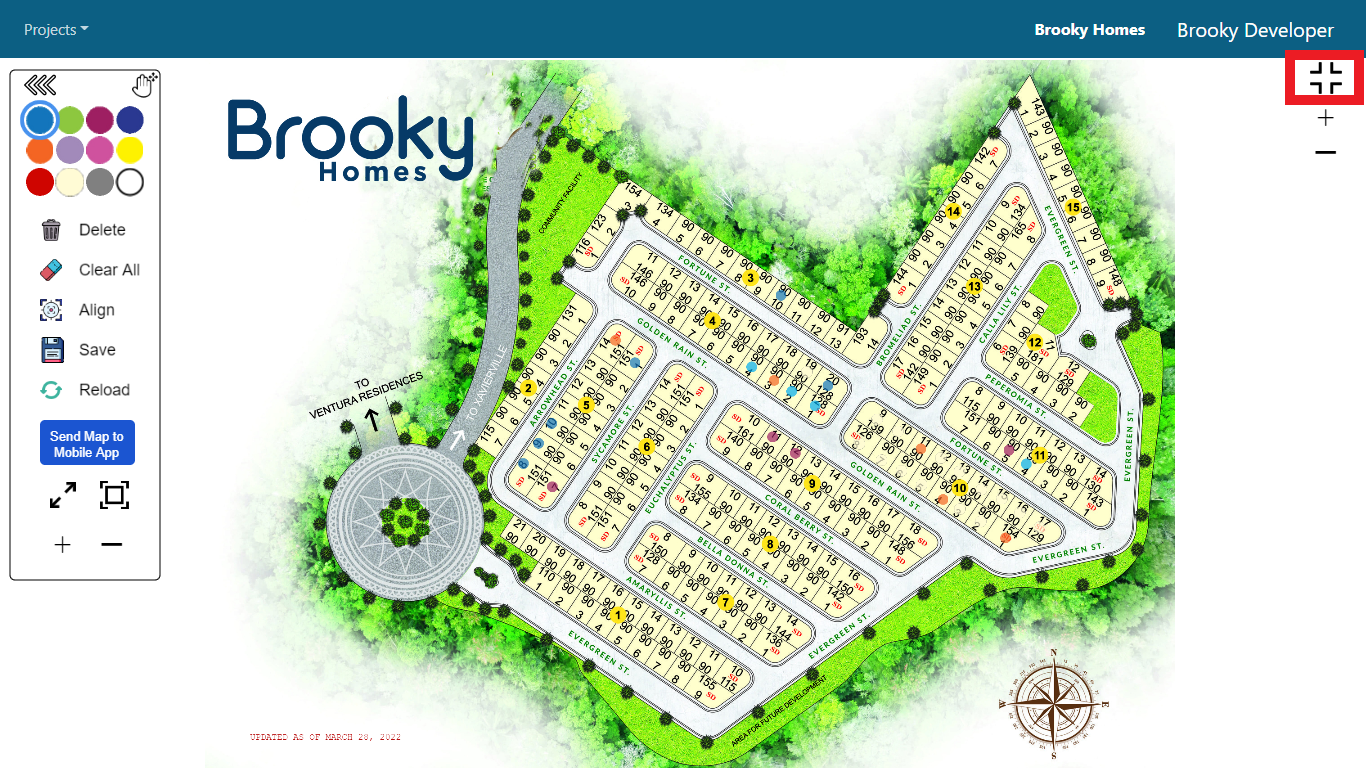
5. In the sample map, there are different buttons displayed. To have a full screen view of the map, see the photo below. To exit full screen, press Esc on your keyboard or just click the full screen icon again.
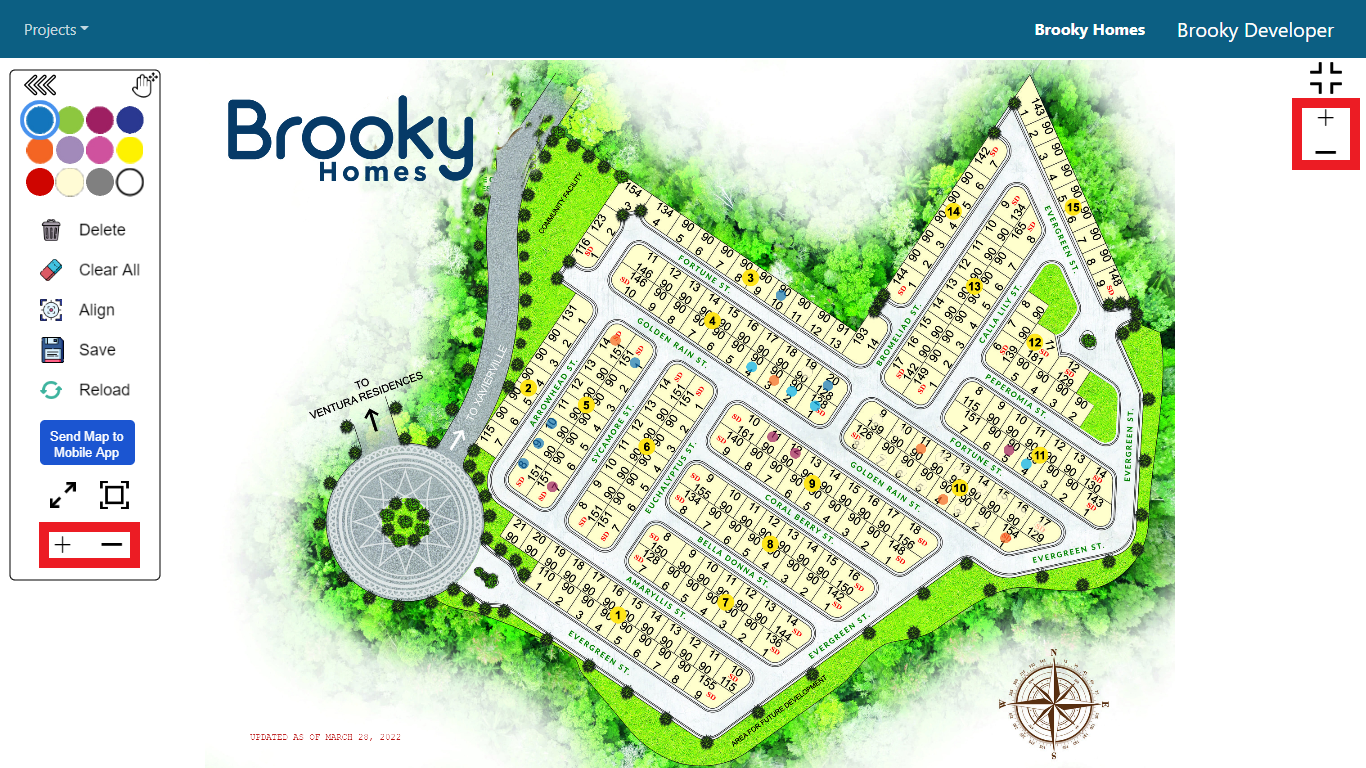
6. To zoom in and zoom out the map, see the photo below.
7. Another zoom in feature in this map is the photo shown below.
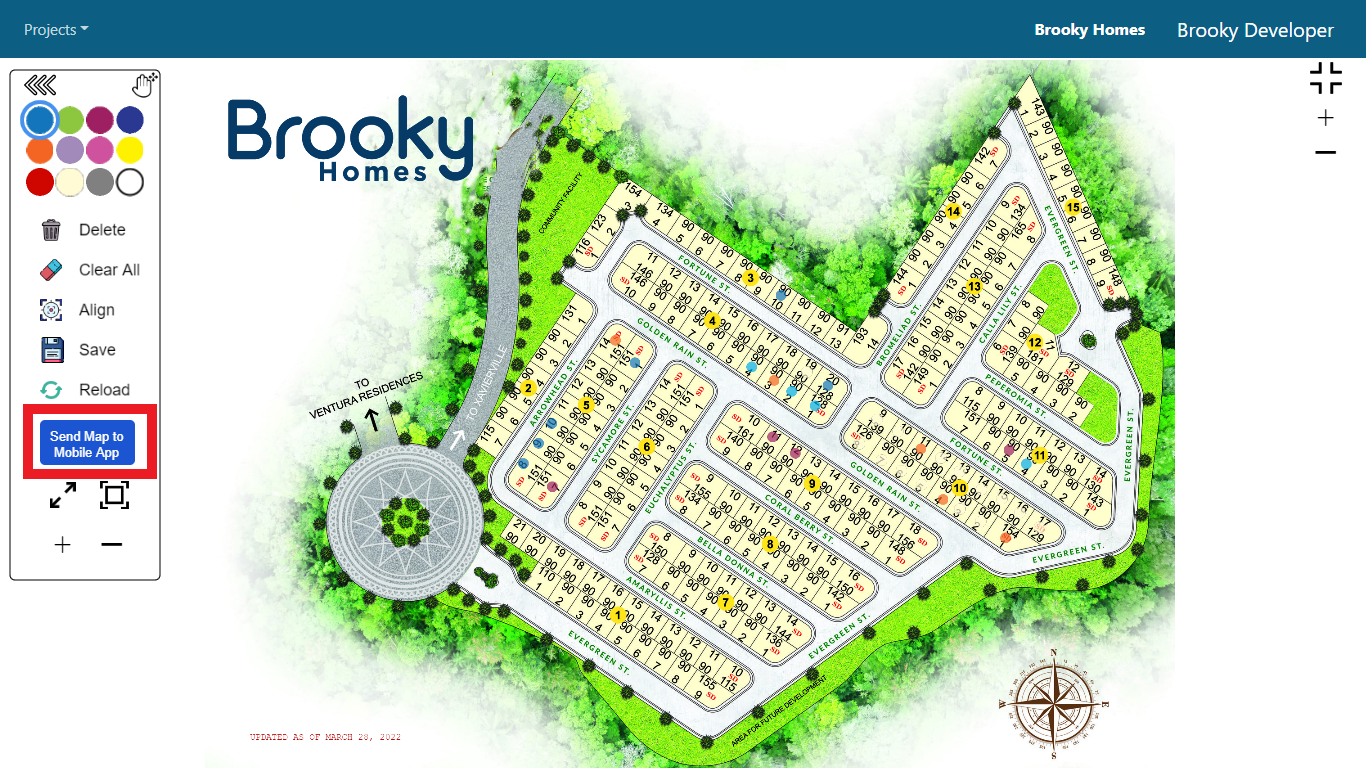
8. You can also send the map to the mobile application of Brooky by clicking the Send Map to Mobile App button.
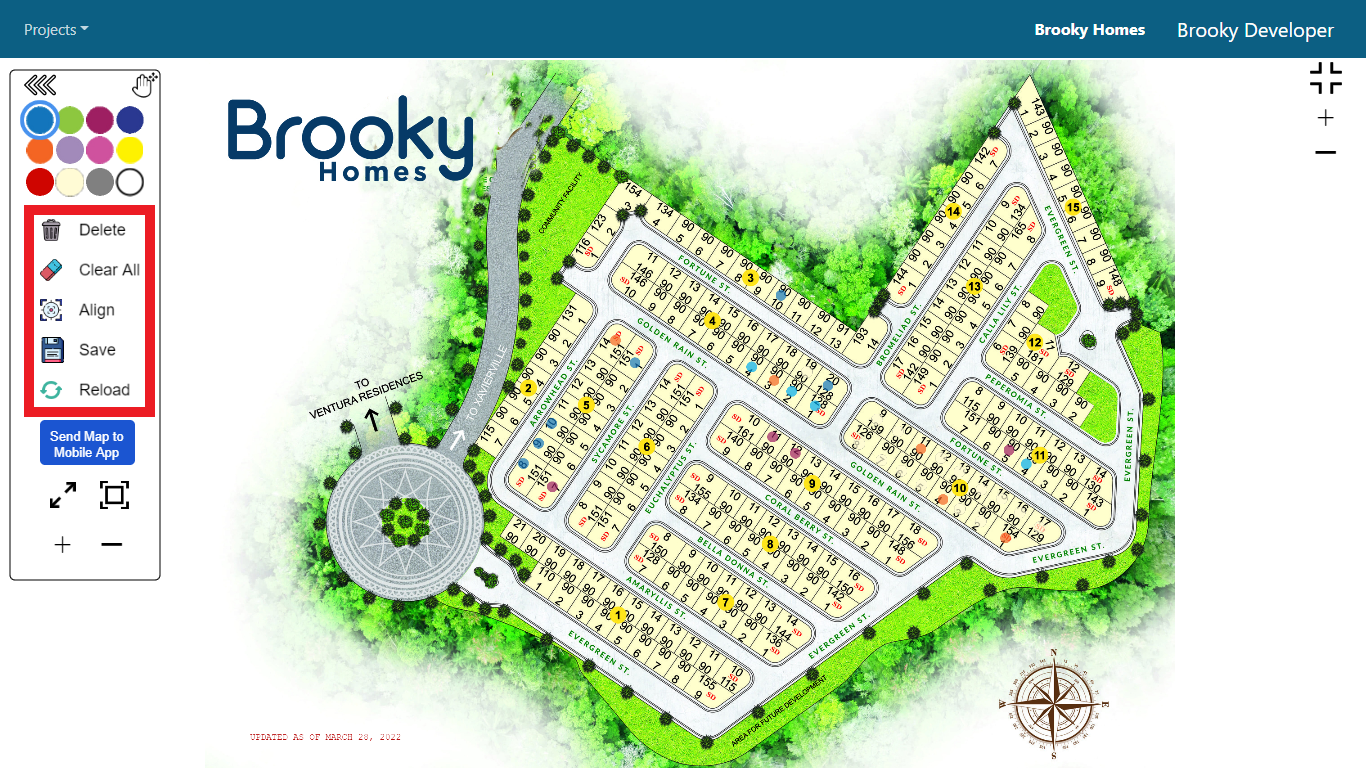
9. The Delete, Clear All, Align, Save, and Reload options are also available on the interactive map. These features can be used to change the information in each map location.
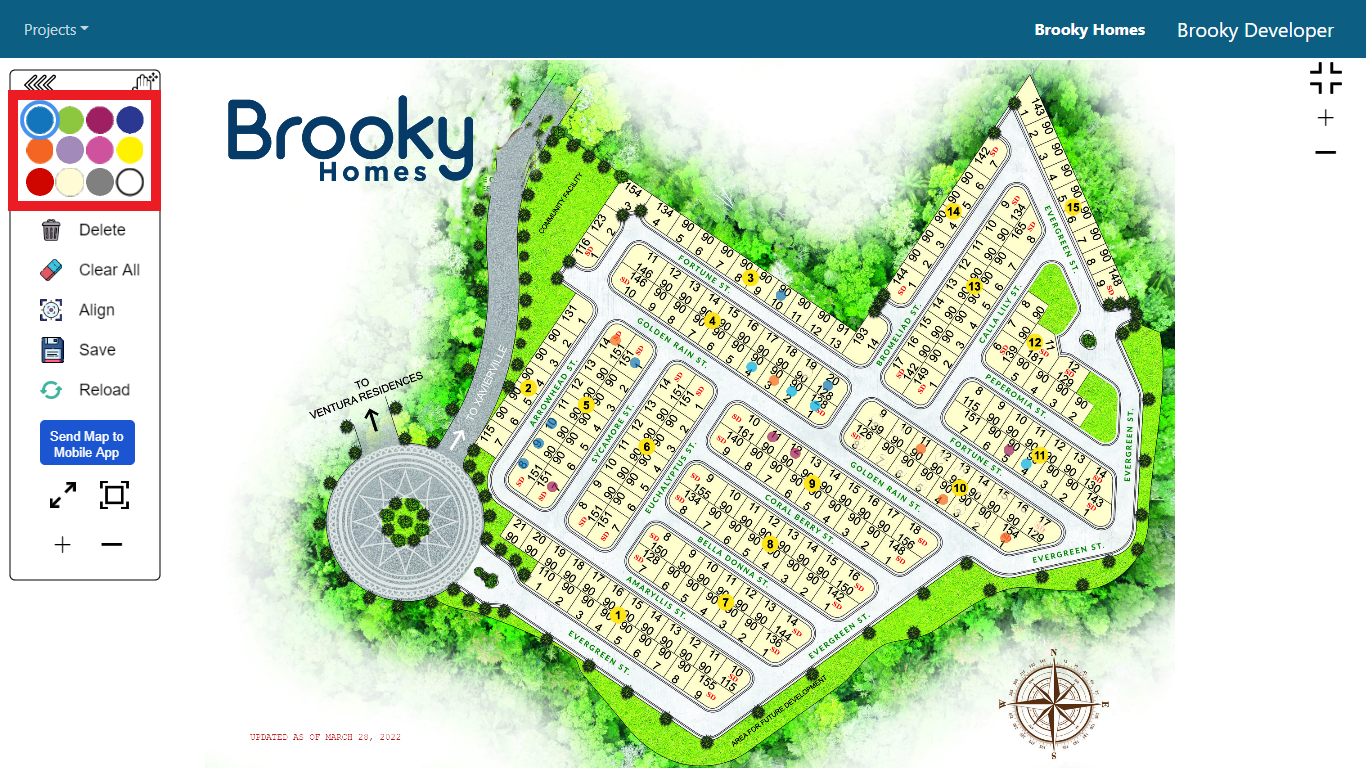
10. The Color legends will show the status of the unit/property whether it is Available, Sold, On Hold or Not for Sale.
11. To move the map to any sides of the screen, see the photo below.

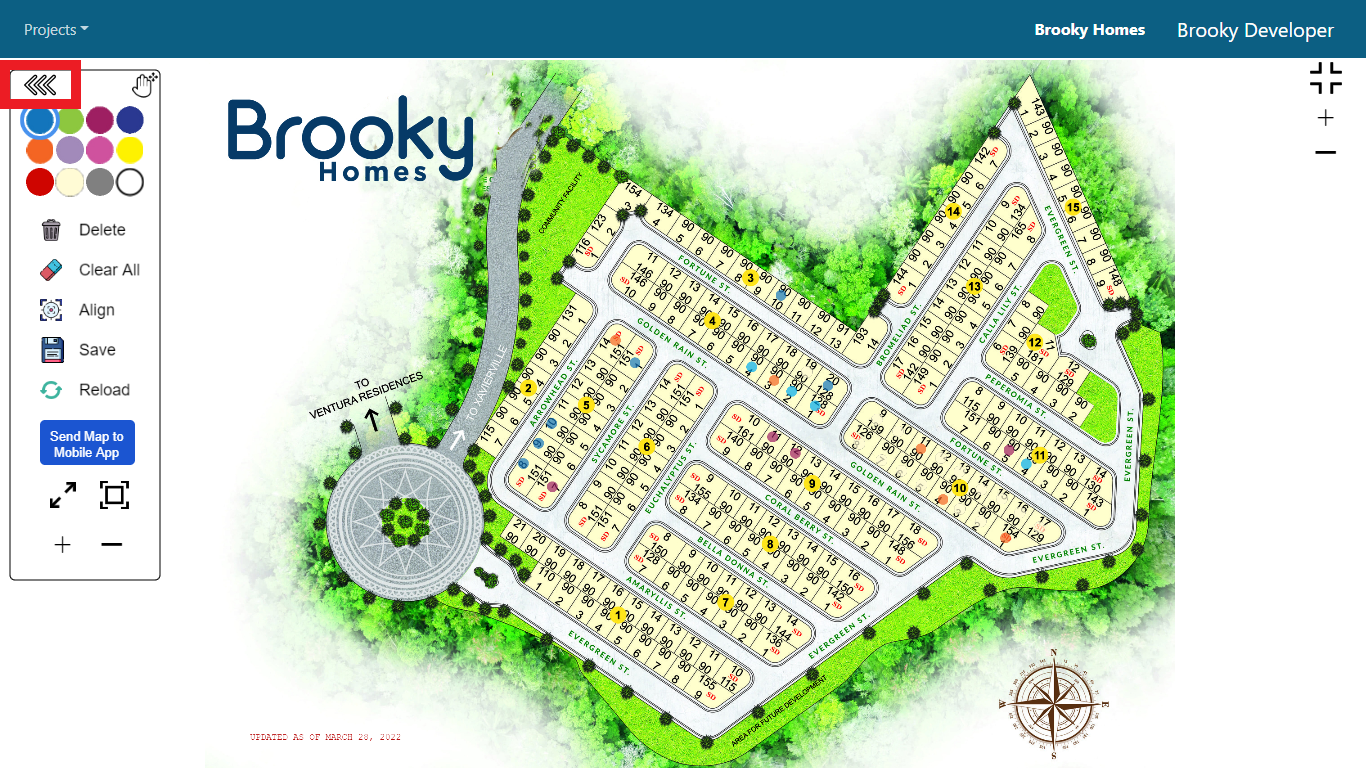
12. The Toggle Sidebar icon is shown in the photo below.
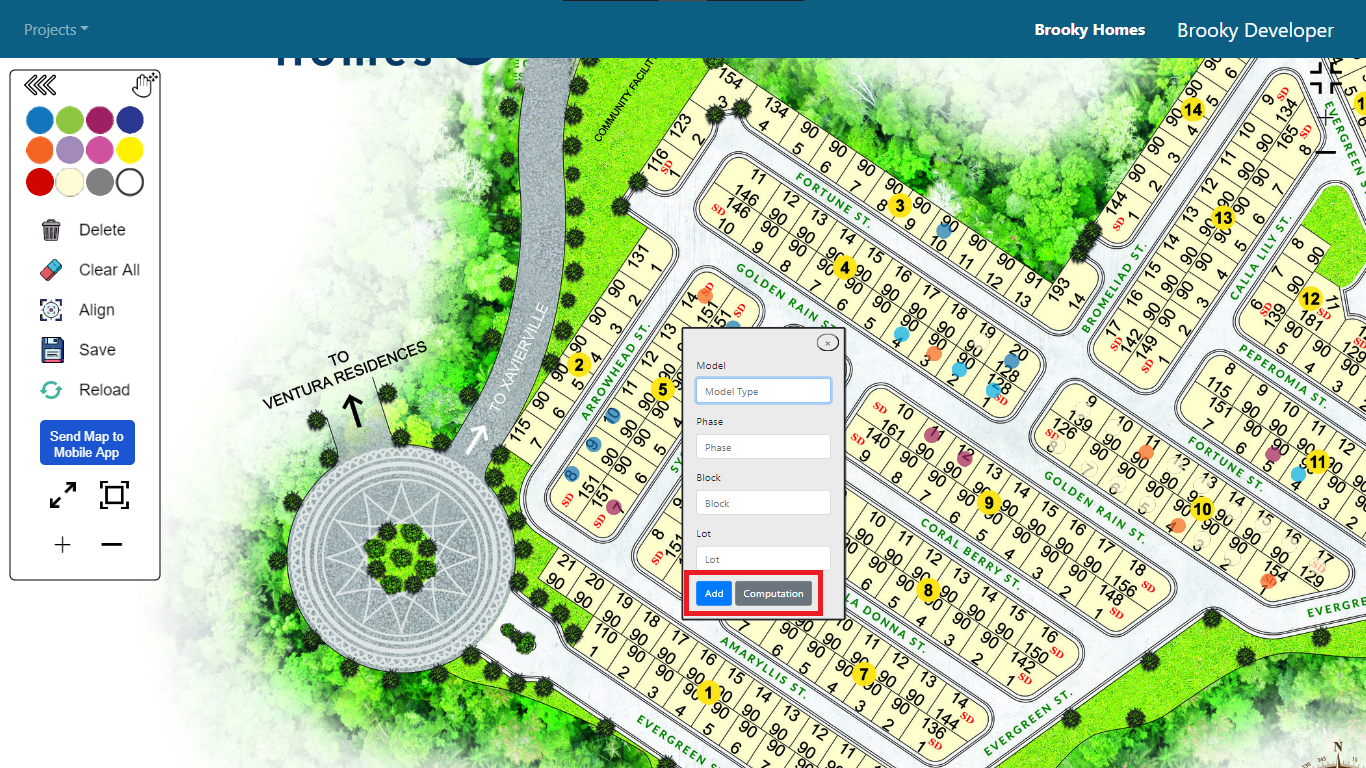
13. You can also click a specific property in the map and then edit its details.

14. After entering the property's details, click the Add button, and the changes will be reflected in the property. When you click the Computation button, you'll be sent to the computation page, where you can see a detailed breakdown of the property's payments.
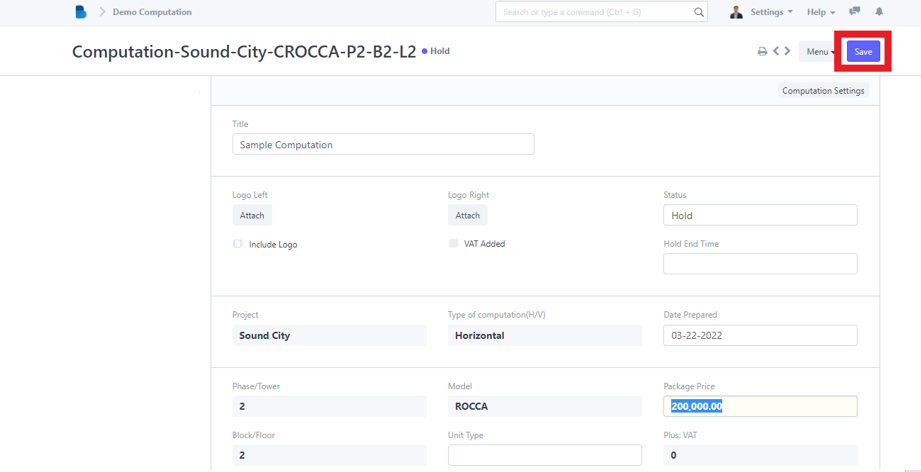
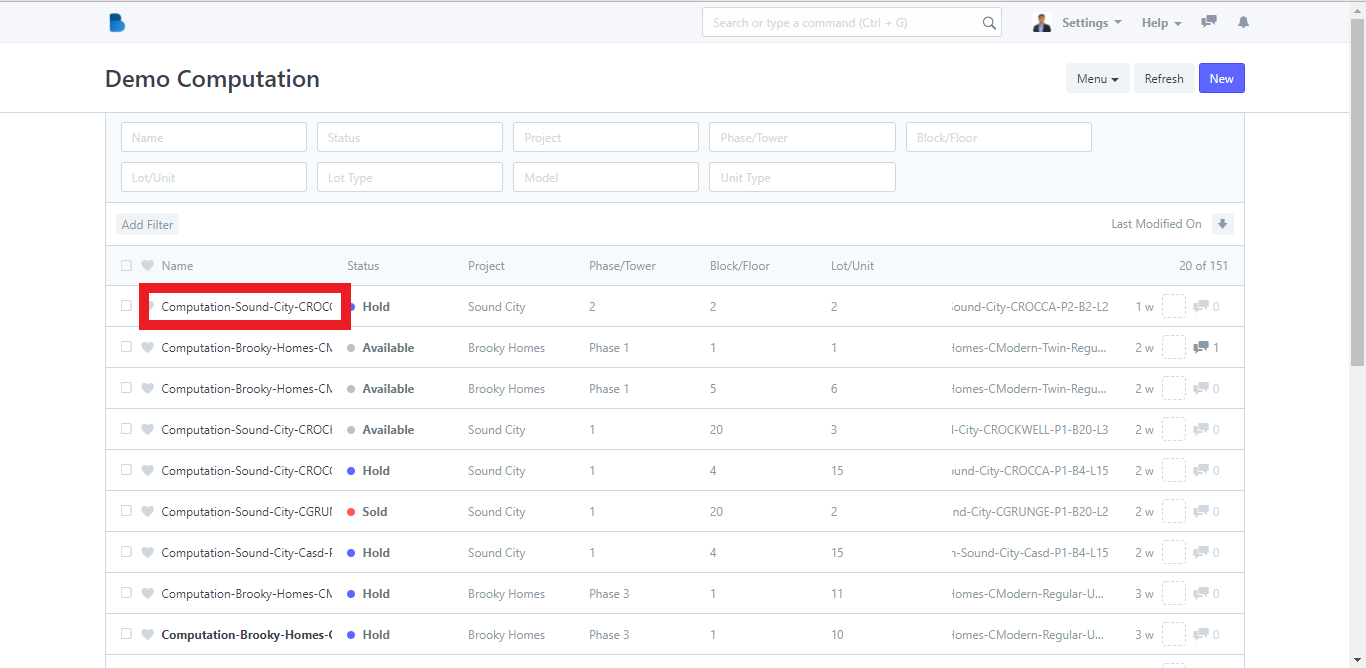
1. On the Interactive Map module, click the Computation button in the Menu dropdown option and it will redirect you to its page.
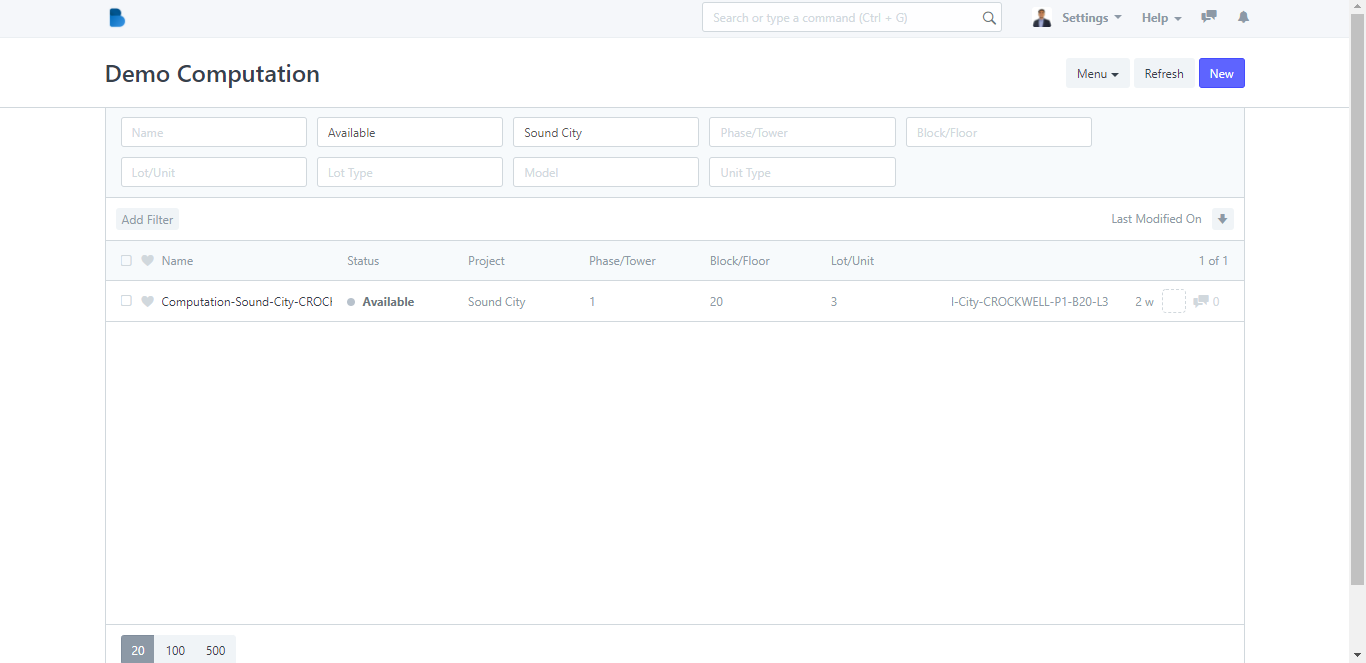
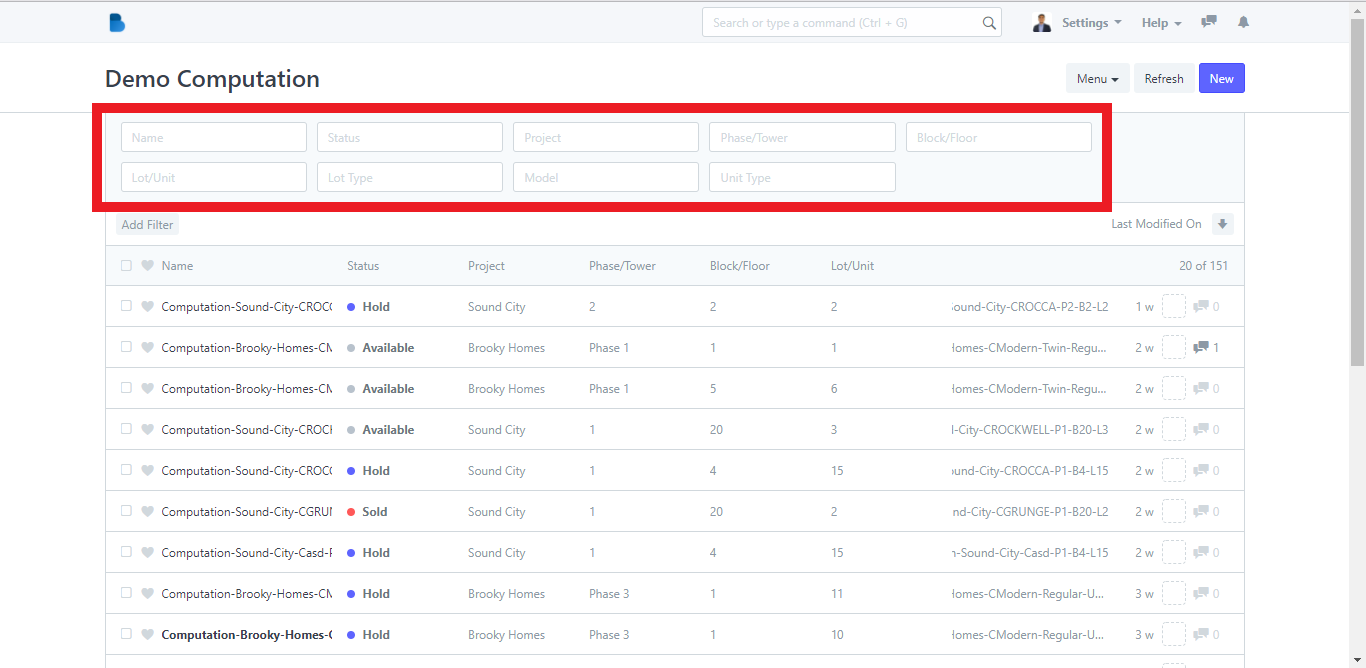
2. You can fill in these fields with the necessary information to quickly locate a certain computation.
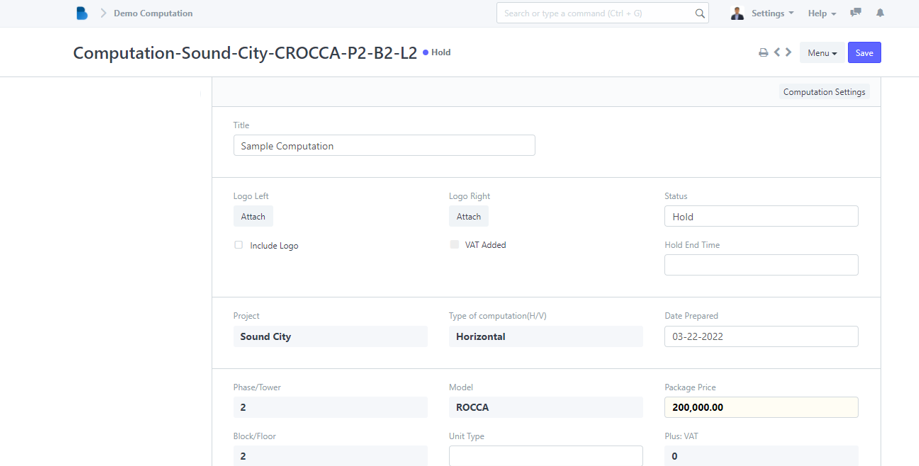
3. When you click a computation, you will be taken to the entire computation details for that property.
4. After you've filled in all of the necessary information, click the Save button.