(Reservation Management) Reservation Transactions
How to Create a Reservation
- On Brooky Administrator View click "Reservation Managements".
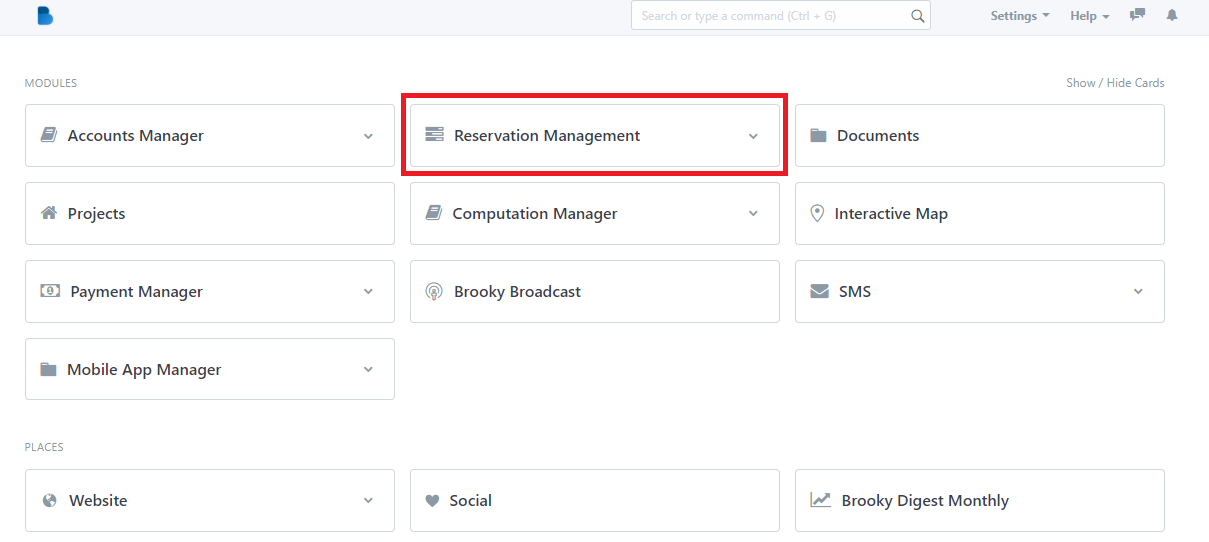
2. You will see Reservation Management features, We will first focus on Reservation Transactions ‘Click Reservations Management’.
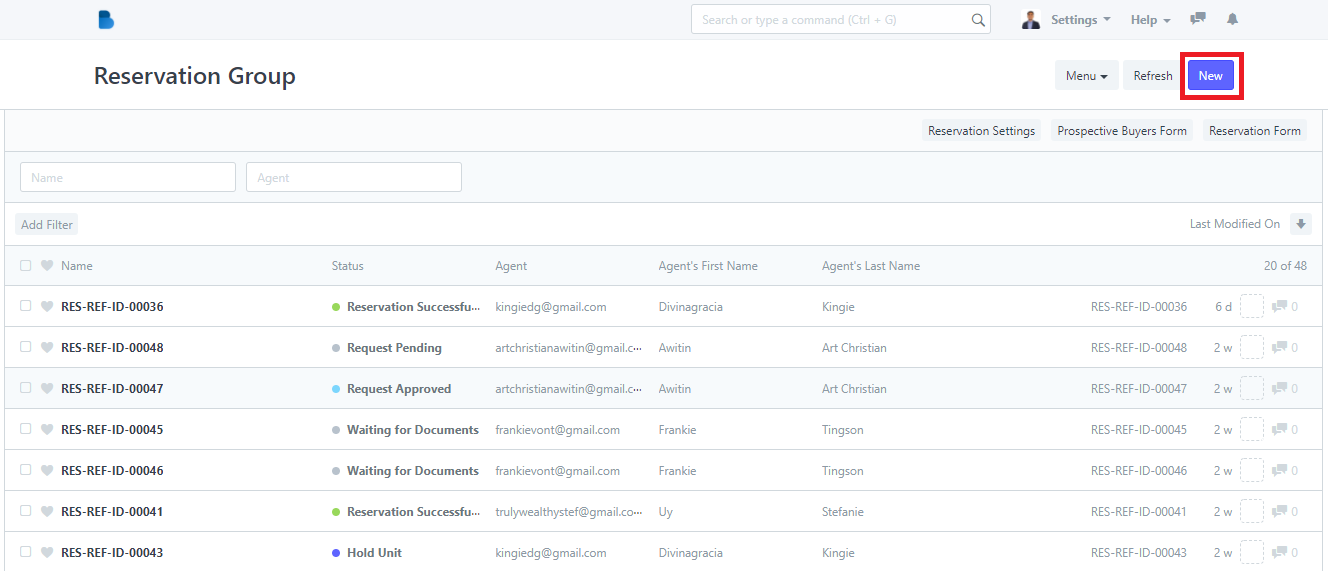
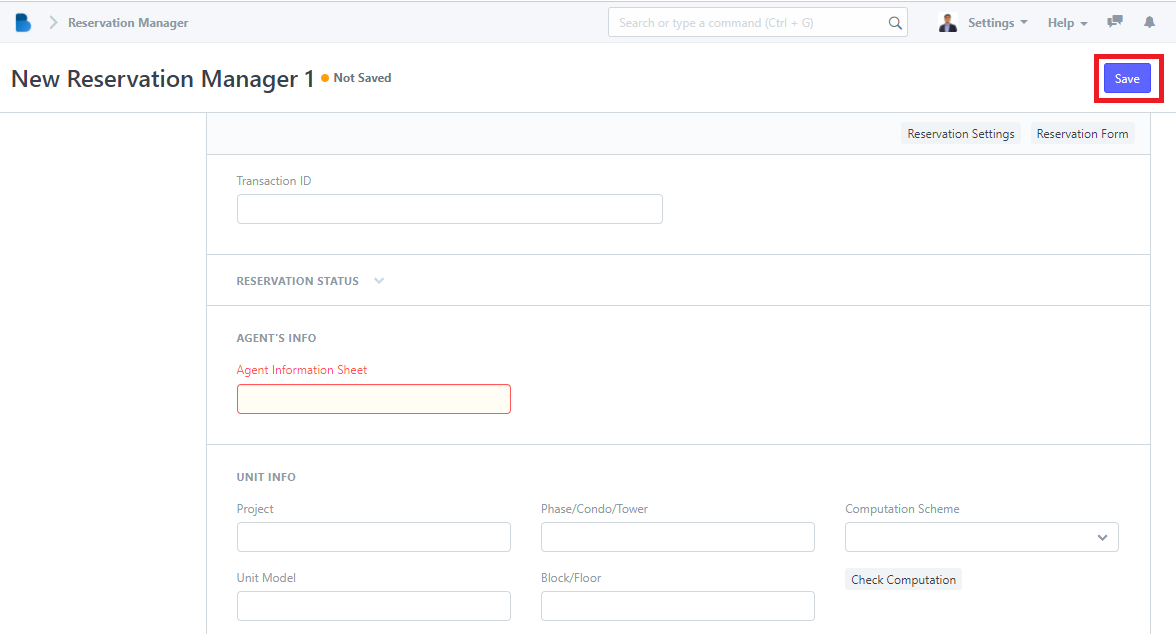
3. Click the ‘New' button to create a reservation’.
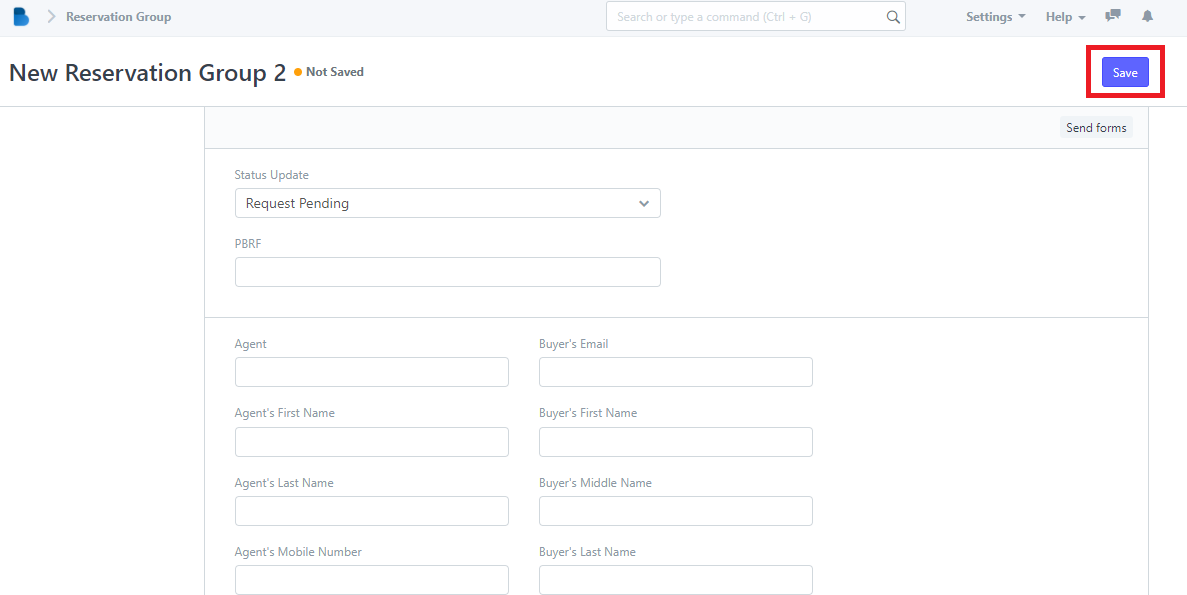
4. To create a reservation fill up the necessary information and click 'Save'.
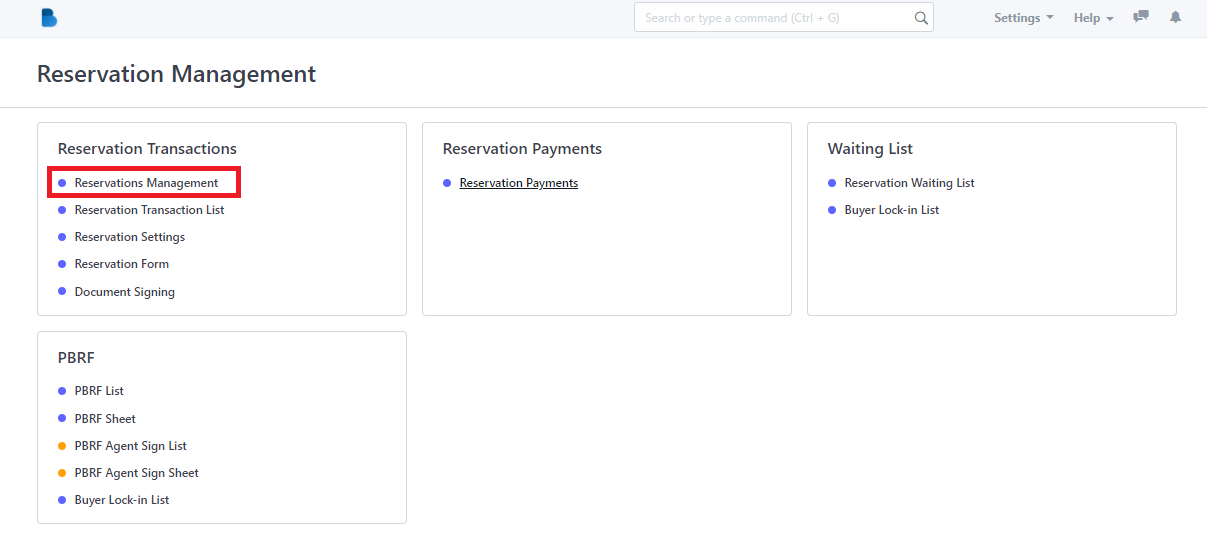
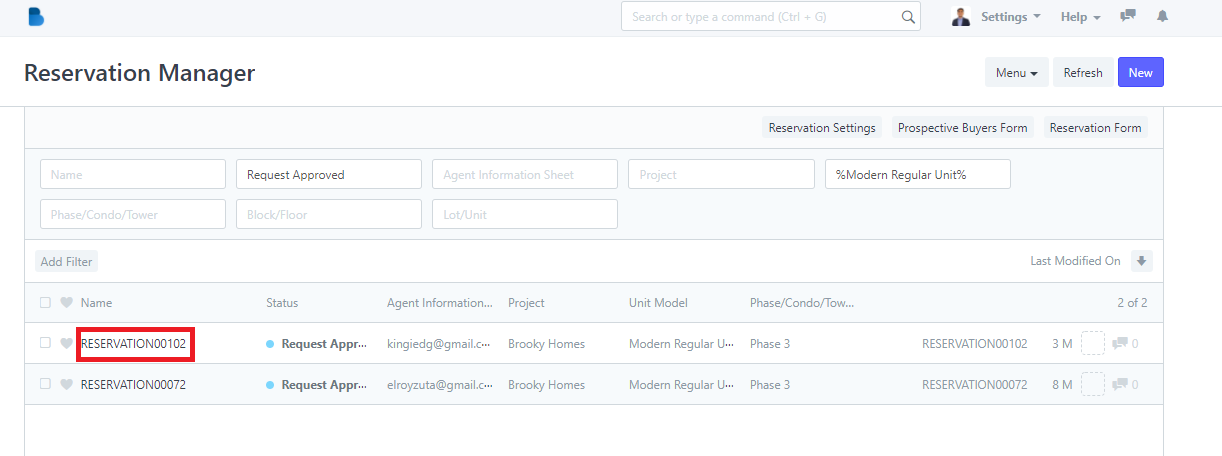
1. You will see Reservation Management features, We will first focus on Reservation Transactions ‘Click Reservations Management’.

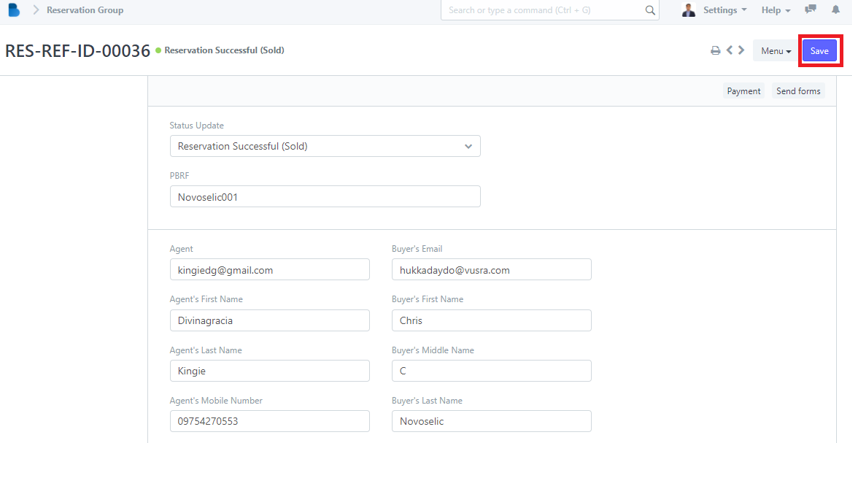
2. Click the ‘Name' that you want to view/edit and it will redirect you to view/edit page of that specific data.
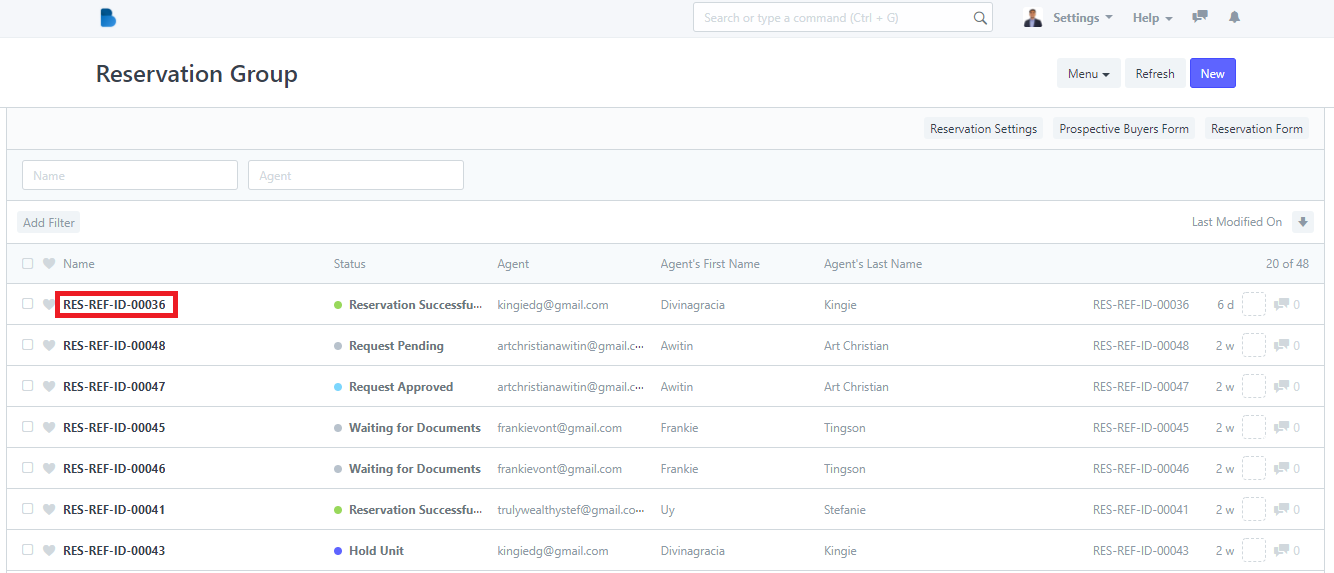
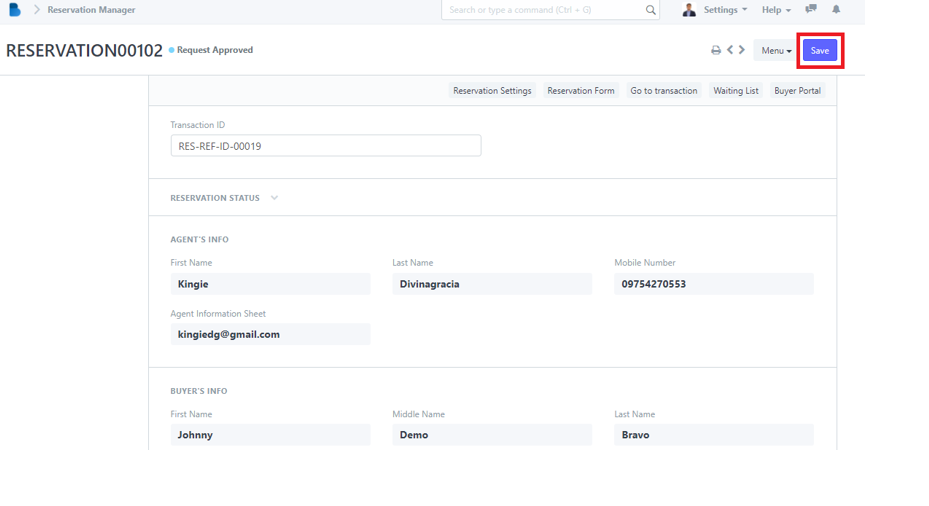
3. You can check, edit data, and edit status of the person who had a reservation. If you had any changes/updates click 'Save'.
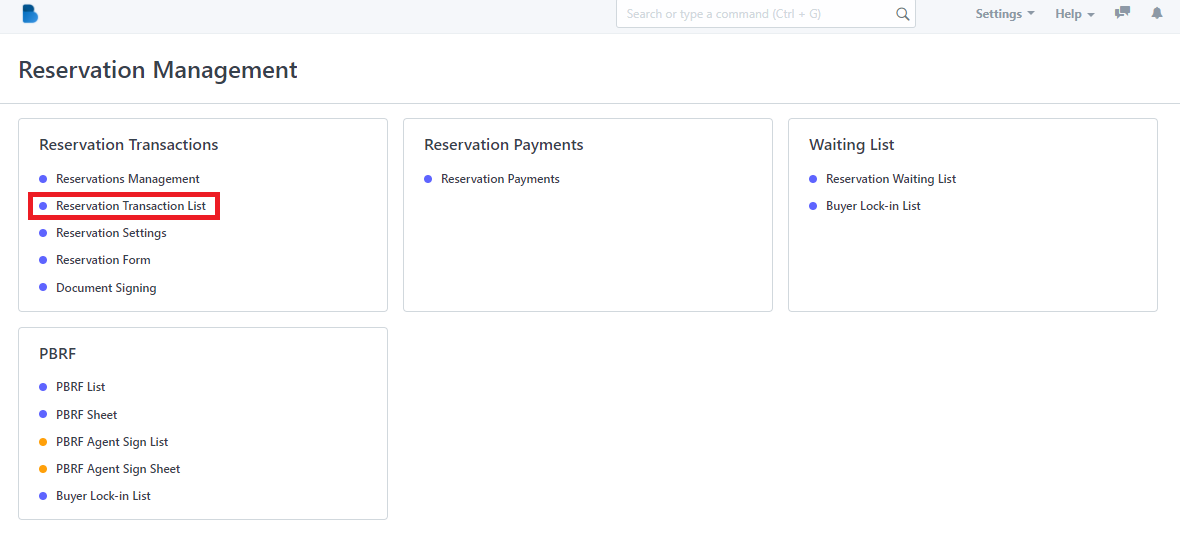
- In the Reservation Management Module under Reservation Transactions Click 'Reservation Transaction List'.
2. Click the ‘New' button to create a Reservation Transaction List’.
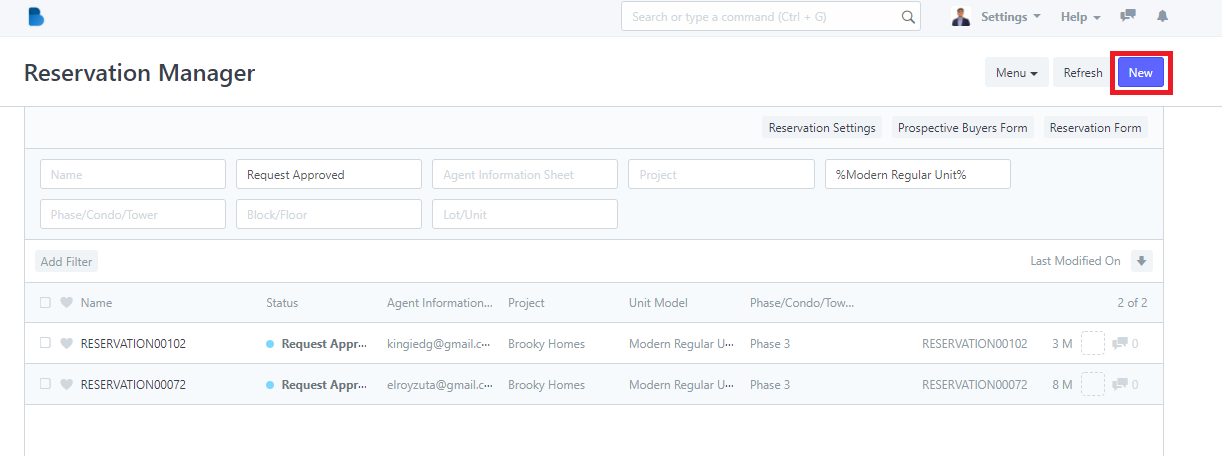
3. To create a reservation transaction fill up necessary information and click 'Save'.
- In the Reservation Management Module under Reservation Transactions Click 'Reservation Transaction List'.

2. Click the ‘Name' that you want to view/edit and it will redirect you to view/edit page of that specific data.
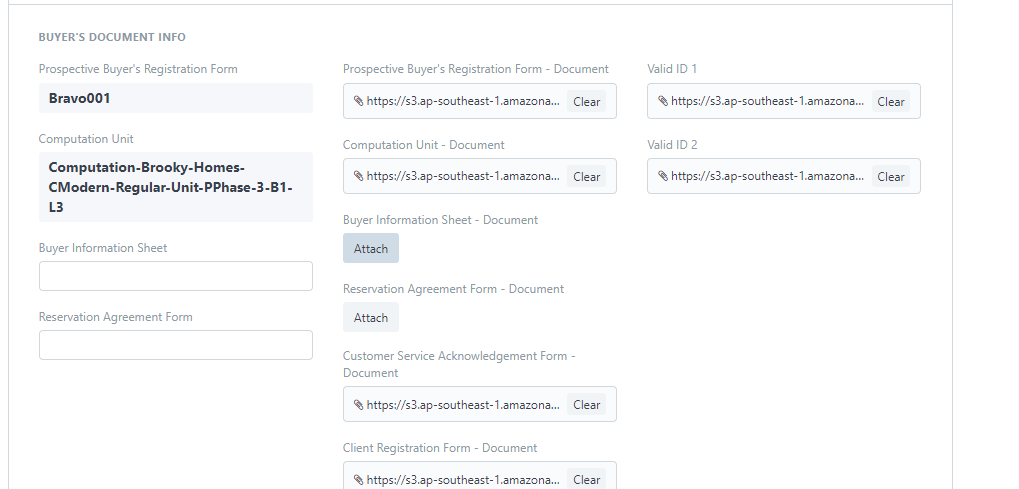
3. You can check, attach, edit data, and edit status of the person who had a reservation. If you had any changes/updates click 'Save'.
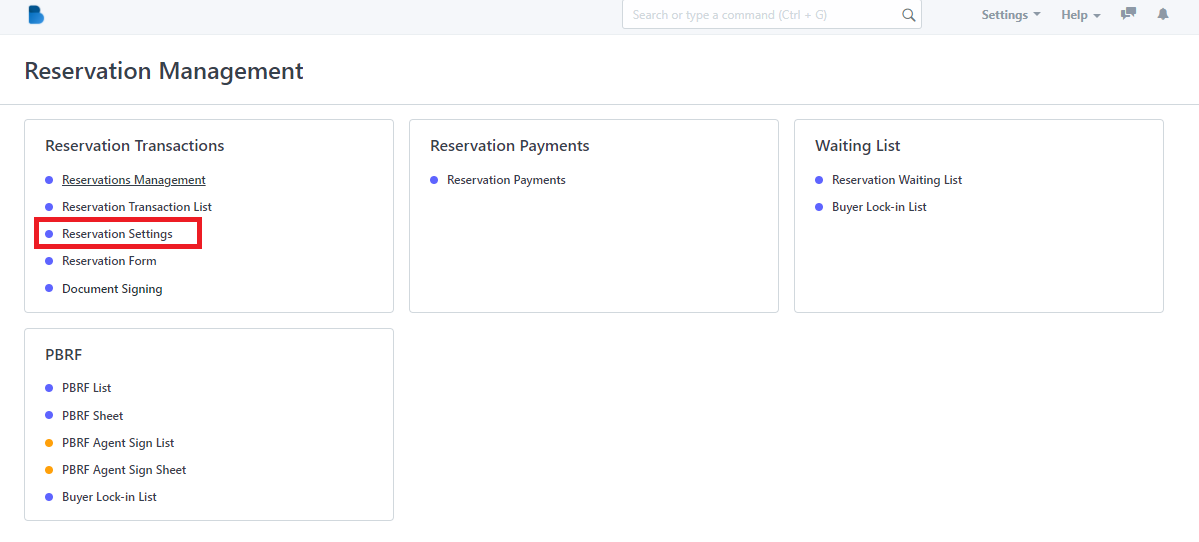
- In the Reservation Management Module under Reservation Transactions Click 'Reservation Settings'.
2. You can adjust the settings for reservation such as this highlighted ones.
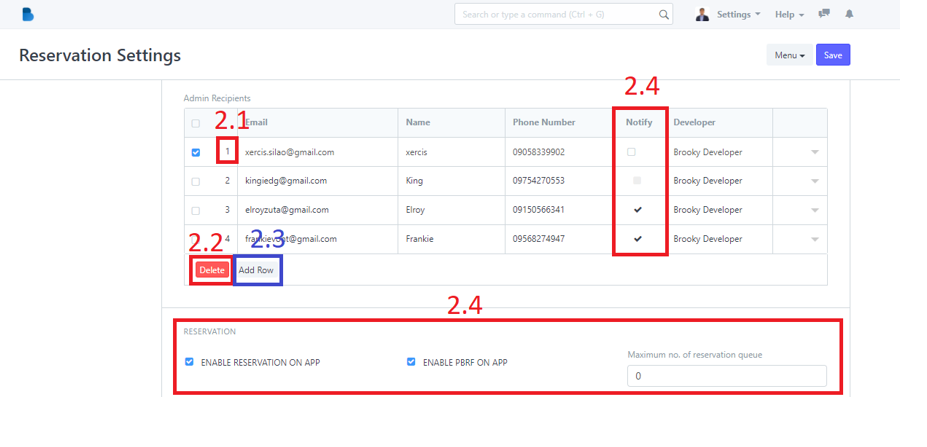
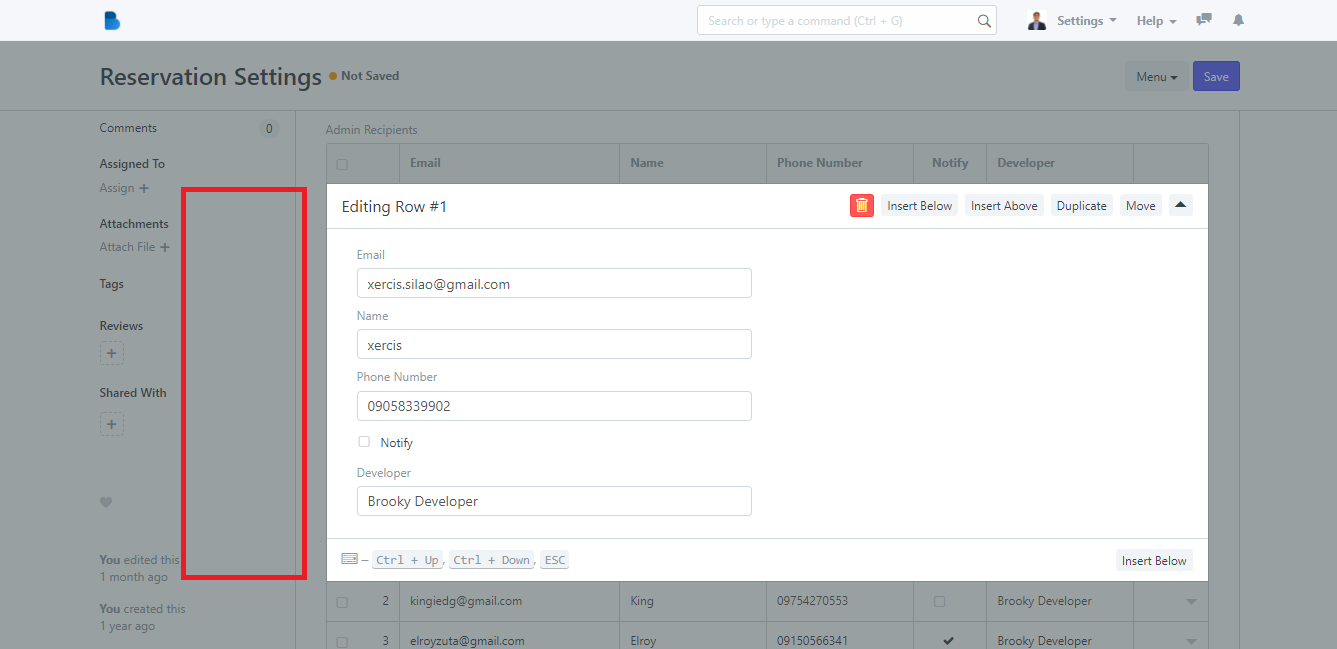
2.1 When you clicked the 2.1 highlight your redirected to Editing row in which you can edit the information of the rows and once your done. Click outside box just like the highlighted part. It will automatically save.
2.2 When you clicked the 2.2 highlight you will be able to delete the row or multiple rows depending on how much row you select. Remember to select a row first by tapping the 'checkbox' so the delete button will appear
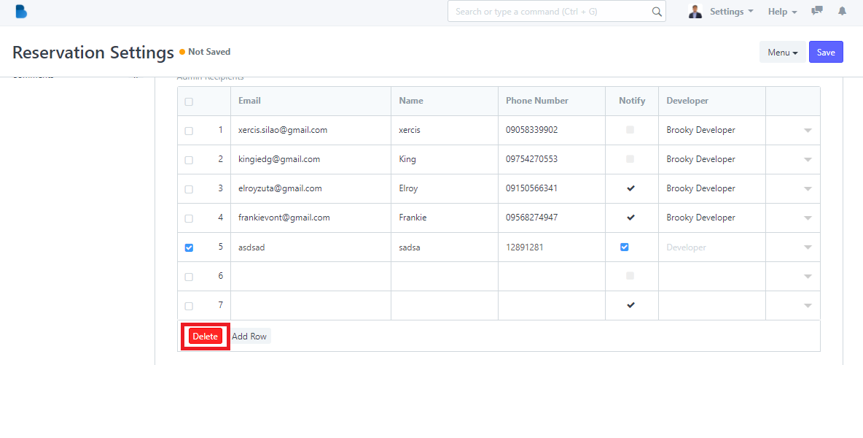
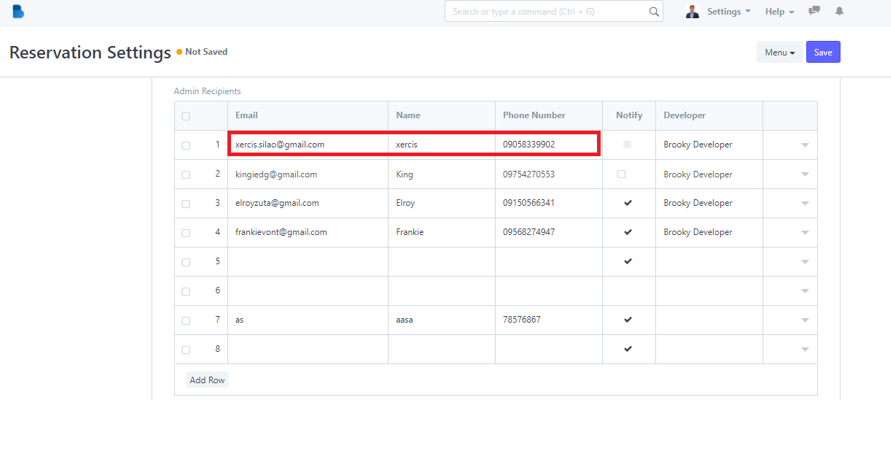
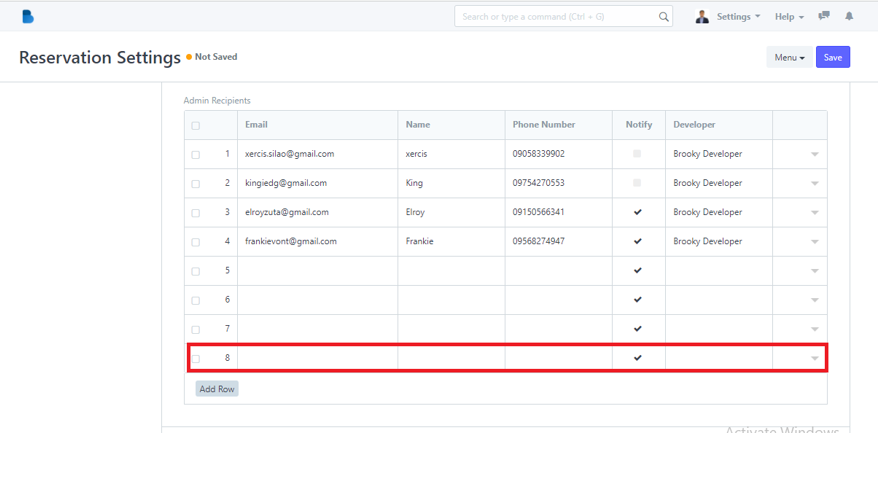
2.3 When you clicked the 2.3 highlight you you will be able to add a new row or multiple rows depending on how many times you click the 'Add Row'. As you can the picture in 2. only has 7 row now its 8 after I pressed the 'Add Row' button.
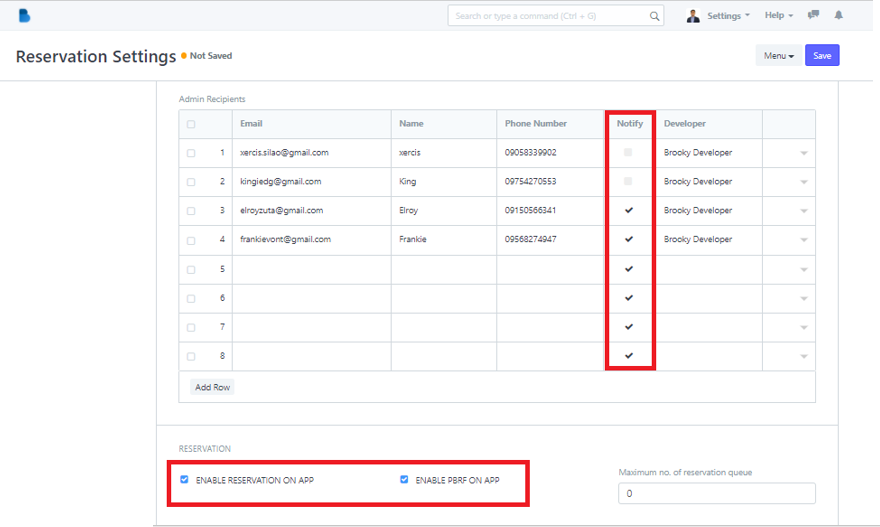
2.4 When you clicked the 2.4 highlight you you will be able to change the settings of the person whether you want him to get notified or you want to enable reservation or PBRF on the app.
3. You can also add rows below for Direct Payment Links and Block Users if you want to block a certain in email from creating a reservation.

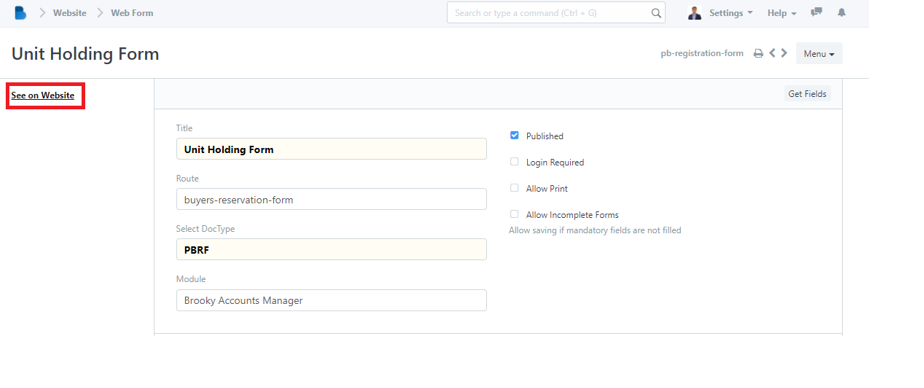
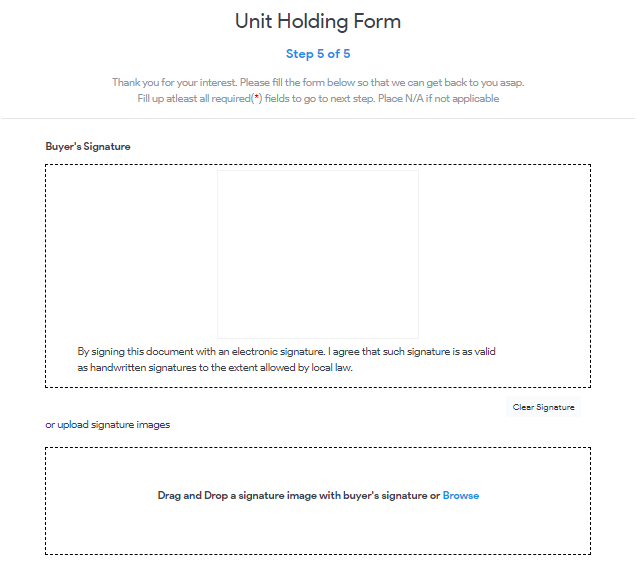
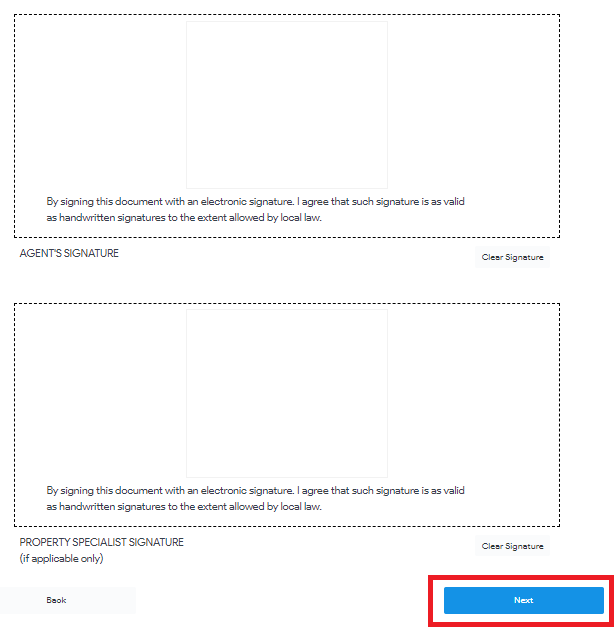
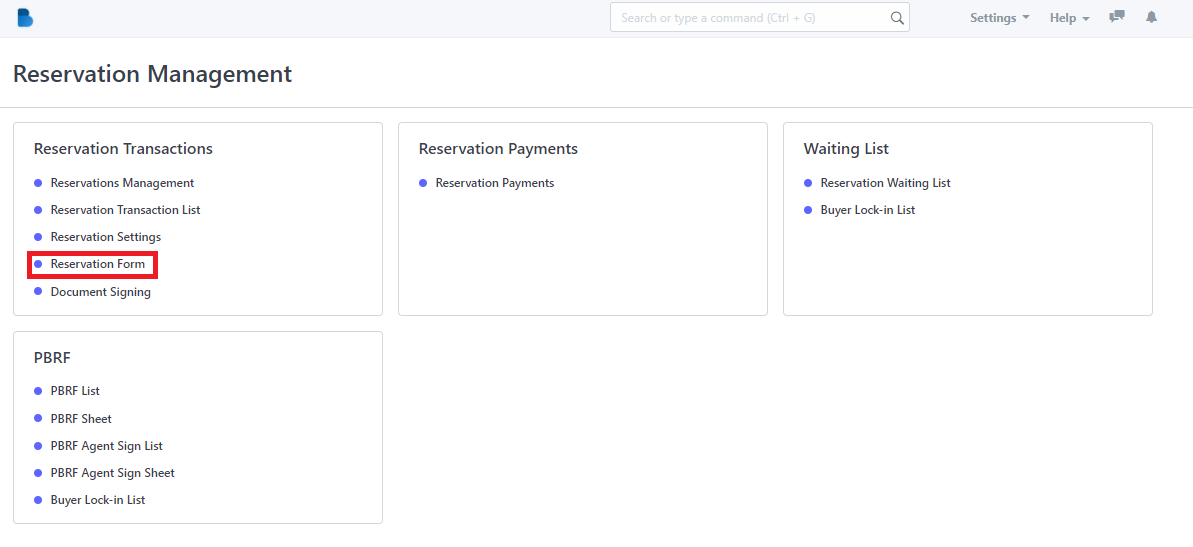
- In the Reservation Management Module under Reservation Transactions Click 'Reservation Form'.

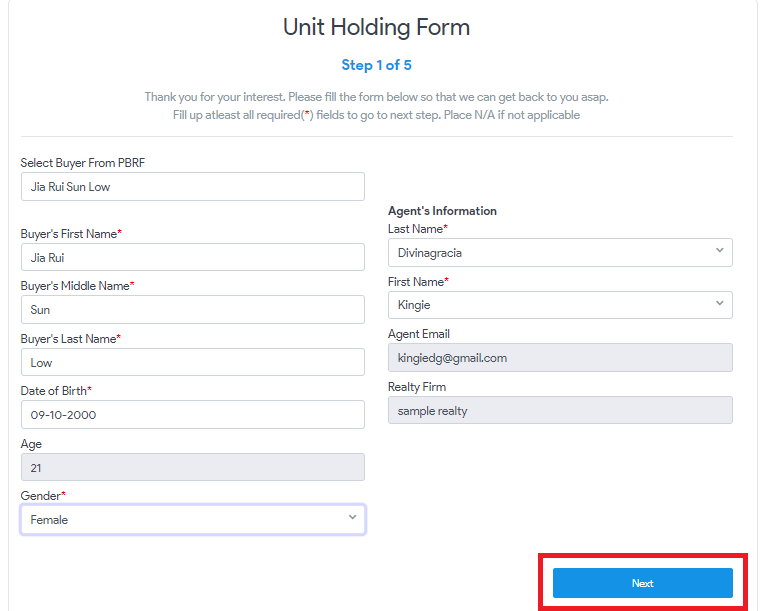
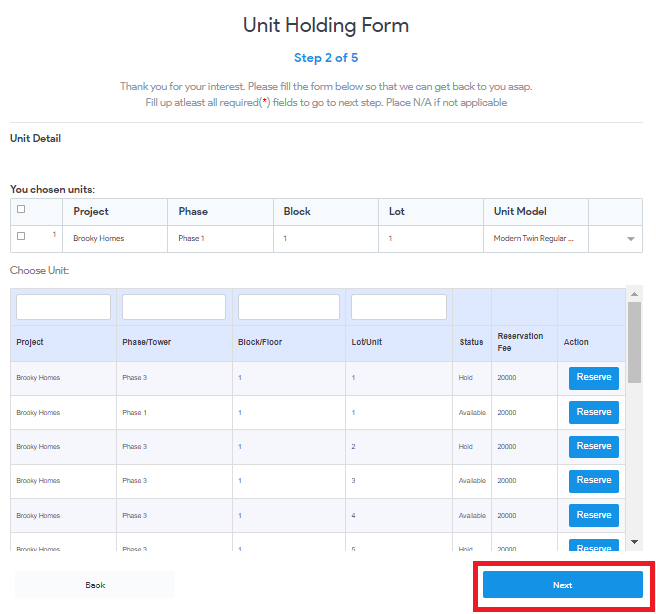
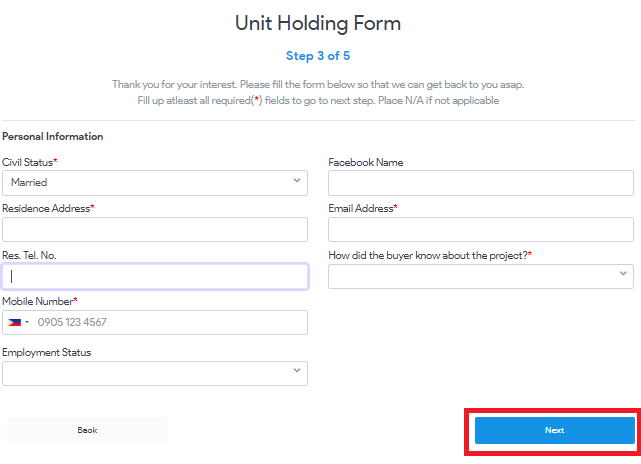
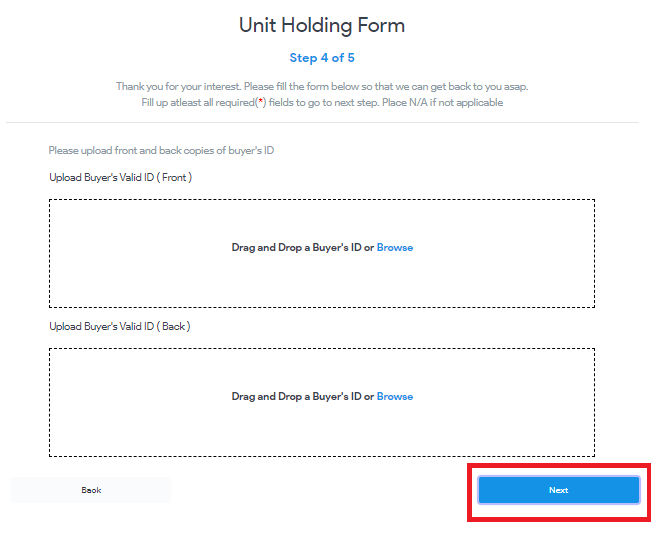
2. You can create a Reservation Form by clicking this highlight 'See on Website'.
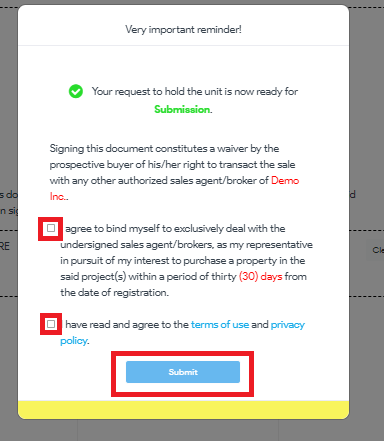
3. Fill up the information and attached necessary data and click 'Next' until you reached step 5 out of 5 and press 'Submit'.
How to View, Edit, and Change Permission to Reservation Form Settings
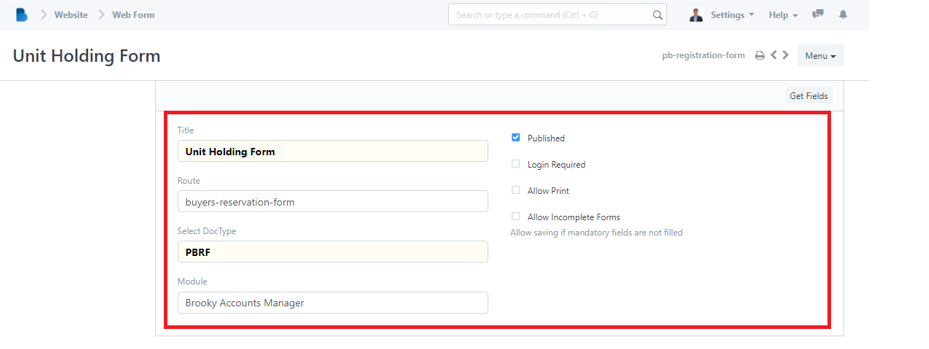
- In the Reservation Management Module under Reservation Transactions Click 'Reservation Form'.
2. You can edit the Route and the Module of Reservation/Unit Holding Form. Also it allows the admin to enable/disable permission to published, login required, allow print, and allow incomplete forms.
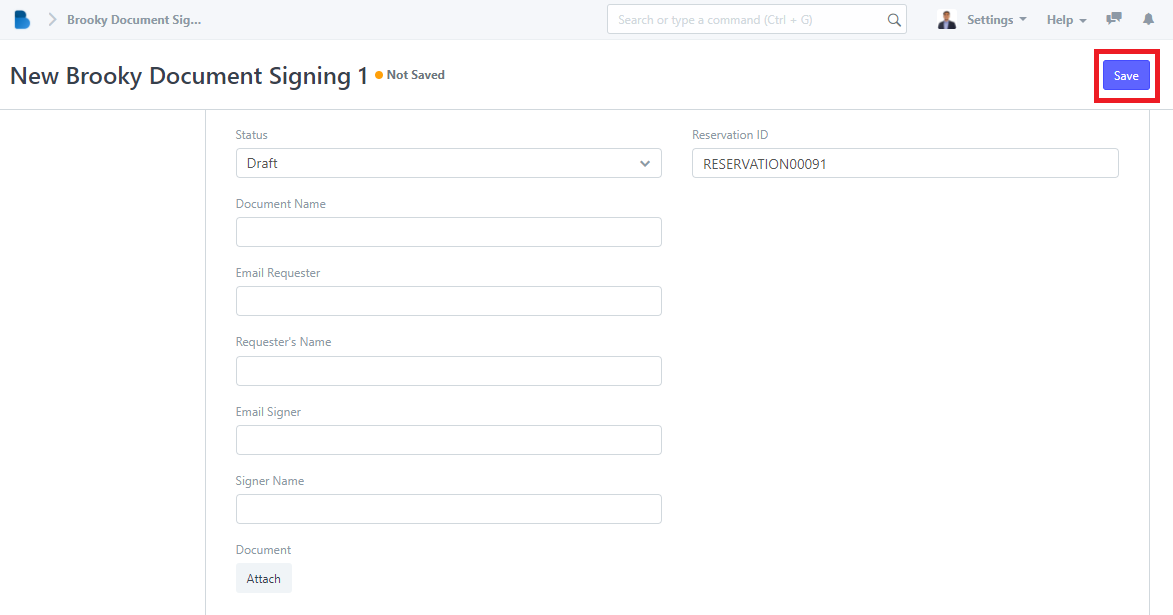
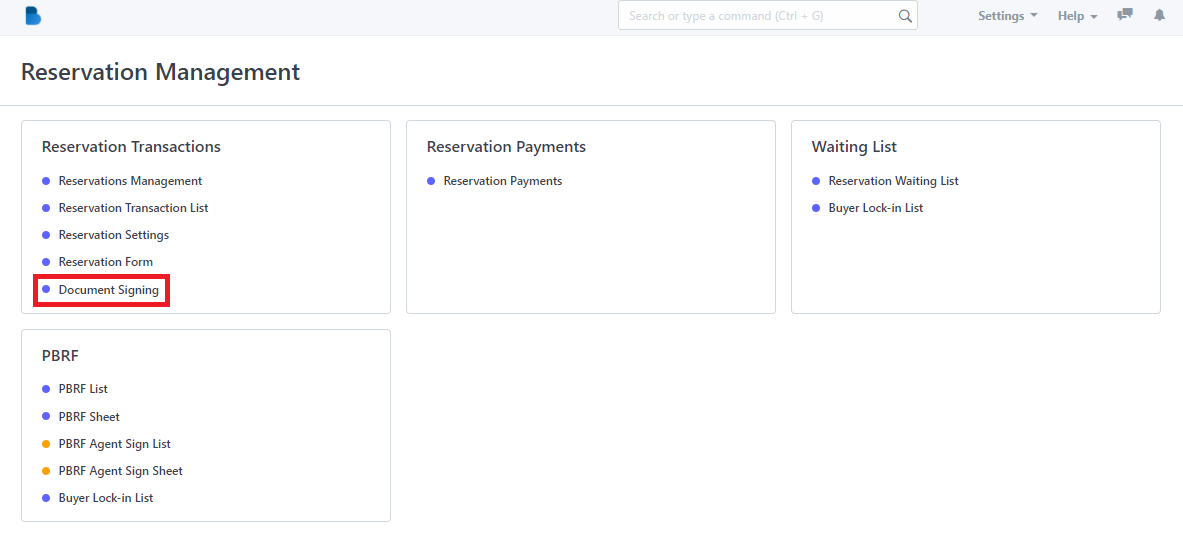
- In the Reservation Management Module under Reservation Transactions Click 'Document Signing'.

2. Click the ‘New' button to create a new Document Signing’.
3. To create a document signing fill up necessary information and click 'Save'.
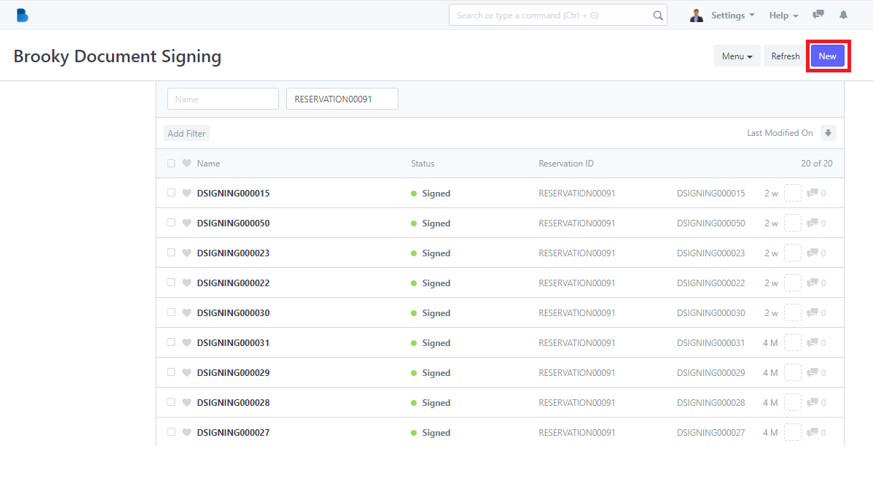
- In the Reservation Management Module under Reservation Transactions Click 'Document Signing'.
2. Click the ‘Name' that you want to view/edit and it will redirect you to view/edit page of that specific data.
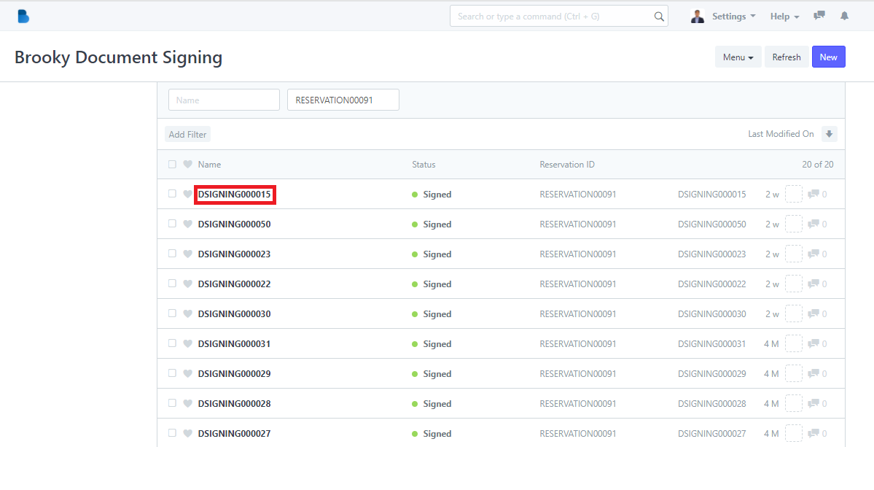
3. You can check, edit data, and edit status of the person. If you had any changes/updates click 'Save'.
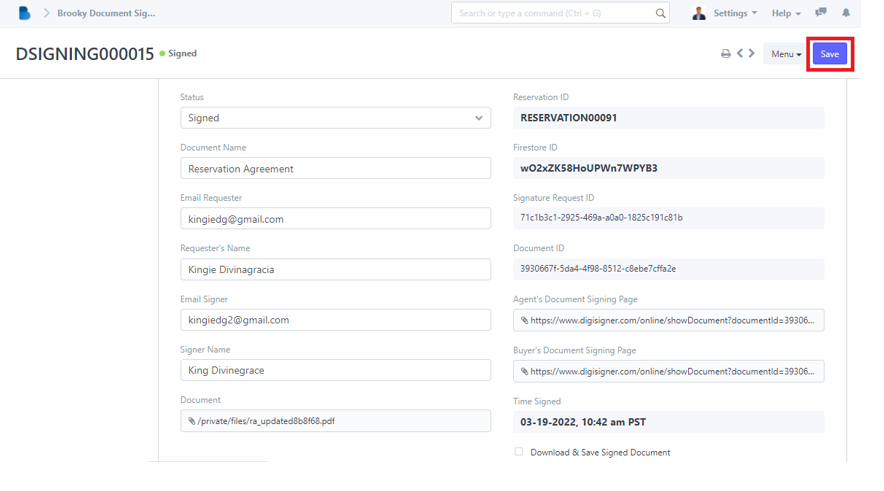
4. At the bottom when selecting and viewing a document signed. You'll be able to see if the buyers and agent signed already their documents and if any changes occurs you can change their status to either 'Signed', 'Waiting to Sign', or 'Draft'.
